Tuesday, October 4, 2022
Let It Snow! (Card #1--Simpler Version/ Card #2--Fussier Version)
For my next card, I really wanted to stick to Christmas cards to build up my 2022 Christmas stash. I started with the Featured Stamper challenge when I started researching possible Splitcoaststampers challenges to enter that I had not yet participated in. I found a card with snowflakes that got my mojo going, as I've collected many snowflake dies over the years. I had one particular Stampin' Up die set, Snowfall Thinlits, that had all sizes and shapes of snowflakes, including a snowflake swirl. Since I had another challenge I wanted to do that I thought would lend itself well to snowflakes, I decided to give it a whirl and see what I came up with.
Saturday, October 1, 2022
Wonderful Blessings of Friendship & Happiness (Joy of Sharing Kit Alt. #3)
This is my third alternative card for the Joy of Sharing kit. I have used papers and die-cut from the kit plus a front panel in SU's Real Red, though the base is still using the kit's Mossy Meadow 5" x 7" card fold. I also snipped a strip from one of the Mossy Meadow's base folds to create base the double flag strip, which I added behind the sentiment panel and popped up both pieces for more depth. I think the red card front is really quite attractive and adds a bit of a different look. To finish it off, I will be adding some design bits to the inside, plus a Chatterbox verse before sending it off for Christmas come December.
According to my usual methods for Splitcoaststamper challenges, I have reviewed my accumulative challenge list to see what past or current challenges my card design might fit, and tweaked it as necessary, before beginning. I found ?? challenges to enter and they are listed below:
Tuesday, September 13, 2022
The Wonders & Blessings of Christmas! (Joy of Sharing Kit Alternatives #1 & #2)
I purchased this Joy of Sharing Christmas kit back in December 2020, plus a refill kit several months later, but I never got around to doing anything with it. My Mom sent me a Christmas card last year made from this kit...a bit of an alternative design...and it was so pretty. It gave me incentive to get the kit out and take it with me on my 5-day craft retreat in early September.
The kit + refill included (16) 5"x7" pre-folded Mossy Meadow cardbases with the front and back both green. I decided to cut them in half and mount them to white cardbases, now making it possible to have 32 cardbases with green fronts...way too many probably! I finished four different cards at my retreat using the kit pieces. Because the foil rectangular pinecone die-cut frame, the die-cut poinsettias and the die-cut pinecones were pretty much all the same, each card, though different, didn't really look that different; therefore, after working with the kit almost all of one day, I got a bit tired of it and moved on to other things.
For the first two cards made, I used a different sentiment stamp than the one provided in the kit, because I wanted my sentiment to have a vertical placement (the kit stamp was horizontal). This stamp was from the 2020 Dove of Hope stamp set. I also decided I would ink distress ALL edges of cardstock and die-cut pieces to give my card a more vintage and aged look.
Card #1...
My first card has a vertical orientation, and I used two of the green cardbases provided. I adhered one full 5"x7" Mossy Meadow panel to a white cardbase totally covering the white and making it now appear as a green base. I cut another Mossy Meadow panel to a smaller mat layer and popped it up off the green base leaving a small border showing around the bottom layer. I then adhered the gold metallic framing to this top layer. Next, I cut and added a red petite dotted dsp panel to host the stamped sentiment label. I added layers of poinsettia die-cuts to the top right and lower left of the gold metallic frame, leaving the frame pinecones exposed on the other corners. I dressed up the center of the poinsettia with gold metallic gems. Take a peek at my Alternative Card #1 using a different sentiment than provided by the kit...Dove of Hope stamp set:
Card #2...
My second card has a horizontal orientation. I used one green 5"x7" panel to form my cardbase as in Card #1. I cut an Early Espresso brown mat layer for this card instead of green as in the first card. I used the red double fishtail flag strip placed horizontally under my vertically stamped sentiment label. I added poinsettia die-cuts on the top left and bottom right, leaving the gold metallic pinecone of the frame showing on the opposite corners. Once again, I added gold metallic gems to the centers of the poinsettia. Take a peek at my Alternative Card #2 using the same sentiment as Card #1 from another stamp set...Dove of Hope:
Tuesday, August 30, 2022
Candy Cane Wishes for Christmas!
I still have very few Christmas cards ready for Christmas giving this year. It is starting to weigh heavily on me that I'm so far behind; therefore, my next card must be a Christmas card for my stash! I just received my Sweet Candy Cane stamps/dies and the Christmas Banner stamps/ dies that I ordered from the current Stampin' Up mini catalog so I'm eager to try them out.
The Sweetest Christmas dsp in that same catalog has a lot of wonderful patterns
and strips. I decided on a criss-cross background effect by using a striped
diagonal paper pattern overlaid with the diagonal panel die-cut. I used all
three colors in the striped paper on my card front stamping and die-cuts: Real
Red, Garden Green, and Pool Party, plus I added a bit of aqua glitter paper to
add some sparkle and bling!
As most candy canes come in individually wrapped, clear cellophane wrappers, I
decided to cover my Real Red, ink-stamped canes with Scotch clear packing tape
to resemble these cellophane wrappers. This is an idea we used in a class card
designed by Dar Peterson that I borrowed. I am pretty happy with the way my card looked upon completion...take a peak below at the finished card:
Ingredients: Stampin' Up-- Cardstock: Basic White, Garden Green, Pool Party. DSP: Sweetest Christmas. Stamps/Dies (J-D 2022 Mini): Sweet Candy Canes/ Candy Cane dies; Christmas Banner dies (pine boughs). Ink: Real Red. Punch: 1-1/4" Circle. Ribbon: 3/8" Pool Party Sheer. Gems: Elegant Faceted Gems. Other-- Paper: DCWV 6"x6" Glitter Pastels Mat Stack. Spellbinders Dies: Splendid Circles. Scotch 2" Clear Packing Tape.
Sunday, July 31, 2022
Mitering with a Twisted Oval Christmas!
I seem to be on a short hiatus from cardmaking of late! I've been really busy with other activities at home, away from home, and with family. As usual, I have lots of cardmaking events that have pasted me by!
One thing that has been passing me by quite regularly is getting started on my Christmas stash this year. I have been worrying about it, and since we've seen "Christmas in July" come and go, I actually got the yen to make a card very late in July! I had a lot of incentive from Splitcoaststampers' challenges as well, and I will be posting it there as well.
I received some new free paper through the Stampin' Up Sale-A-Bration event going on in July and August, called Silver and Gold Specialty dsp (white glossy with gold or silver foiling), and somehow it got me interested in getting at least one Christmas card in July finished. Take a peak below at my finished card, though I have not completed the inside verse or design, which I usually post. I'm actually realizing that Christmas cards do not usually get a peak at the inside verse, because I'm not usually mailing them at the time that I make them!
Thursday, November 25, 2021
It's A Night Sky for Christmas! (VSN#3)
Splitcoaststamper's Virtual Stamp Night sprang onto the scene, leaving me with the exclamation, "How did I miss that VSN was coming up?!!" I think I first noticed it when they did a call for Hostesses several weeks back, but it completely slipped my mind with unexpected family happenings! Bottom line, all of a sudden there it was, and I was spurred me to action.
I have always wanted to fully participate, but I never seem to accomplished more than the Pre-MINI challenges and just a few of those during the main event. This theme sounds really fun, "Let TV Be Your Guide!" I really wanted to play!! So, I am already playing catch up!
Since LuvLee's MINI3 will be easy for me as I have a kit card I'm going to use, I'm going to undertake that one next! It will meet the galaxy night sky requirement. My goal is to complete the last of the three MINIs within the next few days since they have now been posted for slightly over a week!
With this card completed, I have two down and one to go. Then, I'll be ready when the main event starts on December 17th. After the card image below, I will follow with "The Story" of my changes making this card into a bit of an Alternative rendition rather than just like the kit version.
THE CONSTRUCTION STORY
To start, I cut the fronts off all of the kits pre-folded card bases. I wanted to add more color layers, and I also wanted my cards to end up as a 4-3/4 x 6-inches, as I prefer this size to the traditional A2 size of 4-1/4 x 5-1/2-inches.
I cut my new cardbase from Blueberry Bushel and then the added a Red Foil layer which will be underneath the card front itself. Working with the kit's card front scene, I stamped an array of galaxy stars with Night of Navy ink and added metallic star and snowflake gems scattered about. To the evergreen trees and using a fine white Gelly Roll pen, I added white lines to depict a sparse layer snow. To the snow shadows, I added Dazzling Diamonds glitter. I also added Wink of Stella/Clear to all the red parts in the scene: packages, elf hats, and elf shoes. I adhered the card front to the Red Foil layer. Next, I popped up my elves, package, and sled onto the card front and finished by adding clear rhinestones to the elf hats. I thought all these additions dressed up the fun snow scene quite nicely and added lots of pizzazz to the original kit design!
Thursday, November 18, 2021
Santa's Sleigh Christmas Tag Card! (VSN#2)
At the end of September, I went to a card class hosted my Stampin' Up demonstrator duo and friends, Dar Peterson and Luci Kirschbaum. It was their annual holiday card event and it was so nice to see friends of old! I'm always looking for more Christmas cards, so I was only too happy to attend!
As always when presented with a finished card sample, my creative edit mode kicks in with ideas that I might like to change or include that would make the card more me. This never means that I do not like the original design, it just means that I can not curb myself to just make the card as is...my bad??!! Therefore, I often complete cards at home after leaving the class, keeping in mind while at class where I might want to make changes. I got this card's die-cutting, embossing, etc. complete at class and brought the pieces home, along with a picture, but I just finished putting it together last night because it was so perfect for one of the Splitcoaststampers' VSN mini challenges (more about that later).
This card's original design is by Dar Peterson. She used Stampin' Up's new holiday die, Giving Gifts, using the Santa Sleigh, plus the Tailor Made Tags dies from the Annual catalog. Though I contempted adding a red foil layer instead of the regular Real Red cardstock, I loved this sweet Christmas card pretty much just as it was. I ended up deciding to only add red rhinestones to give a little sparkle. . . three to the upper left and two to snowflakes. Take a peak at the finished card, which is almost ready to mail after I add my verse and inside design:
Sunday, November 14, 2021
Triangle Christmas Trees!
This is a Christmas card design by Luci Kirschbaum from a Stampin' Up card class I attended at the end of September. I brought it home to think about what it needed, if anything, before I felt it was finished. It has been sitting in my unfinished Christmas cards for well over a month! It was time revisit it and make up my mind what I wanted to do. . .leave it as is or add something more.
The design is geometric, not normally my style especially in a Christmas card, but somehow I found this card very appealing. I decided I liked it, but maybe it needed a little sparkle and be a bit larger to fit the card size I generally prefer. I added some rhinestone tree toppers for sparkle and a new Always Artichoke card base, enlarging its size to 4-3/4 x 6-inches. I do like the sparkle, extra color, and layering that I added to tweak just a little. See my finished card below:
Ingredients: SU Cardstock--Evening Evergreen, Basic Gray, Always Artichoke. SU 2021 July-Dec Mini: Peaceful Place Specialty DSP & Sweet Little Stockings stamps. SU Dies--Stitched Triangles. SU Ink--Evening Evergreen. SU Embossing Folder--Evergreen Forest 3D. SU Basic Rhinestones. Colorbox Charcoal ink distressing (trees). Chatterbox computer verse. Size: 4-3/4" x 6".
Saturday, September 25, 2021
An Abstract Whimsy Christmas!
Here is a Christmas card for those who like a bold, abstract geometric flair with lots of bright and vibrant colors! I like the design style, but usually not for Christmas cards, especially in such a non-traditional color combination! (But, it actually grew on me as I worked with it!)
Ingredients: All Stampin' Up products: Cardstock--Night of Navy, Polished Pink, Mossy Meadow. DSP--Whimsy Wonder Specialty. Vellum--2021-23 In-Color Shimmer Vellum. Dies--Layering Circles, Whimsical Trees, Christmas Trees. Ink--Polished Pink. Wink of Stella-Clear. Chatterbox computer verse (inside). Size 4-3/4 x 6-inches.
CONSTRUCTION NOTES WITH A STORY!
This is the first of four cards to be completed from a Christmas card class I attended this month. Its original design was by one of our hostesses, Luci Kirschbaum. Abstract Christmas cards are really out of my comfort zone, so it took time working with it before I began to appreciate its bold, totally non-traditional colors and abstract geometric design! I loved the elements and dies Luci used in her composition, and I really like the changes that I made.
I started by switching the striped paper from a left vertical strip to an angled quasi-banner and built my card from there. It was handy that I brought my mini-paper cutter with me to class! The positioning of other elements are somewhat the same as Luci's, though I moved my tree a bit to the left and threw on a few more stars. In addition, I added a new and larger framing card base in Blueberry Bushel. I really liked this color addition as I was able to achieve my love of a larger card, plus the blue softened the bold colors and brought out the blue in the dsp stripes, which I liked.
Friday, August 20, 2021
Warm Up with Christmas Mittens!
I needed more Christmas cards for my stash. I decided to check out my Christmas scraps to see if there were any pieces that I could use for another card. I found the sentiment stamped vanilla strip, the stamped/die-cut mittens, and the scalloped cherry cobbler circle. I had written Gumball Green on the back of the mitten die-cuts, so I would know what color of ink they were stamped with, which helped me locate an old 2012 Christmas dsp that I thought would look great with my pieces. This gave me some building blocks for card design ideas.
Next, I visited my list of old Challenge Catch-ups for inspiration on just what I might need to do to meet some challenges and lots of ideas began to percolate! Take a look at my finished card...I was happy with the finished design and salvaging and cleaning out some old scraps that either needed to be used or tossed!
Ingredients: Stampin' Up products: Cardstock--Very Vanilla, Gumball Green, Cherry Cobbler, and Silver Foil. Patterned dsp--Be of Good Cheer. Stamp--Make A Mitten... Punch--Mitten Builder, 2-3/8" Scallop. Embossing Folder--Snowburst (scallop-punched border). Rhinestones.
Thursday, August 5, 2021
Non-Traditional Christmas Dove!
More Christmas cards to do!! This card's original design idea came from my Stampin' Up hostess duo's 2020 Covid Christmas Card Make-It @ Home Kits, by Dar Peterson. It was time to get the last card finished and posted. I tweaked the card to fit the ideas circulating in my head: enlarged the card, tweaked the dove placement, added more gems, more silver foil, and changed-up color layers... explanations below:
I scrapped the white cardbase, changing to the dove's Roccoco Rose and enlarging the card to 4-3/4" x 6", which I prefer. I enlarged my border layers to 1/4" on the bottom two color layers. I added a silver foil sentiment backing to coordinate with the silver olive branch in the dove's beak. I added three vertical rhinestones to the upper left corner, coordinating with those in the sentiment.
As I "tweaked and built" this card, its color scheme grew on me. At first, I wasn't sure I even like it, though I loved the card design. Now, several months later, I actually really liked it! Thanks Dar for the original card design and always encouraging us to change-up, tweak, and "build" our cards to fit our own creativity! See my finished card below:
Sunday, May 30, 2021
Magic & Wonder At Christmas!
This is another card fashioned during my January New Year's resolution binge cardmaking marathon. I was so happy with the end result that I resolved to go back and make more of this design at a later date. I just finished a total of four more replicas for my card stash, but I still want to make at least three more! I did add some Copic-colored sequins for the poinsettia stamin to add even more dimension on several versions.
My card is a modified CASE of a card originally designed by Dar Peterson, a friend and one-half of my Stampin' Up demonstrator duo, plus side-kick Luci Kirschbaum. Because of COVID-19, they were not able to host card classes for well over 15 months; therefore, they issued card kits from time to time for their friends and followers to purchase and complete in their homes. This CASE original was from their Christmas kit issued in late October 2020. Take a peek at the beautiful results of this truly elegant card and read below for the particulars on the modifications that I made.
One of my favorite Christmas card themes is poinsettia blooms that come in a myriad of colors and usually make elegant cards. This card uses the Poinsettia Petals and coordinating die set, which is still available in the 2021-22 Annual catalog. I was so happy with the end results of my January CASE that I just finished a total of seven replicas for my card stash! I did add some Copic-colored sequins for more dimension of several versions.
I modified Dar's design by enlarging my card and changing the sizing on the kit papers to fit. I added two more color layers to the base layering in So Saffron and Garden Green to bring out the beautiful color shades in the Poinsettia Place dsp paper. Garden Green became my card's new card base and I built the card's layering from this base instead of white as in the original design. The original design used the gold oval background layer in the sentiment as in my card, but I added it as a background layer behind the horizontal ribbon band as well. I added some Acrylic Glitter Glaze to the poinsettia's petals to add sparkle and sheen, but kept the rest of the card similar to the original design.
Thursday, May 20, 2021
Stepping To Church for Christmas!
Here is my first center-step card that I've made from start to finish with my own template design for a larger 4-3/4 x 6-inch card. To help me redesign the dimensions, it is a remake of a card I made at my Stampin' Up demonstrator duo's card event back in the fall of 2017, which I loved! What can I say, I'm not very adventuresome, especially since it involved refiguring the template dimensions in order to remake it into the larger size. I kept the original card to use as a guide, which helped me figure it all out much easier.
Because the card was larger, I was able to add a third layer. I ended up with a black cardbase, followed by a white mat layer, followed by the card front layer with the die-cut pieces. I really like the white on black look. The original design just started off with the white cardbase, which didn't allow for as much contrast. I really like my added contrast by having three layers, and starting with the black first, then white, then black again. I stuck to the original card design, and I thank Luci Kirschbaum for always allowing us to CASE our class cards and modify them as we like. Here is my enlarged, finished card below:
Sunday, May 9, 2021
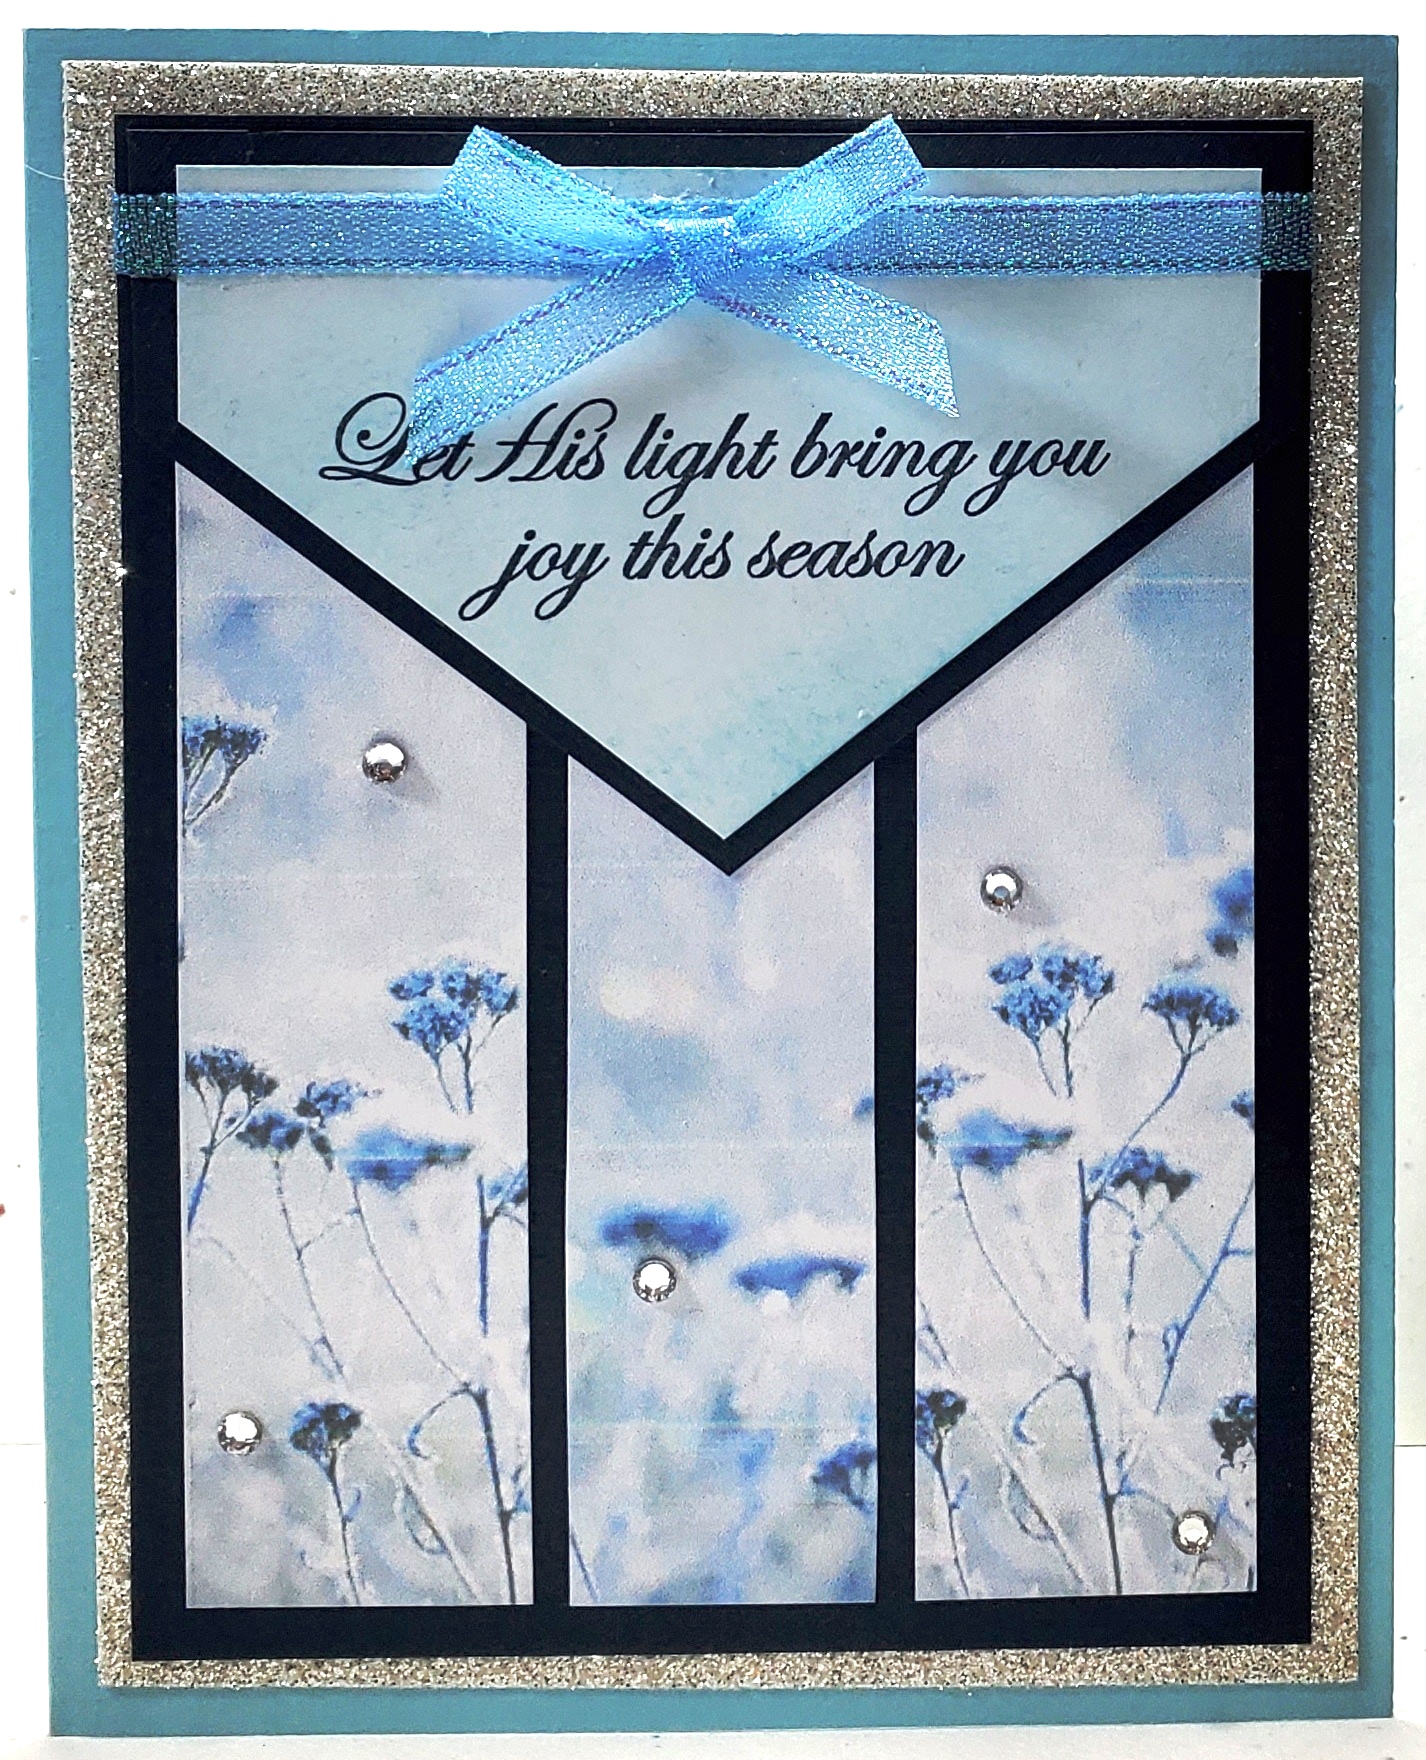
Let His Light Bring You Joy!
I'm trying to catch up on my blog posting, and I found this Christmas card that I made earlier this year that hadn't been posted. I used this same card design for two sympathy cards back in January, but planned to remake it into several Christmas cards as well. My card design was based on a My Favorite Things sketch from April 2018 - MFTWSC383, plus some Splitcoaststamper Challenge ideas as well.
I liked the Feels Like Frost paper that I used on the sympathy cards, and I planned to use it on the Christmas cards as well. I did not make the same mistake in measuring the flap this time, so it was plenty long enough to be positioned at the top of the layering scheme so the ribbon strip and bow would rested directly on the flap. Take a peek at my finished card:
My design rotated the sketch design to a portrait style and shortened the flap so it did not drop as low onto the body of the card. I decided to place my sentiment on the flap similar to where MFT shows the white rectangle but lower in the angled area, and I layered the flap with navy. In addition, I added vertical paper strips from top to bottom with the envelope flap overlaying the top portion of the strips. Take a look at the My Favorite Things sketch that I based my card design from:
Wednesday, April 28, 2021
A Wondrous Gift is Given
More Christmas cards are needed for my 2021 Christmas stash. This is a remake of a card made back in 2009, using the now retired Stampin' Up Lovely As A Tree stamp set that was so popular and remained current from 2001 to 2019! My new card has more layers added, including some sparkly silver glimmer paper, Dazzling Diamonds glitter, and sequins that the original did not have.
I just love the technique of layering trees in navy ink and silver embossing with a little added Dazzling Diamonds glitter into the mix. Unfortunately, the photo does not pick up on the glitter added, but it is quite sparkly in RIL! I've also added some sparkly sequins scattered about. Take a peek at an update of an old card below:
Ingredients: Stampin' Up products: Cardstocks--Whisper White, Night of Navy, Silver Glimmer. Stamps--Lovely As A Tree (ret. 2001-19), Wondrous Gift (ret. 2007-09), Snow Front (2019). Ink--Night of Navy, Versamark. Embossing Powder--Silver, Heat & Stick. Glitter--Dazzling Diamonds. Ribbon--1/4" Night of Navy Grosgrain; Silver Cording. Size: 5 x 6-1/4 inch.
Thursday, April 1, 2021
God's Peace at Christmas!
This is another of my January New Year's resolution Christmas cards. It was also another 2019 card kit from my Stampin' Up mentors, Dar Peterson and Luci Kirschbaum. Its original design was presented by Dar, and again I did some modifications that came to mind when I looked at the pieces.
Those who read my blog regularly know that my favorite card size card is more like an A7 (4-3/4 x 6-1/4 inches) than the standard A2 card (4-1/4 x 5-1/2 inches). I really like a 4-3/4 x 6-inch card the very best, which does not fit an "A" anything, and that is was I chose for this card. So, of course, my first step was to cut a larger cardbase. I decided on a white base, rather than starting with the Melon Mambo as in the original design. Also, I exchanged Dar's silver layer for green, Call Me Clover. I really wanted to bring out the green in the ribbon, and I achieved adding more color as well. Next, I cut my vellum layer with a cross-stitch edged die to add a bit more texture and interest. I'm not sure, but I think the original was colored on top of the vellum, but I chose to color with Copics on the backside of the vellum instead. I retained the rhinestones in the four corners, but I Copic-colored them to a nice warm gold to coordinate with the gold embossing. Take a peek below at my finished rendition...it will go into my Christmas stash for 2021 cards.
Ingredients: Stampin' Up products: Cardstocks--Whisper White, Melon Mambo, Call Me Clover, Vellum. Stamps--God's Peace (candles/ sentiment--2019 Holiday). Embossing Powder--Gold. Rhinestones. Other: MemoryBox die--Cross-Stitched Frame Border Die. Copic Markers. Chatterbox verse (inside). Size--4-3/4 x 6 inches.
Saturday, March 20, 2021
Christmas Dove Brings An Olive Branch!
This is another Christmas card for my 2021 stash! I do love this Stampin' Up dove stamp and die set that I used, which I'm surprised wasn't carried over into the annual catalog.
I wanted to use vellum for the dove, which I underlaid with Tempting Turquoise and added silvery wreath. I thought a night sky would be pretty, and I found a pretty piece of dsp with deep to mid-range blue tones. To complete the look of my night sky, I embossed the dsp with the SU Winter Snow embossing folder and then sprinkle/ splattered it with white acrylic paint. It was just the look I wanted.
I used a silver heat-embossed sentiment on vellum with the Tempting Turquoise as an underlay mat as I did with the dove. I modified this die-cut mat, cutting it down narrower to fit the width I wanted. Take a look below at the finished card:
Ingredients: Stampin' Up products: Cardstock--Night of Navy, Tempting Turquoise (ret.), Silver Foil, Translucent Vellum. Stamps/ Dies--Dove of Hope/ Detailed Dove dies; Wreath Builder dies, Ornate Frames dies (sentiment underlay/ modified). Ink: Shaded Spruce (sponged Shimmer cardstock). Embossing Powder--Silver. Embossing Folder--Winter Snow (SU-2020 Holiday). Other: Paper--Recollections Bold Brushstrokes 12x12 paper pad; DCWV Shimmer cardstock--white. Folk Art--White acrylic paint. Size--4-3/4 x 6-inches.
Friday, February 5, 2021
A Snowflake Merry Christmas!
This is another of my January New Year's resolution Christmas cards. It was also another 2019 card kit from my Stampin' Up mentors, Dar Peterson and Luci Kirschbaum. Its original design was presented by Luci, and again I did quite a bit of modifications that came to mind and to make the card more me, plus fitting some Splitcoaststamper challenges along the way!
First, turned my cardbase from horizontal to portrait, and I added more cardbase layers, one in Balmy Blue to add more color to the card front's framing. I kept the white snowflake embossed layer to host the geometric card front shapes. For this geometric card front, I re-arranged, re-located, re-sized, and added to the patterned geometric shapes. I used the same dsp patterned paper supplied in the kit, and when I cut and added to the number of these shapes. My geometric placements were a lot more uniform and balanced and not quite so random. I also centered up the sentiment layer and positioned only one glitter snowflake at its upper left corner, eliminating the second snowflake all together. In addition, I added a few more sequins to finish. Take a peek below at my finished card:
Saturday, January 16, 2021
Reindeer Prancing & Dancing!
After my abysmal failure with getting 2020 Christmas cards made and sent to friends and family, other than my four children, and I was probably only successful with those, because I always make a gift pocket inside their cards to hold their Christmas checks...basically the "packaging" to hold their present. These four cards were all one design with four different colors that I made just two days before Christmas.
As the New Year approached and I was still in my funk, I woke one morning and was just fed up with my down mood that had persisted during all of the holidays. I was really upset with myself and "kicking myself in the hindquarters" for not forcing myself into my craft room to make Christmas cards. I felt that I had pushed by depressed vibes onto everyone else and not cheered them up if they needed it by getting happy mail at Christmas! I vowed never to let another Christmas go by without me making and sending my cards, because with all my surgeries for my knees and hands in the previous three years, I had missed other Christmases as well.
In early January, I pushed myself into my craft area and gave myself a good talking to. I made a wonderful New Year resolution. I would stay in my craft area and make enough cards to cover family and long-time friends for Christmas 2021 (that would be around 70 cards) by the end of January; I was not allowed to make other cards; and I was not allowed to put what Christmas materials I had out away until I finished. To help me out, my first two designs were alternative designs off the October 2020 Paper Pumpkin, "Joy to the World."
YAY! I completed my resolution, though I fudged a little on "other cards." After I got over 3/4 of the cards finished, I had a few sympathy cards I felt I really needed to address...so I cheated a wee bit. I spent many, many hours and literally a minimum of three weeks of January continually at my craft table getting my 70 Christmas cards finished, except for their inside design and verse. I developed about 15 designs and made four to six of each. This blog post is for my fourth card design, which is a take-off of an unfinished 2019 card kit from my Stampin' Up mentors, Daralee Peterson and Luci Kirschbaum. Its design was originated by Dar, and I modified and embellished upon it, changing it to make it my own.
The original design only had two layers and both were the same color...Very Vanilla. I exchanged the Very Vanilla cardbase for one in a lovely, soft navy, called Blueberry Bushel, plus added additional layers in copper foil and Pretty Peacock. I colored the stamped berries, peeking from under the foliage framing, with Copic markers to match the blueberry cardbase. I added clear embossing and glitter to the Pretty Peacock foliage framing, and added an embossing folder design to the dashing deer. I enlarged single layer sentiment, changed its shape to a double fishtail flag, and added a double fishtail blueberry mat layer beneath. I moved it from a right off-center position, centering it up below the framing. To finish, I Copic-colored rhinestones to match the color of the Pretty Peacock cardstock and added them to the four corners of the vanilla layer. I am really pleased with all the colorful paper and embellishment additions. It is so pretty and sparkly! Take a peek below at my finished card:
Ingredients: Stampin' Up Products: Cardstocks--Blueberry Bushel, Pretty Peacock, Very Vanilla; Foil--Copper; Pattern dsp--Brightly Gleaming Specialty; Stamps--Frosted Foliage, Itty Bitty Christmas; Dies--Dashing Deer (2018 Hol.), Frosted Foliage (2018 Hol.), Stitched Rectangles, Lakeside Dies (sentiment banner) (2019-20 Annual) (coor. stamp: Lilypad Lake); Rhinestones (Copic-colored). Other: Spellbinders Mystique Embossing Folder. Size: 4-3/4 x 6-1/4 inches.
Monday, January 11, 2021
Joy to the World Wreath (October 2020 - "Joy to the World" Paper Pumpkin Alternative)
I was really please with my first alternative card for the Stampin' Up Paper Pumpkin October 2020 "Joy to the World" kit using the pretty Christmas rose flowers provided in the kit. I had a little mojo going now, and I came up with some ideas for the wreath die-cut provided in the kit. I thought I'd try my hand at another alternative card using it.
The pine needle wreath in the kit was so lightly colored that it was difficult to see what it even was...it really needed help. I watched a few YouTube videos on completing this kit, and I saw that most were using the stamp set provided and stamping a new wreath with the leaf/ pine needle wreath stamp. One particular video showed how to turn the stamp so that it fit best over the other wreath and did not cover up the red berries on the original...that was very helpful! I used the wreath, the stamp set, and the red twine provided in the kit, but I added the other papers, loving the color combination from my first card, plus another "Joy" die that I had recently purchased from Stampin' Up. I also loved the look of the first card's embossing folder so I thought I'd use that again as well. Take a look at my finished card below:
Ingredients: Stampin' Up products: Paper Pumpkin October 2020 "Joy to the World" kit elements. Paper/ Cardstock--Cherry Cobbler, Whisper White, Call Me Clover, Gold Glimmer. Dies--Joy Dies (2020 Holiday). Ink--Call Me Clover; Memento Tuxedo Black. Other: Paper--DCWV Kraft & Gold. Hot Off the Press--Diamond Dots EF. Pretty Pink Posh: red sequins. Size: 4-3/4" x 6-1/4".
.jpg)
.jpg)
.jpg)