Sunday, July 31, 2022
Mitering with a Twisted Oval Christmas!
Wednesday, July 6, 2022
Hugs for Kandie!
An SCS Alpha friend recently lost her husband, and we are sending her well wishes and thoughts via the Splitcoaststampers' (SCS) Teapot Challenge, 7/5/22..."In A Word!" Each of us is challenged to choose a WORD theme for our cards that represents what we want to say to Kandie. Mine is "Hugs" and goes along with my inside verse of sending along thoughts, prayers and hugs to let her know I care.
My card is made with a stencil and blender brush inking. I made the stencil from the lacy flower die, Artistic Dies, by Stampin' Up, deliberately using white cardstock so that the leftover stencil would finish with lots of inks and could be converted into another card, which can be seen here: [URL=https://chatterboxcreations-1.blogspot.com/2022/06/my-daughter-grows-beautiful-flowers.html][COLOR=#6A5ACD]Hugs to Kandie![/COLOR][/URL]
The idea for my design came from a card class (by Luci Kirschbaum) that taught this clever die-cut stencil and two-card idea! I've cased the original cards with changes to both to make them more me. I love larger than A2 cards, more color mat layers, added embellishments, and often a sentiment change as well. For these cards, my tweaking involves all of those listed changes above. Take a peek below at my finished card and its inside verse:
Sunday, June 26, 2022
Father's Day at the Beach!
Being raised in the Pacific Northwest near the ocean, spending at day at the beach, means the ocean is definitely the scenery. I thought I'd give my youngest son a day off to enjoy some ocean scenery; after all, he was the only one of the four children who never lived in Hawaii where ocean beaches were very much a part of everyday life!
I used the Stampin' Up Waves of Inspiration stamps and the coordinating Waves Dies with Balmy Blue, Pacific Point, and Night of Navy inks. I brushed and ink-blended the white cardstock top panel with Balmy Blue giving it a filtered blue sky look (a light blue sky with wispy white clouds blended into the blue).
My wave was next, which I built with the Balmy Blue, Pacific Point, and Night of Navy inks. I stamped my colors in layers using these three inks one on top the other...over-stamping...but stamped-off with the two darker colors. I kept adding over-stamping until I got the look I wanted. I used my Misti to aid me in this process. My last stamping was done by applying Night of Navy on the lower portion of the waves only by using a Stamp Write marker inked onto the bottom of the stamp surface. After it was completely dry, I ink blended with Balmy Blue until I was satisfied with this lighter color mixed into my waves.
Then, I had an accident...while trying to stamp my seagulls where I wanted them (before popping on the clouds), my stamp block got ink on its edge, which transferred to my card front next to two of my seagulls! Whoa as me...not the first time I've had this problem with tiny stamped objects! So not to lose all my carefully ink waves, which I thought turned out rather spectacular, I fussy-cut the wave off and after preparing a new card front with my Balmy Blue brushed ink blending, I glued my waves to the bottom of my new card front.
I decided not to re-stamp my seagulls, as I just didn't want to chance the same problem, so I practice a little of drawing my own seagulls with a fine mechanical pencil and then flicking over with Copic markers in T5, T4, T2. It worked so well, and I could make them larger or smaller as desired! I found adding them with Copic markers works best for me! I die cut the clouds and cloud edges, which give the clouds more texture and dimension; I popped the clouds off the card surface; and overlapped two the smaller clouds and popped them off each other.
I originally started this card thinking to make a birthday card for my stash, as I never have enough birthday cards. I pulled out my Teeny Tiny Wishes stamp set (retired) and stamped with Night of Navy ink onto Balmy Blue cs and die-cut it with the narrow die that I knew would work well for sentiments. I attached Linen Twine through the open ends to the sentiment strip and added it to the middle of the card. Taking a look, I realized it would be a great masculine card, and I still needed another Father's Day card for our delayed family Father's Day get together, which would be taking place next week-end. I didn't want to re-do the die-cut with the twine, so I carefully made a new sentiment on the computer that I could carefully cut and paste over the happy birthday stamping. It worked perfect...take a look below:
(NOTE: When I say spatulated off, I used an OLD Cricut spatula, which is irreplaceable and works wonders when for this purpose because of its narrow, thin blade, Unfortunately, Cricut re-designed their spatula over 10 years ago so these old ones are almost impossible to come by!!)
Tuesday, June 21, 2022
A Bohemian Chic Paper Weave!
About four times a year, Splitcoaststampers hosts a Virtual Stamp Night challenge, which starts a month earlier than the official challenge date with three mini challenges. When the official event happens, it starts on a Friday evening with four challenges, each on the hour, starting at 5:00 p.m. to 9:00 p.m. The second day starts at 1:00 p.m. and goes under 11:00 p.m., also with a challenge each hour. My first goal was to at least get the mini challenge completed and at least six the next two days. I was being realistic that I'd probably not get all challenges done in the time limit allotted for uploading the the gallery. My fondest wish is that someday, maybe I'll actually complete all challenge and get them uploaded on time!
Well, this year, so far, I'm really random. I may finish the minis, but I'm diving right into one of the later challenges, which I didn't really see myself completing, because I thought the challenge would be difficult to design a card for. But while browsing a few of the possible inspiration photos, I ran across one that really sparked my interest and reminded me of a collection of papers I recently bought, which motivated me to get started. I also check for other challenges that might help me in my design, but I will have to add them later because of the short timeline to make and upload cards!
Take a peak at my completed card, which uses the bedroom color scheme and floral idea found in the paper:
Ingredients: Stampin' Up: Cardstocks--Crumb Cake, Calypso Coral, Basic White, Gold Foil. Patterned Paper--Symbols of Fortune DSP. Stamps-- Here's A Card (sentiment). Ink--Soft Succulent. Embellishments--Brushed Butterflies. Technique--Layered Strip Weaving. Other: Copics--Butterfly colors...R09 (orange), G29 (green), Y38 (Golden Yellow). Chatterbox inside verse. Size--4-3/4" x 6."
Monday, June 20, 2022
My Daughter Grows Beautiful Flowers
In the middle of thinking about and making Father's Day cards, I realized I also needed to be thinking about my oldest daughter's birthday card! I attended a June card class where we learned to make two cards in one by die-cutting a lacey floral die out of white cardstock to use as a stencil on another white card front panel, creating a negative inked floral bouquet. We were to use our blender brushes to ink and colorize our blossoms with three lovely ink colors, but I decided to use four: Polished Pink, Orchid Oasis, Starry Night, and Parakeet Party for the leaves. What gorgeous colors these are together. Our white cardstock stencil ended up very prettily ink blended as well and became the focal die-cut for the second card. This is the card I decided to finish for my daughter!
I adhered four 1/2" black paper strips spaced 1/2" apart and horizontally across the white cardstock front panel, starting in the middle...find the card front middle before starting. Next, adhere two 1/4" black strips at the top and bottom, but also leaving 1/2" of the white cardstock showing. I adhered this card front panel to a black mat layer with a narrow 1/8" border. I add two more base layers...the 4-3/4" x 6" black card base and a Gorgeous Grape cardstock cut to 4-3/8" x 5-5/8". I positioned the inked Artistic lacy flower die-cut where I liked it, allowing for my sentiment strip toward the bottom and offset to the left.
To finish, I added a 1/4" x 1" tiny black strip to host three medium rhinestones colored with Copic markers to match the Parakeet Party ink and positioned the strip toward the upper right corner of the card front. I punch my white cardstock sentiment strip with the Lovely Label Pick-A-Punch and popped two rhinestones beside the stamped "Happy Birthday". I also added two Glitter Enamel Gems to the flower centers, coloring them with Copics to accent the inked blooms.
I was super pleased with the look...black and white always dresses up any card...such a classic combination! Take a peek below and my finished card and my inside Chatterbox verse:
Saturday, June 11, 2022
Flowers Bring Love & Hugs!
Birthday cards...I need birthday cards! I just can't make enough birthday cards. I also need a card with well wishes for retirement for early June. The SCS Virtual Stamp Night is asking for flowers for a Summer Flower Festival!! So, with that in mind, I've definitely decided my card will feature flowers with a belated birthday/ retirement theme, all rolled into one. I needed to further search other SCS challenges that my card might fulfill. This search provided me with a total of 14 fairly new and old challenges that my card would fit. In case you were wondering, SCS welcomes completing a challenge at any time not just the week the challenge is presented!
My card needed to be fairly simple to meet the one-hour time limit for making cards for the VSN challenges, but I'm really happy with the outcome...four layers and another for the Sweet Sorbet inked flower and sentiment, both of which I popped. Take a look at my card in its finished state:
Ingredients: Stampin' Up: Cardstock--Whisper white, Pretty Parakeet, and Orchid Oasis. Patterned dsp--6"x6" DSP Assortments--2022-2024 In-Colors. Stamps/ Dies--Sending Smiles/ Sending Dies. Dies--Basic Borders. Inks--Starry Night, Orchid Oasis, Parakeet Party, Sweet Sorbet. Markers (SU)(stamp coloring). Gems--2022-2024 In-Color Matte Decorative Dots. Stampin' Up Markers. Other: Copic Markers (darkening gems).
Tuesday, May 31, 2022
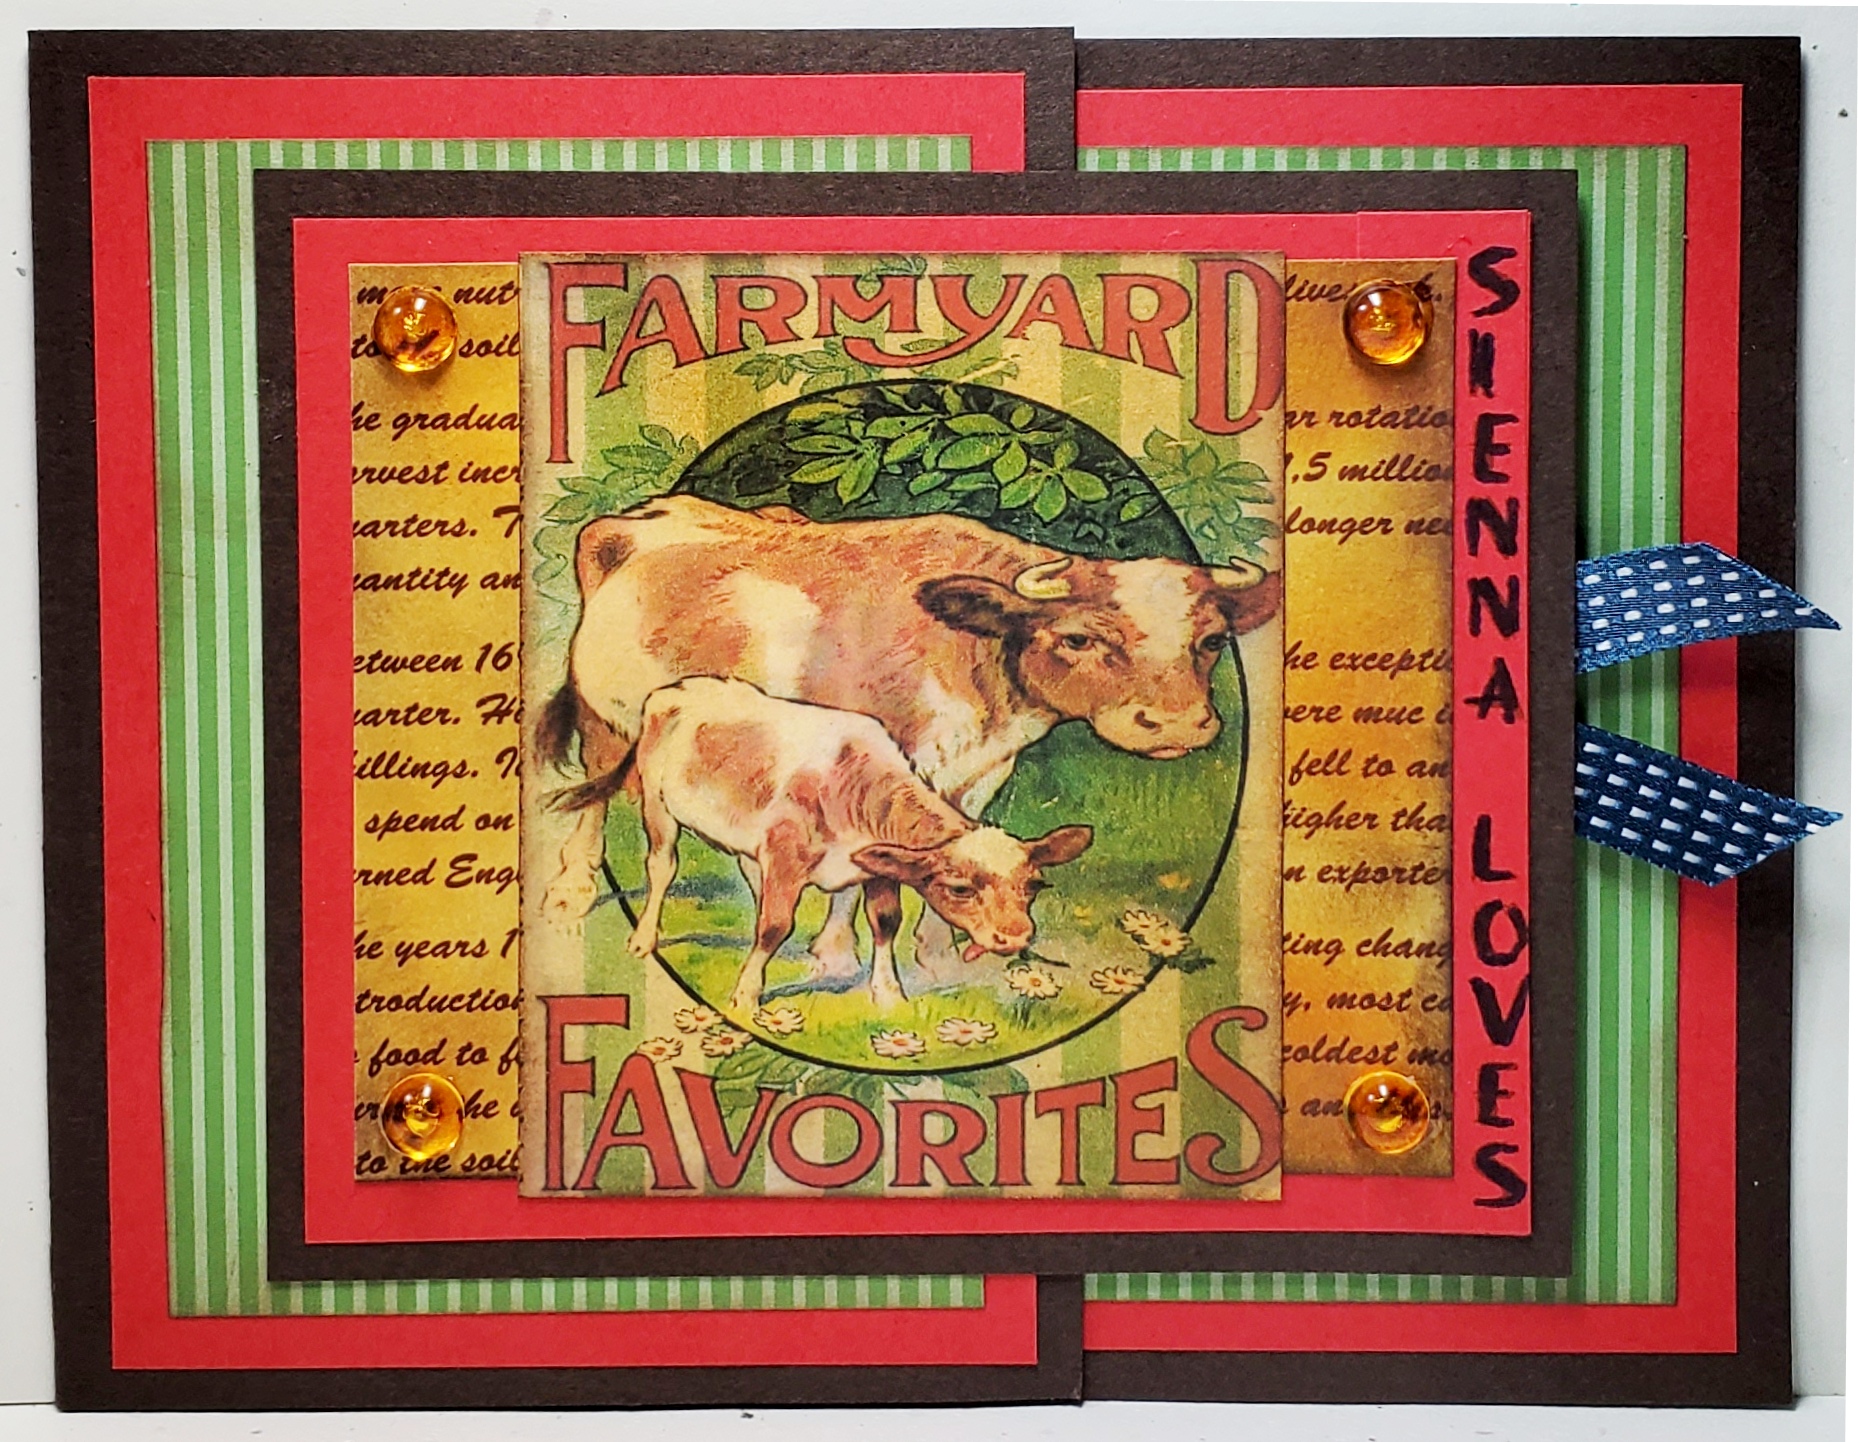
Farmyard Favorites for Father's Day!
Father's Day is coming, and the Virtual Stamp Night Mini Sneak Peek was held just a few days ago. The first one wants your card theme to be farm animals...like in Old MacDonald's farm. I'm thinking someway I will build a Father's Day card out of this challenge.
My son-in-law is such a good Dad! His daughter, and my middle granddaughter, was three this past March. From the time she was three months old, he has taken her to oodles of animal places and events...zoos, summer fairs, petting zoos, etc. You name it, if it's within 50-miles of their location (even on vacation), he will find an animal place to take Sienna. As a result, she just loves animals, has no fear, and you can see why. Her first favorite was a cow, and one of her first words was moo-moo!
I'm a lover of "simple" vintage cards (those without too much frou-frou), and for some reason, I've not made many vintage cards in the last few years. I went to my stash, because I remember a vintage cow image that I almost made into a card a few years ago. I had to scrap the idea at the last minute, because I forgot to take the image and any papers with me to a retreat where I planned to make the card! I had even mounted it on homemade script paper that I made prior to leaving that talks about medieval farming as I needed a computer and printer to do so. Using it now, was just a matter of deciding the layout, design, and papers! I actually copied my design layout that I used on the replacement card. Take a peek at my finished card below with its vintage slant!
Ingredients: Stampin' Up: Cardstocks--Early Espresso, Poppy Parade, And Very Vanilla. Patterned DSP--2012-2013 DSP Stack--Wild Wasabi Stripe. Inks--Soft Suede, More Mustard, Chocolate Chip. Other: Patterned Paper--Medieval English Farming Script (homemade/ink distressed). Vintage Farmyard print (stash). Gems--Robin's Nest DewDrops-Golden. Technique--Short Front Flap Card. Chatterbox computer verse. 4-3/4" x 6."
Sunday, May 15, 2022
Let's Party with Dinosaurs!
My oldest son is newly engaged, and they intend to tie the knot in June 2023 if everything goes according to plan. Through this union, I have acquired what would be a great granddaughter. She will be three years old on her birthday in a few weeks...the same age range as are my three natural granddaughters, which is 2-1/2 to 5 years. Her Mom and grandmother (who is my son's fiancé) planned a dinosaur-themed birthday party. So, needless to say, I needed a birthday card and wanted to try my hand at the dinosaur theme.
I found a darling little cartoon line-art baby dinosaur, who had just hatched from his uniquely designed egg. I thought this would be a good place to start. Next, I found some pink, white, and green digital dinosaur paper to add to the plan. My next task was to search out some Splitcoaststamper challenges to fit this card into my "challenge catch-up" goal. With all these thoughts in mind, I came with up my card design, which started with the Standing Pop-Up card fold technique.
The face of Amara's card got so heavy, the card wouldn't stand up, so I invented a little paper fold "hinge" to insert into the hollow box-like rectangular front platform that allows the card to fold down flat to insert it into an envelope for mailing and also to pop-up and open to allow the card to stand on a flat surface.(1) My "hinge" isn't a terribly difficult addition if you can do it before you form the box and while the cardbase is still flat, but it becomes much more tedious to insert the "hinge" with the attachment flat covered in glue after the box is formed!
With all that was said above, take a look below at Amara's finished baby dinosaur Standing Pop-Up card when finished. I think she will love it, as well as Mommy and her grandmother!
Tuesday, May 3, 2022
Being A Dad is Whiskey Business
I went to a card party a few months ago, and my Stampin' Up demonstrator duo (Daralee Peterson and Luci Kirschbaum) had a card design using the new "Whiskey Business" stamp set. I loved their card design idea, but decided to enlarge it and tweak it here and there to make it more mine.
I gave it a new, enlarged and ink-distressed white card base, a new, ink-distressed punch size panel to host my changed sentiment, re-positioned brads, plus a pale blue decanter, glass, and ice shaded with Copic Markers. I also used Copics to color my whiskey and highball drink, getting better shading, blending, and highlights than could be achieved with the water-base markers provided. My finished card, inside and out, can be seen below:
Saturday, April 30, 2022
My Mother is Celebrated & Loved!
It is already May, and I really need to get my Mom's Mothers' Day card made, compose my inside verse, finish the inside card design, and get it into the mail ASAP in order for it to arrive on time. After reviewing various Splitcoaststamper challenge possibilities, I decided to finish one of my card class designs (original by Luci Kirschbaum) that I remembered was lurking in my “To Do Stash,” but there were some changes I wanted to make that occurred to me while in class. I wanted to jazz it up a bit and make it more me by adding layers, making it larger, and change the sentiment and its presentation.
I added layers below the card front with a Poppy Parade cardbase and a White Iridescent Glimmer layer. I changed the label shape and sentiment theme from a simple fishtail flag to the Lovely Labels punch design, and I made my new sentiment Mothers' Day wording using two computer fonts I really liked. I have to say, I really like all my changes.
I composed an inside verse using the computer and added a two-layer corner punch design to the four corners of the verse cardstock. I coordinated these punch corners with the card front's beautiful tulip dsp and the iridescent glitter paper. I'm just sure Mom will love her card......take a peek below:
Tuesday, April 19, 2022
Easter's Symbol of Salvation!
Moving on to my second Easter card that I found in my "TO DO" box: a previously finished card from a 2018 class card. When I got home from class, I separated the layers with my trusty spatula (OLD Cricut spatula), because I knew I wanted to elaborate on the card when I had time and I didn't want the glue tape to set. The pieces ended up stashed in my "Need to Finish...TO DO Stash" box and promptly forgotten! The original card's design credit goes to Dar Peterson, one of my two SU demonstrator duos.
I got out all the pieces and my photo of the original to see if I could remember what I wanted to do different. My changes do not really change the original design look too much, but adds a bit more sparkle and elegance, I think, with more Gold Foil added. I enlarged the card to a 4-3/4" x 6" card from an A2 by making a larger new white card base, adjusting the Blackberry Bliss larger (I used the original for an inside card layer), and cut and inserted a Gold Foil layer before adding the top white embossed card front layer. I also added a Gold Foil scalloped oval below the multi-color stitched dsp layer.
I was really please with the foil additions as it dressed up this lovely card even a bit more by adding more eye-catching metallic sparkle that coordinates with the gold filigree cross. Now, here's the rub! I forgot to take a photo of my remodel before popping it in the post for mailing!
All I got to say is...woe is me, sigh! I bid you to use your imagination to envision how those changes looked as this is a photo of the original design! Take a peek below at it and my inside design and stamped verse:
Ingredients: Stampin' Up: Cardstock--Blackberry Bliss, Basic White, Gold Foil. Pattern--Painted with Love Specialty dsp (2018 Occasions). Stamps--You're Inspiring (sentiment); Easter Promise (inside verse). Dies--Cross of Hope Framelits (2018 Occasions/ 2018-19 AC); Stitched Shapes Dies (oval). Petal Burst EF (2018 AC). Other: Brilliance Chalk ink--Gingerbread. Ribbon scrap.

-Teapot%20Chal.--Artistic%20Dies%20(Luci%20cjp%20mod).jpg)
-Teapot%20Chal.--Artistic%20Dies-inside%20(Luci%20cjp%20mod).jpg)


.jpg)


.jpg)

--Liz%20Thayer.jpg)


--So%20Cool...It's%20Your%20Birthday-inside.jpg)