Tuesday, September 6, 2022

Floating Poppy Birthday!

One thing I really need to set my mind to is building up my birthday card stash. It seems I am always missing sending a birthday or two throughout the year because I run short of time to create one. Birthdays just sneak up on me and catch me short-hand more often than not. For the next several months, not only do I need to focus on my Christmas card stash, but also get started replenishing my meager birthday card stash. 


I started browsing through my Splitcoaststamper "challenge catch-up" list to see what challenges I have yet to do since 2017, and believe me, I still have plenty to complete! I was hoping to get my creative mojo juiced and stoked. I got lots of color ideas, techniques, and design ideas from my search with a total about 20 or so challenges that I could use to influence the design outcome of this birthday card for either one of my fall birthdays or for my birthday stash. After deciding on my card design, theme, and colors, I used 14 challenges that I can claim that inspired me. My card also uses the Floating Elements technique. Take a peak below at my finished card:


Ingredients: Stampin' Up products-- Cardstock: Basic Black, Starry Night, Sweet Sorbet, Tahitian Tide, and Orchid Oasis. Window Sheets. Dies: Poppy Moments. Gems: Polished Dots. Other-- Happy Birthday Shadow die. Copic Markers (gem coloring). Chatterbox verse. Size: 4-3/4" x 6".

Tuesday, August 30, 2022

Candy Cane Wishes for Christmas!

 I still have very few Christmas cards ready for Christmas giving this year. It is starting to weigh heavily on me that I'm so far behind; therefore, my next card must be a Christmas card for my stash! I just received my Sweet Candy Cane stamps/dies and the Christmas Banner stamps/ dies that I ordered from the current Stampin' Up mini catalog so I'm eager to try them out. 


The Sweetest Christmas dsp in that same catalog has a lot of wonderful patterns and strips. I decided on a criss-cross background effect by using a striped diagonal paper pattern overlaid with the diagonal panel die-cut. I used all three colors in the striped paper on my card front stamping and die-cuts: Real Red, Garden Green, and Pool Party, plus I added a bit of aqua glitter paper to add some sparkle and bling! 


As most candy canes come in individually wrapped, clear cellophane wrappers, I decided to cover my Real Red, ink-stamped canes with Scotch clear packing tape to resemble these cellophane wrappers. This is an idea we used in a class card designed by Dar Peterson that I borrowed. I am pretty happy with the way my card looked upon completion...take a peak below at the finished card:

Ingredients: Stampin' Up-- Cardstock: Basic White, Garden Green, Pool Party. DSP: Sweetest Christmas. Stamps/Dies (J-D 2022 Mini): Sweet Candy Canes/ Candy Cane dies; Christmas Banner dies (pine boughs). Ink: Real Red. Punch: 1-1/4" Circle. Ribbon: 3/8" Pool Party Sheer. Gems: Elegant Faceted Gems. Other-- Paper: DCWV 6"x6" Glitter Pastels Mat Stack. Spellbinders Dies: Splendid Circles. Scotch 2" Clear Packing Tape.

Thursday, August 25, 2022

Baby & Winnie Are Roommates!

I had a baby shower to attend to welcome the upcoming birth of a dear friend's great granddaughter! The baby room is decorated with a Winnie the Pooh theme, so I wanted to use that as my card theme.  I've always loved the Winnie the Pooh quote "Sometimes the littlest things take up the most room in your heart!" I really wanted to use it in some way with my card.  I search online for some free images and downloads, and I came up with this doodled image of this quote and decided to use it as the card front focal point.


I printed the image and quote, colored it with Copic markers and sponge-colored the background with Pool Party ink. I found a Spellbinders die to frame the quote & image, some pretty variegated sheer ribbon and rich golden dot paper.  Putting it all together, I came up with a cute and quick card!


Last, I composed an inside verse, printed it, distressed the edges, punched decorative corners and added some sparkly gems to this corner punch area that I color-shaded using Copic markers.  Check it out below both inside and out:


Ingredients: SU Cardstock: Whisper White, Garden Green. Recollections Cardstock: Light Yellow, Patterned Paper: MFT--Dots & Stripes Sorbet 6x6 Paper Pack. Spellbinders Dies: Fleur de Lis Rectangles. SU punch: Curvy Corner Trio. Image/Verse: Free Winnie the Pooh Doodling. Ribbon Scrap: Offray 1/2" Two-Tone Sheer. SU Gems: Glitter Enamel Dots (Copic colored). Chatterbox Verse. Size: 4-3/4" x 6." 

Friday, August 19, 2022

A Just Right Day!

My daughter-in-law's birthday falls in mid-August two days after my Mom's birthday. I went to a card class back in March or April and several of those cards remained unfinished because I wanted to change them a bit rather than follow the original design exactly. As Ginger loves flowers, and I think she would love to have a greenhouse added to her backyard, I decided one particular unfinished card lent itself well to Ginger, as well as several challenges I wanted to enter.

First, I add a few more flowers and extra foliage inside my greenhouse, plus one more blossom outside as I like the look of an odd number of blooms rather than just two, which is an even number. I finished the greenhouse and attached it to the planned white stitched rectangle panel.

The original cardbase design used the same Just Jade cardstock color under the Just Jade embossed brick layer. I wanted to add larger underlying layers and more color. I decided on a Pale Papaya cardbase to match the sentiment die-cut and to use this new cardbase in a picture frame look with an added white mat, and then the Just Jade Brick & Mortar 3D embossed layer. 

I trimmed brick embossed layer about an 1/8" smaller all the way around. I decided to add Clear heat embossing over the 3D bricks to give them a bit of sheen and bring out the texture. I added a little sponged Pale Papaya ink to a recycled scalloped doily for the edging that peeks out just below the greenhouse white stitched panel.  I shaped the doily into a double fan look.  

Next, I offset this same white mat panel quite a bit more to the right than in the original card design to accommodate for the sentiment overlap, which was placed in this location with a specific challenge requirement in mind. I really like my changes and additions to the larger card size, the new Pale Papaya cardbase, the white mat layer, the Clear heat embossing over the 3D brick dry embossing, the extra blooms, and the fan-like doily as I think they all added and enhanced the original card design, which was presented by Luci Kirschbaum!  Take a peak below at my newly-made finished card inside and out:


Ingredients: Stampin' Up: Cardstock--Pale Papaya, Whisper White, Just Jade, Soft Succulent, Vellum. Stamps/Dies--Garden Greenhouse/ Greenhouse Dies. Dies--Stitched Rectangles, Message Dies. Ink: Just Jade, Pale Papaya, Versamark. EF--Brick & Mortar 3D. Elegant Faceted Gems. Other: WOW Clear Matt Embossing Powder. Rectangle doily from stash. Chatterbox verse. Size-4-3/4" x 6".

Saturday, August 13, 2022

Happy Day!

 I have quite a number of birthdays in August between family and friends.  I'm feeling behind already, so I got my thinking cap on and decided to get serious!  With some help from Splitcoaststamper challenges, I came up with a vintage design that I'm really pleased with! It will be for one of my husband's sisters, who moved to Florida in this last year to be closer to her oldest daughter. I'd better get it finished and off in the mail as she lives about as far from Washington state as she could be...kitty-corner across the U.S.!


I found this wonderful vintage paper in my paper stash from Michael's Craft Stores, "Recollections Signature Vintage Country Paper Stack. It got my vintage mojo going full speed ahead, which made me really excited to get started!  Vintage is one of my favorite card styles, yet I haven't made many cards in this style during the past several years.


I used five patterns from the paper pack that I cut into varying widths and distressed inked the edges before horizontally layering them one after the other, on  a pre-sized cardstock guide.  I also used one of the patterned tags provided in the paper stack as my sentiment rectangle centerpiece. I stamped my birthday sentiment onto it using my Misti stamp positioner, and I adhered the finished tag onto a black lattice frame for added interest.  I fussy cut several identical flowers from several of the tags and layered and distressed their edges to provide additional depth, finishing off with a sparkly gem. My last addition was to add a black-striped sheer ribbon horizontally with a two-loop side bow.  Take a look at my finished card. I'm pretty pleased with its outcome.


Ingredients: SU Cardstocks--Basic Black, Gold Foil. Patterned paper--Recollections Signature Stack--Vintage Country (12x12). SU Stamps--Itty Bitty Birthdays. Spellbinders dies--Lattice Rectangles. Ink--Memento Tuxedo Black. Colorbox--Chestnut Roan ink distressing. Offray--3/8" sheer black stripe ribbon. Jolee's Boutique--Black Circle Bling Gems. Chatterbox verse. Size--4-3/4" x 6."

Saturday, August 6, 2022

Birthday Love!

My Mom's 97th birthday is right around the corner, and I needed to get a card finished and off in the mail very soon. I got busy checking out Splitcoaststamper challenges to see what I might come up with.  I usually start with the Sketch Challenge, the  Inspiration Challenge, or the Featured Stamper Challenge and move on to others from there.  I play a little Challenge Catch-up game with myself, trying to incorporate as many challenges as possible in my card from the design, to the theme, or the color scheme. This week I found 12 challenges I could enter for this card!


From the Inspiration Challenge, I decided on a monochromatic card mostly in blue shades from light to dark. I'm using a ribbon bow, an idea from the Featured Stamper Challenge. Other challenges influenced my card design as well.


I remembered the Boho Indigo Card Kit that came out in the Stampin' Up 2020-21 Annual Catalog that I purchased and that I had never gotten around to using it to make any cards.  I really can't tell you why that is, because the 6x6 paper pad is full of gorgeous double-sided patterns in many shades of blue, including white. It also includes some ivory-white pre-embossed papers as well. I certainly planned to use it now for Mom's card, plus I added some Metallic Shimmer White, Balmy Blue, and Night of Navy cardstock layers, in addition to some Dotted Swiss vellum. Take a peek below at the finished card inside and out:


Ingredients: Papers: Cardstock--SU-Night of Navy, Balmy Blue, Basic White (inside);  Bubbley White Metallic Shimmer (Amazon); Paper Pizzaz Vellum Dots; SU Boho Indigo 6x6 dsp. Stamps: SU-Boho Indigo Kit stamps. Dies: MFT-Stitched Circle STAX; Spellbinders-Pinking Circles LG. Punch: Martha Stewart--Trio of Butterflies, SU Pearls, Ribbon-3/8" Navy w/White Stitch (stash). White Sequins-Pink Posh (Copic colored navy). Wink of Stella-Clear (butterflies). Chatterbox verse (inside). Size--4-3/4" x 6."

Sunday, July 31, 2022

Mitering with a Twisted Oval Christmas!

I seem to be on a short hiatus from cardmaking of late! I've been really busy with other activities at home, away from home, and with family.  As usual, I have lots of cardmaking events that have pasted me by!


One thing that has been passing me by quite regularly is getting started on my Christmas stash this year.  I have been worrying about it, and since we've seen "Christmas in July" come and go, I actually got the yen to make a card very late in July!   I had a lot of incentive from Splitcoaststampers' challenges as well, and I will be posting it there as well.


I received some new free paper through the Stampin' Up Sale-A-Bration event going on in July and August, called Silver and Gold Specialty dsp (white glossy with gold or silver foiling), and somehow it got me interested in getting at least one Christmas card in July finished.  Take a peak below at my finished card, though I have not completed the inside verse or design, which I usually post.  I'm actually realizing that Christmas cards do not usually get a peak at the inside verse, because I'm not usually mailing them at the time that I make them!


Ingredients: Papers--White Metallic Shimmer cs (Amazon), Recollections-Gold Foil, SU-Silver & Gold Specialty dsp (Jul-Aug 2022 SAB). Dies--Spellbinders-Elegant Twist Etched Ovals, Ovals-Large; SU-Into the Woods (tree/ 2018 Holiday--2019-20 AC); Reverse Confetti Cuts-Winter Words (Oct.2015). Studio 112-Metallic Gems. Wink of Stella-Gold (3 of 4 peace layers colorized). Chatterbox verse-inside. 4-3/4 x 6 inches.

Wednesday, July 6, 2022

Hugs for Kandie!

An SCS Alpha friend recently lost her husband, and we are sending her well wishes and thoughts via the Splitcoaststampers' (SCS) Teapot Challenge, 7/5/22..."In A Word!"  Each of us is challenged to choose a WORD theme for our cards that represents what we want to say to Kandie.  Mine is "Hugs" and goes along with my inside verse of sending along thoughts, prayers and hugs to let her know I care.


My card is made with a stencil and blender brush inking. I made the stencil from the lacy flower die, Artistic Dies, by Stampin' Up, deliberately using white cardstock so that the leftover stencil would finish with lots of inks and could be converted into another card, which can be seen here: [URL=https://chatterboxcreations-1.blogspot.com/2022/06/my-daughter-grows-beautiful-flowers.html][COLOR=#6A5ACD]Hugs to Kandie![/COLOR][/URL]


The idea for my design came from a card class (by Luci Kirschbaum) that taught this clever die-cut stencil and two-card idea! I've cased the original cards with changes to both to make them more me. I love larger than A2 cards, more color mat layers, added embellishments, and often a sentiment change as well. For these cards, my tweaking involves all of those listed changes above. Take a peek below at my finished card and its inside verse:


Ingredients: Stampin' Up: Cardstock--Basic White, Polished Pink, Starry Night, Parakeet Party. Glimmer--2022-245 In-Color 6x6 Ombre Glimmer (butterflies), White Glimmer (Hugs). Dies--Artistic Die (Artistically Inked), Butterfly Wings (Butterfly Brilliance). Inks--Orchid Oasis, Polished Pink, Parakeet Party. Banners Pick-A-Punch. Ribbon--1/8" Metallic Woven-Orchid Oasis. Basic Pearls. Other: Dies--Cottage Cutz Expressions (Hugs). Copic markers (pearl coloring).  EK Punch--Victorian Medium (inside corners). Chatterbox verse. Size: 4-3/4 x 6 inches.

Sunday, June 26, 2022

Father's Day at the Beach!

Being raised in the Pacific Northwest near the ocean, spending at day at the beach, means the ocean is definitely the scenery.  I thought I'd give my youngest son a day off to enjoy some ocean scenery; after all, he was the only one of the four children who never lived in Hawaii where ocean beaches were very much a part of everyday life!


I used the Stampin' Up Waves of Inspiration stamps and the coordinating Waves Dies with Balmy Blue, Pacific Point, and Night of Navy inks.  I brushed and ink-blended the white cardstock top panel with Balmy Blue giving it a filtered blue sky look (a light blue sky with wispy white clouds blended into the blue).   


My wave was next, which I built with the Balmy Blue, Pacific Point, and Night of Navy inks.  I stamped my colors in layers using these three inks one on top the other...over-stamping...but stamped-off with the two darker colors.  I kept adding over-stamping until I got the look I wanted. I used my Misti to aid me in this process. My last stamping was done by applying Night of Navy on the lower portion of the waves only by using a Stamp Write marker inked onto the bottom of the stamp surface.  After it was completely dry, I ink blended with Balmy Blue until I was satisfied with this lighter color mixed into my waves. 


Then, I had an accident...while trying to stamp my seagulls where I wanted them (before popping on the clouds), my stamp block got ink on its edge, which transferred to my card front next to two of my seagulls!  Whoa as me...not the first time I've had this problem with tiny stamped objects!  So not to lose all my carefully ink waves, which I thought turned out rather spectacular, I fussy-cut the wave off and after preparing a new card front with my Balmy Blue brushed ink blending, I glued my waves to the bottom of my new card front.


I decided not to re-stamp my seagulls, as I just didn't want to chance the same problem, so I practice a little of drawing my own seagulls with a fine mechanical pencil and then flicking over with Copic markers in T5, T4, T2.  It worked so well, and I could make them larger or smaller as desired! I found adding them with Copic markers works best for me! I die cut the clouds and cloud edges, which give the clouds more texture and dimension; I popped the clouds off the card surface; and overlapped two the smaller clouds and popped them off each other.


I originally started this card thinking to make a birthday card for my stash, as I never have enough birthday cards. I pulled out my Teeny Tiny Wishes stamp set (retired) and stamped with Night of Navy ink onto Balmy Blue cs and die-cut it with the narrow die that I knew would work well for sentiments.  I attached Linen Twine through the open ends to the sentiment strip and added it to the middle of the card.  Taking a look, I realized it would be a great masculine card, and I still needed another Father's Day card for our delayed family Father's Day get together, which would be taking place next week-end.  I didn't want to re-do the die-cut with the twine, so I carefully made a new sentiment on the computer that I could carefully cut and paste over the happy birthday stamping.  It worked perfect...take a look below:


(NOTE: When I say spatulated off, I used an OLD Cricut spatula, which is irreplaceable and works wonders when for this purpose because of its narrow, thin blade,  Unfortunately, Cricut re-designed their spatula over 10 years ago so these old ones are almost impossible to come by!!)

Ingredients:  Stampin' Up:  Night of Navy, Balmy Blue, Basic White cardstocks. Stamp/ Dies--Waves of Inspiration/ Wave Dies; Teeny Tiny Sentiments (retired). Inks--Night of Navy, Pacific Blue, Balmy Blue, *Basic Gray (seagulls). Linen Twine.  Other: Copic markers--T5, T4, T2 (*Handmade seagulls, rather than stamped). Fussy-cutting. Chatterbox sentiment/ verse. Size--4-3/4" x 6."

Tuesday, June 21, 2022

A Bohemian Chic Paper Weave!

 About four times a year, Splitcoaststampers hosts a Virtual Stamp Night challenge, which starts a month earlier than the official challenge date with three mini challenges.  When the official event happens, it starts on a Friday evening with four challenges, each on the hour, starting at 5:00 p.m. to 9:00 p.m. The second day starts at 1:00 p.m. and goes under 11:00 p.m., also with a challenge each hour.  My first goal was to at least get the mini challenge completed and at least six the next two days.  I was being realistic that I'd probably not get all challenges done in the time limit allotted for uploading the the gallery.  My fondest wish is that someday, maybe I'll actually complete all challenge and get them uploaded on time!


Well, this year, so far, I'm really random.  I may finish the minis, but I'm diving right into one of the later challenges, which I didn't really see myself completing, because I thought the challenge would be difficult to design a card for. But while browsing a few of the possible inspiration photos, I ran across one that really sparked my interest and reminded me of a collection of papers I recently bought, which motivated me to get started.  I also check for other challenges that might help me in my design, but I will have to add them later because of the short timeline to make and upload cards!


Take a peak at my completed card, which uses the bedroom color scheme and floral idea found in the paper:


Ingredients: Stampin' Up: Cardstocks--Crumb Cake, Calypso Coral, Basic White, Gold Foil. Patterned Paper--Symbols of Fortune DSP. Stamps-- Here's A Card (sentiment). Ink--Soft Succulent. Embellishments--Brushed Butterflies. Technique--Layered Strip Weaving. Other: Copics--Butterfly colors...R09 (orange), G29 (green), Y38 (Golden Yellow). Chatterbox inside verse. Size--4-3/4" x 6."

Monday, June 20, 2022

My Daughter Grows Beautiful Flowers

 In the middle of thinking about and making Father's Day cards, I realized I also needed to be thinking about my oldest daughter's birthday card! I attended a June card class where we learned to make two cards in one by die-cutting a lacey floral die out of white cardstock to use as a stencil on another white card front panel, creating a negative inked floral bouquet. We were to use our blender brushes to ink and colorize our blossoms with three lovely ink colors, but I decided to use four: Polished Pink, Orchid Oasis, Starry Night, and Parakeet Party for the leaves.  What gorgeous colors these are together.  Our white cardstock stencil ended up very prettily ink blended as well and became the focal die-cut for the second card.  This is the card I decided to finish for my daughter! 


I adhered four 1/2" black paper strips spaced 1/2" apart and horizontally across the white cardstock front panel, starting in the middle...find the card front middle before starting.  Next, adhere two 1/4" black strips at the top and bottom, but also leaving 1/2" of the white cardstock showing. I adhered this card front panel to a black mat layer with a narrow 1/8" border. I add two more base layers...the 4-3/4" x 6" black card base and a Gorgeous Grape cardstock cut to 4-3/8" x 5-5/8". I positioned the inked Artistic lacy flower die-cut where I liked it, allowing for my sentiment strip toward the bottom and offset to the left. 


To finish, I added a 1/4" x 1" tiny black strip to host three medium rhinestones colored with Copic markers to match the Parakeet Party ink and positioned the strip toward the upper right corner of the card front. I punch my white cardstock sentiment strip with the Lovely Label Pick-A-Punch and popped two rhinestones beside the stamped "Happy Birthday".  I also added two Glitter Enamel Gems to the flower centers, coloring them with Copics to accent the inked blooms.


I was super pleased with the look...black and white always dresses up any card...such a classic combination!  Take a peek below and my finished card and my inside Chatterbox verse:


Ingredients: Stampin' Up products: Cardstock--Basic White, Basic Black, Gorgeous Grape. Stamp/ Dies--Artistically Inked (sentiment)/ Artistic Dies (lacy floral). Inks--Polished Pink, Parakeet Party, Orchid Oasis, Starry Night. Punch--Lovely Labels Pick-A-Punch (sentiment label). Glitter Enamel Gems (flower centers). Basic Rhinestones--medium & small. Other: Copic marker (Rhinestone & Glitter Gems coloring). Blender Brushes. Chatterbox verse. Size: 4-3/4" x 6".

Saturday, June 11, 2022

Flowers Bring Love & Hugs!

Birthday cards...I need birthday cards! I just can't make enough birthday cards. I also need a card with well wishes for retirement for early June. The SCS Virtual Stamp Night is asking for flowers for a Summer Flower Festival!! So, with that in mind, I've definitely decided my card will feature flowers with a belated birthday/ retirement theme, all rolled into one. I needed to further search other SCS challenges that my card might fulfill. This search provided me with a total of 14 fairly new and old challenges that my card would fit. In case you were wondering, SCS welcomes completing a challenge at any time not just the week the challenge is presented!


My card needed to be fairly simple to meet the one-hour time limit for making cards for the VSN challenges, but I'm really happy with the outcome...four layers and another for the Sweet Sorbet inked flower and sentiment, both of which I popped. Take a look at my card in its finished state:


 Ingredients:  Stampin' Up: Cardstock--Whisper white, Pretty Parakeet, and Orchid Oasis. Patterned dsp--6"x6" DSP Assortments--2022-2024 In-Colors. Stamps/ Dies--Sending Smiles/ Sending Dies. Dies--Basic Borders. Inks--Starry Night, Orchid Oasis, Parakeet Party, Sweet Sorbet. Markers (SU)(stamp coloring). Gems--2022-2024 In-Color Matte Decorative Dots.  Stampin' Up Markers. Other: Copic Markers (darkening gems).

Tuesday, May 31, 2022

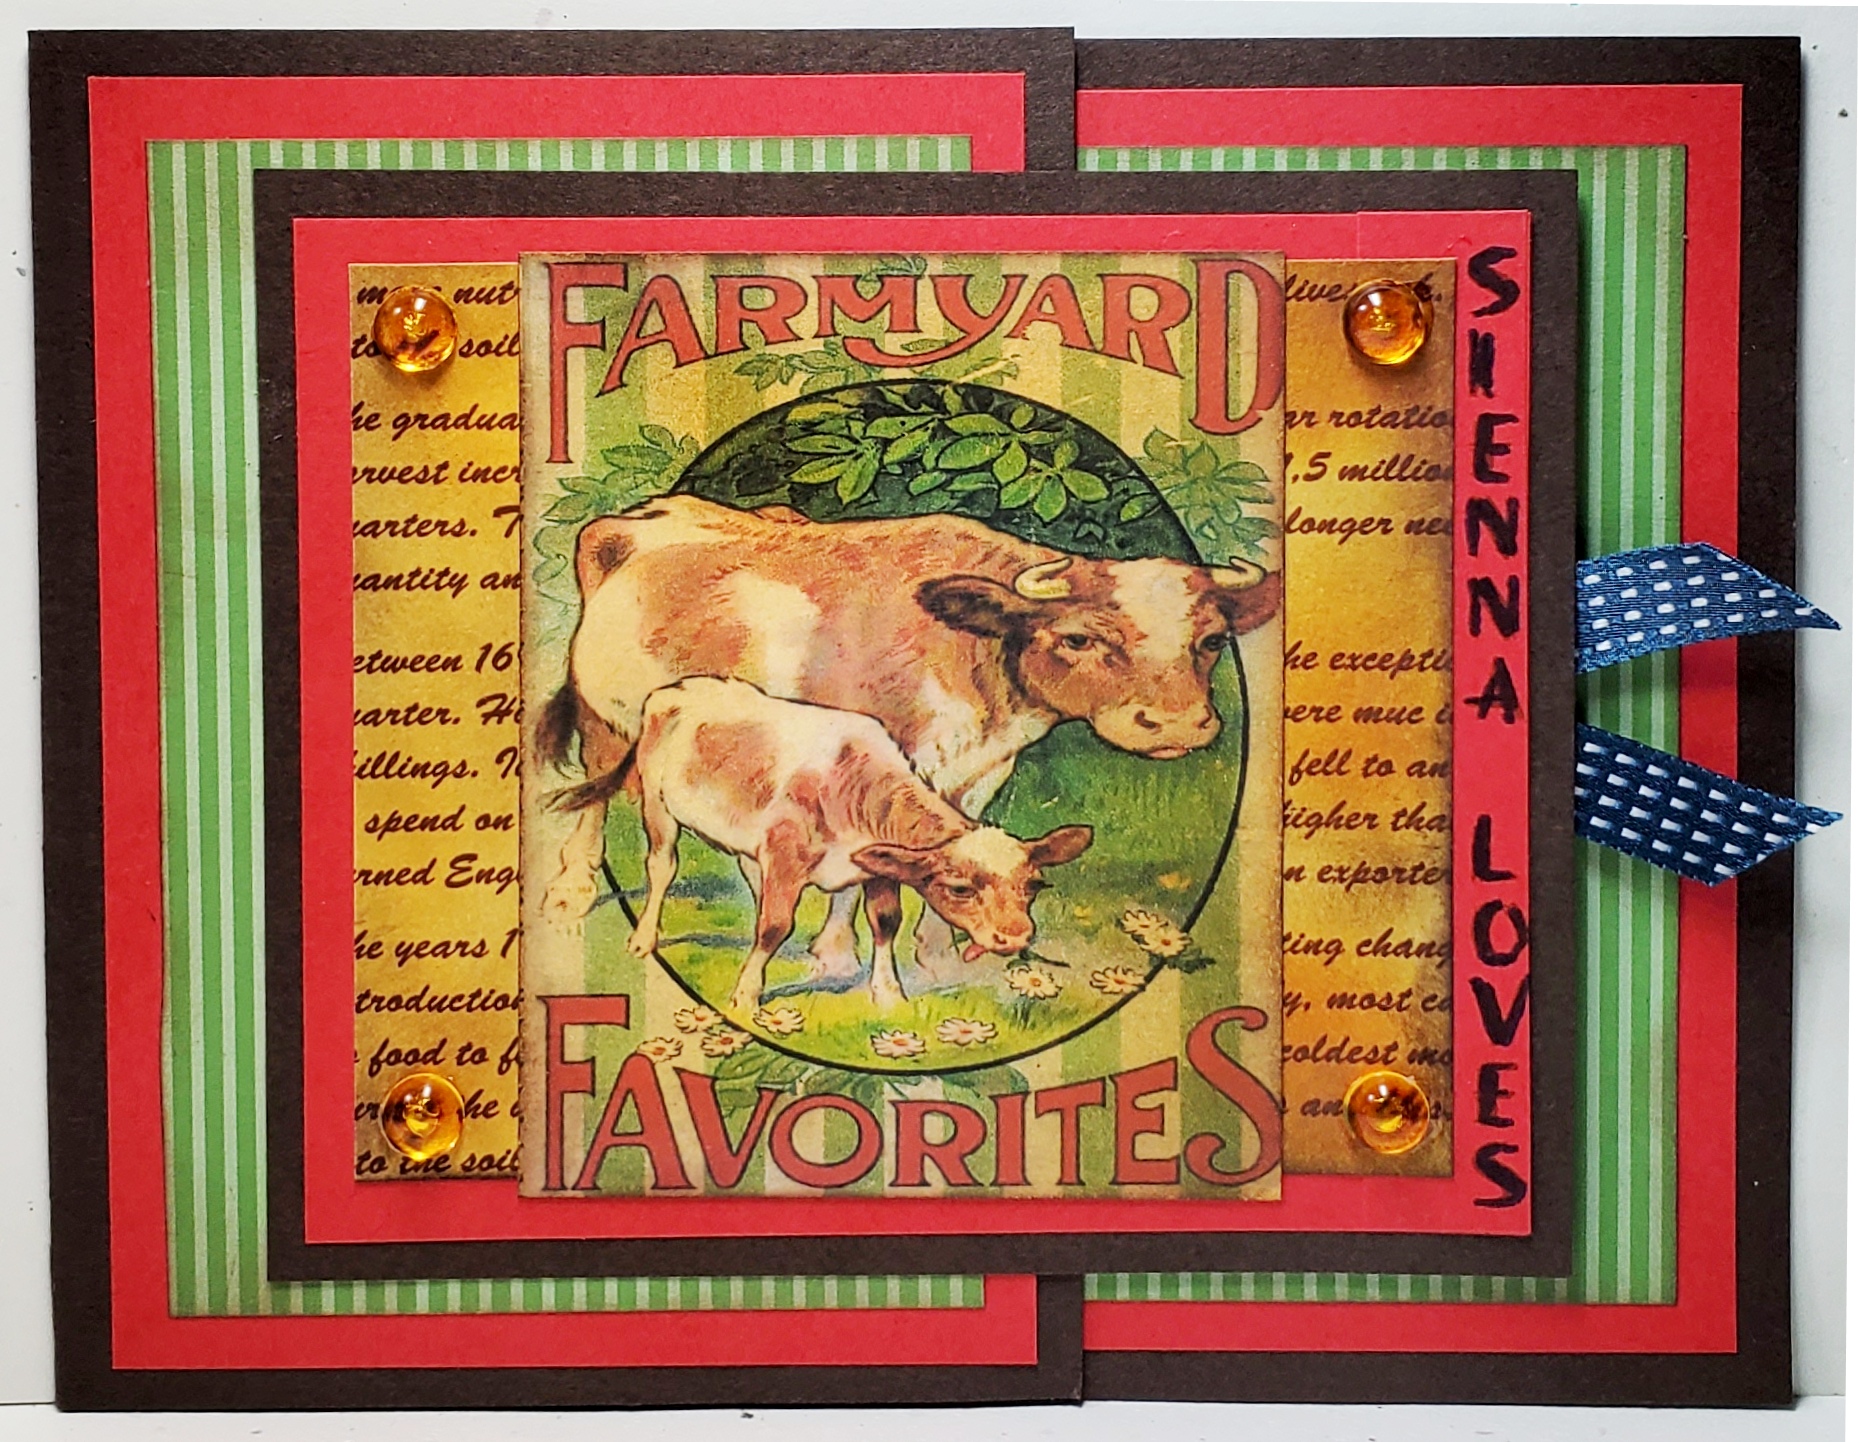
Farmyard Favorites for Father's Day!

  Father's Day is coming, and the Virtual Stamp Night Mini Sneak Peek was held just a few days ago.  The first one wants your card theme to be farm animals...like in Old MacDonald's farm.  I'm thinking someway I will build a Father's Day card out of this challenge.

My son-in-law is such a good Dad!  His daughter, and my middle granddaughter, was three this past March.  From the time she was three months old, he has taken her to oodles of animal places and events...zoos, summer fairs, petting zoos, etc. You name it, if it's within 50-miles of their location (even on vacation), he will find an animal place to take Sienna.  As a result, she just loves animals, has no fear, and you can see why. Her first favorite was a cow, and one of her first words was moo-moo! 

I'm a lover of "simple" vintage cards (those without too much frou-frou), and for some reason, I've not made many vintage cards in the last few years. I went to my stash, because I remember a vintage cow image that I almost made into a card a few years ago.  I had to scrap the idea at the last minute, because I forgot to take the image and any papers with me to a retreat where I planned to make the card! I had even mounted it on homemade script paper that I made prior to leaving that talks about medieval farming as I needed a computer and printer to do so. Using it now, was just a matter of deciding the layout, design, and papers!  I actually copied my design layout that I used on the replacement card. Take a peek at my finished card below with its vintage slant!

(NOTE: The ribbon peeking out the right side is attached to the gift card holder.  It's a blue ribbon seal for a First Place Dad!)

Ingredients: Stampin' Up: Cardstocks--Early Espresso, Poppy Parade, And Very Vanilla. Patterned DSP--2012-2013 DSP Stack--Wild Wasabi Stripe. Inks--Soft Suede, More Mustard, Chocolate Chip.  Other: Patterned Paper--Medieval English Farming Script (homemade/ink distressed). Vintage Farmyard print (stash). Gems--Robin's Nest DewDrops-Golden. Technique--Short Front Flap Card. Chatterbox computer verse. 4-3/4" x 6."

Sunday, May 15, 2022

Let's Party with Dinosaurs!

My oldest son is newly engaged, and they intend to tie the knot in June 2023 if everything goes according to plan.  Through this union, I have acquired what would be a great granddaughter.  She will be  three years old on her birthday in a few weeks...the same age range as are my three natural granddaughters, which is 2-1/2 to 5 years.  Her Mom and grandmother (who is my son's fiancé) planned a dinosaur-themed birthday party.  So, needless to say, I needed a birthday card and wanted to try my hand at the dinosaur theme.


I found a darling little cartoon line-art baby dinosaur, who had just hatched from his uniquely designed egg.  I thought this would be a good place to start.  Next, I found some pink, white, and green digital dinosaur  paper to add to the plan.  My next task was to search out some Splitcoaststamper challenges to fit this card into my "challenge catch-up" goal.  With all these thoughts in mind, I came with up my card design, which started with the Standing Pop-Up card fold technique. 


The face of Amara's card got so heavy, the card wouldn't stand up, so I invented a little paper fold "hinge" to insert into the hollow box-like rectangular front platform that allows the card to fold down flat to insert it into an envelope for mailing and also to pop-up and open to allow the card to stand on a flat surface.(1)  My "hinge" isn't a terribly difficult addition if you can do it before you form the box and while the cardbase is still flat, but it becomes much more tedious  to insert the "hinge" with the attachment flat covered in glue after the box is formed! 


With all that was said above, take a look below at Amara's finished baby dinosaur Standing Pop-Up card when finished.  I think she will love it, as well as Mommy and her grandmother!


Ingredients:  Stampin' Up products:  Papers--Garden Green, Basic White cardstocks, Subtles & Brights Patterned DSP Stacks (Garden Green + Wild Washi--pattern years unknown);  Stamps/Dies--Dino Days(4), Little Letters Framelit dies; Cloudy Day EF--retired(5); Ink--Smoky Slate, Garden Green; Other: White Metallic Shimmer cs (Amazon), Digital paper(2): Cute Baby Dinosaur Dinosaurs s & Confetti Rain-Pink(2) (source unknown--computer stash); Dies--Spellbinders Grand Labels Eleven (retired); Lawn Fawn Grassy Hillsides; Copic Markers; Fussy-cutting; Verse--Chatterbox design(6); Card Size--4-3/4" x 6".

Construction Notes:  1)See "hinge" note for Standing Pop-up fold in dialogue above.  2)Digital papers printed on Amazon White Metallic Shimmer cardstock .  3) Confetti Rain-Pink die-cut letters Copic colored to change to a Rose color.  4)Palm trees from Dino Days stamp/dies; leaves die-cut from SU DSP Patterned Stacks listed & then overstamped with palm stamp.  5)Embossed Clouds: inked raised or positive side of folder to give clouds a gray outline for a typical northwest cloudy day.  Added additional very light brushed ink blending to add more grey to background and edges as well.  6 )Inside "verse" with computer = Chatterbox design (that's me);

Tuesday, May 3, 2022

Being A Dad is Whiskey Business

 I went to a card party a few months ago, and my Stampin' Up demonstrator duo (Daralee Peterson and Luci Kirschbaum) had a card design using the new "Whiskey Business" stamp set.  I loved their card design idea, but decided to enlarge it and tweak it here and there to make it more mine.  


I gave it a new, enlarged and ink-distressed white card base, a new, ink-distressed punch size panel to host my changed sentiment, re-positioned brads, plus a pale blue decanter, glass, and ice shaded with Copic Markers.  I also used Copics to color my whiskey and highball drink, getting better shading, blending, and highlights than could be achieved with the water-base markers provided.  My finished card, inside and out, can be seen below:


Ingredients: Stampin' Up: Cardstock--Basic White, Early Espresso. Patterned dsp--In Good Taste (retired). Stamp--Whiskey Business. Dies--Stitched Recentangles. Inks--Mango Melody, Daffodil Delight, Cajun Craze; Memento--Tuxedo Black; Versamark. Punch--Lovely Labels (sentiment label). Embossing Powder--White. Round Brads (colored with Cajun Craze Dark Blender). Other--Copic markers. Brilliance Gingerbread ink (edge distressing). Chatterbox verse. Size: 4-5/8" x 5-7/8".