Monday, September 30, 2013

In Sympathy!

A good friend of many years and my hairdresser has had a very trying month of September.  It seems that if it could go wrong, it did go wrong!  To culminate an already trying month on various levels, my friend then experienced the onset of a severe bout of medical issues with her mother, and finally lost her to her illnesses.  Losing anyone close to you is a difficult thing, but we realized in losing my husband's mother during this year after numerous falls, concussions, and broken bones that this particular death is very harsh.  I want my friend know that I am thinking about her, keeping her in my prayers, and truly understand her sorrow.  The only thing one can know is that your loved one is no longer in pain and in a better and more peaceful place.  Below is the card I am sending to my good friend with heartfelt sympathy.

Recipe:  Paper: Georgia Pacific cs-white, Bazzill cs-Just Peachy; Authentique-Sweetness/ Poised. Ink: Memento Tuxedo Black; Colorbox Chestnut Road (distressing). Punches: SU-Butterfly (ret.), Small Oval; EK Journal Bracket. EK Fancy Corners punch (inside). Snug Hug-Peach seam binding ribbon.  Butterfly: pearl flower stamens; adhesive pearls.  Credit for the original card design is given to Misty Bradley (Rock, Paper, Scissors) with a few personal additions to her initial design.

Thank Yous Are in Order!

I went to another of Liz Thayer's wonderful cardmaking events a few weeks ago.  It was called a Card Buffet, and this one had a little different slant.  There were 20 cards to pick from that you could make within the time frame of the cropping event all designed by Liz.  As everyone attending was a seasoned cardmaker, there was no instructions only the sample cards available to look at for assembly.  There was a set price for the first three cards and each card thereafter only increased your price by $1.00!  Now THAT is a bargain!  Of course, I wanted to make all 20, but unfortunately, I could only fit five in during the 3-hour period that we had.  But, Liz assured us that in the October Card Buffet coming soon, we would have another chance at those we missed, plus there would be some new additions as well!


I wanted to send a little thank you to both Liz for all of her hard work designing and making our sample cards and to Trish, who opened up her home for this event.  We surely appreciate Trish (and her husband) for allowing us to come in and invade their space, messing it up with lots of paper scraps and pieces that you know ended up on the floor instead of the wastebasket! 


As I was already running late getting cards mailed, I had no time to come up with a brand new design and make cards from scratch.  So, I dug into my stash to see what was there.  I came up with two cards from a set that I made during the first few months that I started to make cards!  I always loved these cards and especially the paper with the little soft glitter added to the backgrounds. They were perfect for what I had in mind.  I did a little re-do on the sentiment for one to fit the occasion better and created an inside design for each to coordinate with the outside.  I also switched out embellishments on the outside to pearls on one and totally added them to the other so that I could use complimentary pearls on the inside!  AND, drum roll. . .I actually made the "hello friend" card a bit shorter so that my pink scallop trim would fit on the inside better.  (For those of you who read my blog. . .I am always changing card kits I buy, and one of the things I most often do is to make the card larger. . .but not this time!  LOL.  I was pretty happy with the end results. 


This one is for Liz.  I hope she likes my little thank you card and her Starbuck's liquid refreshment!

This one is for Trish.  I hope she also likes my little thank you card and her Starbuck's liquid refreshment!

(Credit and thanks to my sister, Heidi Gonzales - My Lil' Scrap Corner (www.mylilscrapcorner.blogspot.com) for the class where she taught me how to make these cards...my very first cardmaking class!)

Friday, September 27, 2013

Mr. Frankie Re-Created...

I saw this Punch Art Frankie head on Pinterest about three weeks ago and it was LOVE at first sight! I traced him back to his author: Jacquelyn Dorer-Russell (www.sugarssmilinpapercrafts.blogspot.com) and left a comment on her Frankie blog entry.  She was kind enough to respond to my comment and offered to send me instructions for Frankie via email, which she did!  Since then, she has also posted a video on her blog with instructions for making him.  


My creative juices have been bubbling and fermenting for about two weeks, and I could no longer wait to make him so I began the hunt for the perfect papers this morning!  I decided I wanted him to have a little bow-tie and place him on a 3/4-top-layer card in order to be able to add the vertical word SCARY  beside him, which is actually adhered on the inside layer of the card.  I also decided to add a little glitter to the letters to make them stand out more.  I will now be able to use another Top Note die inside to hold my Halloween verse.  I am pretty stoked with how he turned out since it went just the way I pictured it in my brain. . .I hope you like him as well.

Recipe:  SU Basic Black cs, Wild Wasabi cs, Recollections Spice Market Burnt Orange cs, Karen Foster: Spooky Collage; DCWV Halloween & Fall Stack (dots). SU Top Note die (head). SU Punches: 3/4" circle (eye pupil), 1" circle (eyeball/ lids), Round Tab (nose), 2" Extra Large Oval (ears), Decorative Label (mouth). Sharpie marker. SU Chalk Marker. SU Ink: Basic Black (distressing). Sizzix Wingo Zingo Alphabet Sizzlits. SU Dazzling Details (frost). Stash: 3/8" dot satin ribbon, Halloween Baker's Twine.

Monday, September 23, 2013

Challenge: Cycling On...

I wanted to make another entry in the "Paper Sweeties" Sketch Inspiration #11 before it closes on September 30th.  The link to the sketch entry guidelines are below; click over and take a look at the wonderful entries:  www.papersweeties.com/uncategorized/paper-sweeties-sketch-inspiration-11/


I love bicycles and particularly penny-farthing bicycles, and I had a yen to making a card with one.  I chose the Feeling Sentimental stamp set from Stampin' Up and decided black and red would offset a black stamped penny-farthing a bring a little dramatic contrast as well.


The instructions said the sketch was a starting point and you could "flip it, change the shapes..."  I decided to do both.  My center focal point would be a square instead of a star to accomnodate my bicycle stamp, and the ribbon or trim would be diagonal instead of horizontal!  I'm hoping I'm still within the guidelines!  Here is how my card evolved.


Recipe:  SU Stamp: Feeling Sentimental (SAB 2013) – penny farthing bicycle. SU papers: Very Vannila base, Basic Black cs, Cherry Cobbler cs. Pattern: AdornIt-Happy Holidays.  SU Ink: Basic Black. SU Punches: Lace Ribbon (ret.), Modern Label. WRMK Deco corner punch. SU 3/8” and mini glimmer brads. SU ribbon: 1/2” Cherry Cobbler Scallop Dots ribbon (reverse side), Offray 3/8” Picot Edge Satin-Black. Recollections Florals. Stickles-Lace. 

Sunday, September 15, 2013

September's Anniversary!

My daughter, Michele, and her husband celebrate their ninth anniversary this year.  Their tradition has been to take a vacation during the week in which their anniversary falls, journeying with their 5th-wheel camping trailer to see new and far away vistas.  This year, as they are living on the East Coast for the first time, they will be taking a trip through Pennyslvania, New York and up to Bar Harbor, Maine, visiting historic and camping destinations along the way.  Thus, I decided a card depicting this camping journey would be just right for them.  


I had an idea in my head, so I began searching online to look for a camping trailer stamp or die, but all the samples I found were on cards made several years ago and the stamps had been discontinued.  I decided to venture another direction, and I found a little online vintage trailer graphic, which I thought would be just right.  Its coloring was a little too dark, so I lightened the teal in PaintShop Pro.  The BINGO card in my stash was bright orange, so I scanned it to a jpeg and then re-colored it as well.  I also made it smaller to fit my card better.  The computer can be wonderful to find things just right for cards if you don't own a stamp or die that will do the trick!  I was able to find several camping graphics and even bought a few on Digi Web Studio, but I didn't end of using those this time around.


I do hope Don and Michele enjoy their anniversary vacation and my take on depicting that journey via this card and the little camping verse made for inside.


Recipe:  SU Always Artichoke cardbase; Recollections-Great Outdoors (stripe); GCD Studios-The Great Outdoors pad (tree scene). Free images: Vintage Camper/sign, Camping digis. Colorbox Chestnut Roan (distressing). Seam binding ribbons: Hug Snug-Serbin Brown (olive); SU: Island Indigo. May Arts twine. Stash: BINGO card (re-sized/recolored); Map (re-sized); buttons, pinking shears.

Tuesday, September 10, 2013

Anniversary Card for My Daughter's Good Friend

My daughter was checking out my "card's I like" file the other day when she realized her good friend's anniversary had come and gone.  She was very unhappy with herself!  She came across a card picture I had saved from my very first "favorite" scrapbook store, Paradise Scrapbook Boutique in Chico, CA.  She was oohing and aahing over this card, so I told her I would make one similar to it if she wanted to send it off to her friend in Colorado.  She was thrilled, and even offered to pay me for it, which of course, I said, "NO...it just gives me an excuse to make another card"!   I had also admired this very same card while visiting the store on one of my trips south where it was on display; therefore, during my shopping spree, I purchased many of the same embellishments for my own stash.


Here is my take on PSB's card, which is very similar to their original design, except I enlarged it from its original size and changed its shape to almost a square.  I also added a few more mat layers than the original.  My daughter was very happy with the results, plus the "Belated Anniversary Wishes" and embellishments on the inside.


Recipe: SU stamp (ret.). SU Cardstock: Very Vanilla, Basic Black. Pattern: Recollections Black & White Stack. Sizzix Sizzilit Label die. PSB Embellishments: Prima Flower, Black seam binding ribbon, Rhinestone flower trim. 

Thursday, September 5, 2013

A Sister-in-Law in the "Out Law" Group!

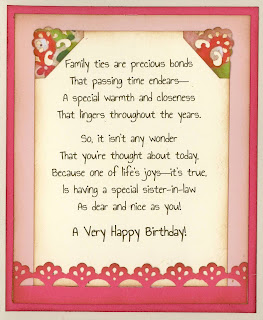
My "outlaw" of a sister-in-law, June, celebrates her birthday one day after mine on September 1st.  I wanted to honor her birthday by making a special card with her in mind.  This past year she has "housed" many out-of-town family members for various family necessities, as well as fun visits too.  She is always so very gracious and welcoming. . . and my husband and I thank her for that.  A thought comes to mind when thinking about those visits during the past several years. . .June always has a pitcher of ice tea ready and welcoming when you visit.  A very cool and refreshing drink for those warm spring and summer days!  


With this in mind, I remembered a "tea" card kit that my sister (Heidi Gonzales: My Lil' Scrap Corner blog) had given me several months ago.  I thought it would be perfect for June.  In creating it, I tweaked Heidi's design just a bit to enlarge the size by adding a vanilla cardbase and a watermelon-colored mat layer.  As I traditionally do, I decorated the inside and added a verse that I composed. This is the card I chose to make June for her birthday and I hope she really likes it.

Recipe:  PTI pattern papers, SU cardstock: very vanilla, blushing bride; Bazzil cardstock: watermelon.  PTI dies: Tea for Two die/stamp set, Fillable Frames #11, Edger #2, Tremendous Tags Dies, Leaf Prints dies. Martha Stewart: Vintage Floral Around the Page punches. Memento Coca Brown. Colorbox Chestnut Roan (distressing)Hug Snug Vivid Pink seam binding ribbon. Stash: Lime green felt, pink flower, rose cut-out, pink/white scalloped lace.

Sunday, September 1, 2013

First Class Event: Totally Loving Christmas!

In mid-August, Liz Thayer had her annual stamping camp event:  Totally Loving Christmas!  We spent the entire day making ten wonderful Christmas cards with Stampin' Up's newest line of stamps presented in their Holiday catalog booklet.  For me, I am so thankful for this wonderful event, because it gives me a head start on the many Christmas cards I want to make for the upcoming holiday season.


I know Liz spent many, many hours getting this event put together for all of us who were delighted to attend; therefore, I always like to send Liz a little thank you card with a Starbucks gift card to provide her with a probably much needed recovery caffeine "pick-you-up."  For her thank you card, after giving it some thought, I finally decided on just the card.  


Last year, I belonged to Becca Feeken's Amazing Grace kit club for the short time it was available...I love Becca Feeken's lovely card designs.  In the very first kit, there were stamps to make a card that depicts the words "First Class" on the front. . .so perfect to tell Liz what "First Class" events she always put on for all of who are lucky enough to get to go.  Because this card's design was so perfect just the way it was, my card re-creation follows Becca's design almost entirely, except that I changed the flower embellishment.  I thought it needed a softer look than the one provided with the kit.  I loved making this card with the new Spellbinder postage dies and the JustRite stamp set that came in the kit.  I hope Liz enjoys it as well!


Recipe:  Neenah Cardstocks: Classic Linen Natural White cardbase, Classic Crest Cream. 7Gypsies cardstocks: Canyon Brown, Mulberry +Antiquities Postale DSP. JustRite stamps: Signed Sealed Delivered (First Class background + Cents). Ink: Memento Tuxedo Black, StampinUp Rose Red, Colorbox Chestnut Roan (distress). Spellbinders: Postage Die Frame (kit exclusive). Hug Snug Mastic Beige seam binding ribbon. Want2Scrap Finesse White Swirls.  Triple pearl hat pin. Wood flat bead. Adhesive half-pearl. Silk & Organza flat flowers.