Showing posts with label Word dies. Show all posts

Tuesday, September 6, 2022

Floating Poppy Birthday!

One thing I really need to set my mind to is building up my birthday card stash. It seems I am always missing sending a birthday or two throughout the year because I run short of time to create one. Birthdays just sneak up on me and catch me short-hand more often than not. For the next several months, not only do I need to focus on my Christmas card stash, but also get started replenishing my meager birthday card stash. 


I started browsing through my Splitcoaststamper "challenge catch-up" list to see what challenges I have yet to do since 2017, and believe me, I still have plenty to complete! I was hoping to get my creative mojo juiced and stoked. I got lots of color ideas, techniques, and design ideas from my search with a total about 20 or so challenges that I could use to influence the design outcome of this birthday card for either one of my fall birthdays or for my birthday stash. After deciding on my card design, theme, and colors, I used 14 challenges that I can claim that inspired me. My card also uses the Floating Elements technique. Take a peak below at my finished card:


Ingredients: Stampin' Up products-- Cardstock: Basic Black, Starry Night, Sweet Sorbet, Tahitian Tide, and Orchid Oasis. Window Sheets. Dies: Poppy Moments. Gems: Polished Dots. Other-- Happy Birthday Shadow die. Copic Markers (gem coloring). Chatterbox verse. Size: 4-3/4" x 6".

Wednesday, January 6, 2021

Christmas Flowers Bring Joy (Paper Pumpkin October 2020 - Joy to the World Alternative)

I think I mentioned several months ago that I finally signed up for Stampin' Up's Paper Pumpkin subscription hoping that would motivate my lost cardmaking mojo.  It helped a little, but not as much as I'd hoped.  I still didn't get started on Christmas cards until just a few days before Christmas...YIKES!  I did fall in love with the October 2020 "Joy to the World" Paper Pumpkin kit, and it did finally spark me to try some alternative designs of my own rather than just make the couple of designs provided in the kit. 
 
I received a cute little penguin card from Ann Otto, the hostess of the Splitcoaststampers' Christmas Card Challenge...one I have participated in many times in past years.  I loved Ann's simple layout design with its left side triangle so much that it immediately gave me the idea to use the bones of her layout and incorporate it into the Stampin' Up October 2020 "Joy to the World" Paper Pumpkin kit elements to create my own card.


My deviations to Ann's layout were to add several layers to the card background, enlarge the left-side triangle and add layers and embossing to it as well.  Instead of a cute little alcohol inked penguin, I positioned two layers of kit's Christmas rose flowers on the triangle to which I did a bit of fussy-cutting and coloring.  I also added gold sequins to the flower centers and added green to the leaves.  I wanted the leaves to show off more and wanted to add depth and texture with the layers, sequins and dry embossing.


The kit came with gold metallic "Joy" die-cuts, but I decided to use my own "Joy" die, cutting it in two colors and setting them in an off-set,  layered placement.  The kit provided two vertical Crumb Cake card bases with a gold-etched vertical patterned, but I wanted to make multiple numbers of my card design to build up my Christmas stash, so I found a background stamp that I thought would work really well.  I stamped and heat embossed the pattern in gold onto plain Crumb Cake cardstock to create eight more card fronts.  I also added ribbon and more sequins that were also not part of the kit.  (Unfortunately, the other seven pre-cut and prepared card pieces are still waiting for me to finish putting them together!)  

Take a peak below at my first alternative card design using the Paper Pumpkin kit supplies, plus some added items and supplies not provided by the kit.  I have included the card ingredients below for your information:


Ingredients:  Stampin' Up products:  Paper Pumpkin October 2020 "Joy to the World" kit elements.  Cardstock--Cherry Cobbler, Whisper White, Call Me Clover.  Gold Embossing Powder; Versamark Watermark Ink.  Polka Dot Tulle Ribbon.  Other:  My Favorite Things background stamp: Balloon Strings.  Alina Craft die: "joy."  Hot Off the Press:  Diamond Dots EF.  Pretty Pink Posh sequins.  Colorbox Ink: Chestnut Roan (edge distressing).  Size: 4-3/4" x 6".

Tuesday, December 22, 2020

Christmas Trees Black & White

 I really got the COVID lost mojo syndrome!  I have just been so unmotivated to do most anything, including one of my favorite pastimes...making cards!  I made only a few Christmas cards, and only those that I didn't have to mail got delivered, because they were VERY local!


Here's an example of how unmotivated I was...I revisited a card I designed back in 2018 and really loved.  I decided to try motivating myself by re-making just a few for two family members that I really needed to give a card to and who didn't receive this design in its first go round in 2018.  This wee bit of motivation only started about six days before Christmas...YIKES!  See this card's design and this year's first completed card below:


Ingredients:  Paper:  Stampin' Up--Whisper White (cardbase); Recollections Signature Glitter Paper/ white; Core'dinations--Black Tie.  Dies:  Spellbinders--Tear Drop Circles; My Favorite Things--Stitched Circle STAX, Stitched Snow Drifts; Sizzix TH-Alternations--Woodlands; Cottage Cutz Expressions--Merry Christmas.  Stampin' Up: Metallic Stars (retired).  Inside:  DCWV--Silver Stag Star dsp.  SU--Basic rhinestones.  SU--Silver Glimmer paper.  EK Victorian Photo Corner punch.  Chatterbox verse.  Size: 4-3/4 x 6 inches.

Thursday, November 8, 2018

Three Trees & Two Colors in a Christmas Forest!

I thought I might dabble in the Virtual Stamp Night Challenge on Splitcoasterstampers.  They started a pre-mini challenge in early November. . .the actual event takes place December 2 & December 3.  The first pre-challenge was all about trees, even scraggly ones like Charlie Brown's Christmas tree!

I decided to use my Sizzix tree dies that I bought last year and did not get to use due to some hand issues that cut my crafting time down to zip!  I checked out the Christmas Central website for the Inspiration challenge to see if it could give some ideas of what to do with a tree or trees.  I spotted some pretty black and white items, which got my creative mojo going, and I decided a night scene with snowy forest trees would be really pretty.

I had to be clever about this as the Virtual Stamp Night requires you to spend only one hour putting your card together.  Your planning, designing, gather papers, and tools don't count against you, plus you may have pre-fold card bases available, and even some mat layers stashed.  It took me 35 minutes to die-cut and assemble my card parts.  I used a timer, and was able to pause and "punch out" when  my brain went into a re-designing mode with changes to my original thoughts, which required more tool gathering time.  I "punched" back in and went to work with more die-cutting and assembling.  I am pretty happy with the end result; take a peek below:


Ingredients:  Paper:  Stampin' Up--Whisper White (cardbase); Recollections Signature Glitter Paper/ white; Core'dinations--Black Tie; DCWV--Silver Stag Star dsp.  Dies:  Spellbinders--Tear Drop Circles; My Favorite Things--Stitched Circle STAX, Stitched Snow Drifts; Sizzix TH-Alternations--Woodlands; Cottage Cutz Expressions--Merry Christmas.  Stampin' Up: Metallic Stars (retired).  Size: 4-3/4 x 6 inches.

Wednesday, October 31, 2018

Halloween Peeking Out All Over!

As mentioned in my previous post, it's that time of year when I get to make Halloween cards...ones I truly enjoy so I can let my imagination run away!  My next card is for DD#2, my youngest daughter, and her husband.  Since there is a man involved, I had to stay away from anything too feminine!

My son-in-law is a Halloween and theme park enthusiast!  The two of them just returned from a five-day Halloween adventure vacation to the Los Angeles area, visiting Halloween horror events and Halloween themed parks and thrill rides.  Warner Bros. Halloween Horror Nights was their primary attraction visited.

I actually started their card well over a month ago after I checking out several Splitcoaststamper challenges before I finally settled on the card layout I wanted to use, but I was unhappy with where it was going so I stopped and only recently got back to it.  I revisited the SCS challenges and finally felt like I knew where I was headed!  I incorporated four common Halloween images usually seen on the Day of the Dead and ones that I was fairly sure they saw in many different versions while on their vacation.  I ended up pretty happy with the results and was pretty sure they would enjoy it as well.  Take a peek below at the finished card:


I found a verse that was perfect for the card, with a few modification, but ended up having to hand-write it because my printer was on the fritz!


Ingredients:  Papers: Stampin' Up cs--Basic Black, Lucky Limeade, Very Vanilla; Bazzill cs--Yam; American Crafts POW Glitter Paper--Caramel; Best Creations Glitter paper--Lime; Pattern Paper--Doodlebug Designs/Ghost & Ghouls--Spookie Sprinkles (confetti), Host of Ghosts (stripe).  Dies:  Impression Obsession: Halloween Cutout Circles; Stampin' Up--Layering Circles; Little B--Halloween Phrases.  Punches: Martha Stewart edger--Cathedral Lace; Stampin' Up--Curvy Corners (inside-retired).  Embellishments: Offray Sheer Stripe--Yellow-Green; Recollections--purple mini rhinestones.  Verse/ modified by Chatterbox.  Size: 4-3/4 x 6 inches. 

Saturday, October 6, 2018

Congrats! to Your Happy News!

We are looking forward to welcoming a new bundle of joy into the family. . .our second grandchild!  She is due to arrive in mid-March next year!  This will be my youngest daughter's first child.  She is so excited as are my husband and me.  Our daughter announced that they were expecting a girl by texting a picture of hubby giving her a big hug as she displayed a lovely pink satin bow tied around the middle of her white shirt as she held fluffy pink teddy bear in the crook of her arm.  It gave me a great idea for a congratulations card!

First, I prepared two pink watercolor papers. . .one for the card face and one for the inside verse area.  I dried them with my heat embossing tool, making sure not to curl or warp the paper (by applying heat to both sides of the paper).  I spritzed both with water to get a water droplet effect and re-dried both.  Then, I flecked darker rose watercolor paint flecks onto their surfaces with a paint brush.  Next, I stamped and fussy-cut my little bear and colored and shaded him very lightly with several pink Copics.  I shimmered the bee's wings with Wink of Stella/ Clear.

It was time to prepare my quilt.  I cut my quilt twice with the quilt die:  once in white cardstock and a second time in the tiny white hearts on pink paper.  I assembled the die-cut quilt pattern pieces that I chose to use to make up the quilt pattern from the die-cut pieces and glued them onto a square of plain white cardstock, starting with the pink patterned frame.  When assembly and gluing was complete, I embossed it with the Quilt Top embossing folder and glued it to my Lifestyles Eyelet Squares die-cut.  


I die-cut "Congrats" four times in plain white cardstock and stacked and glued them on top of one another to give dimension.  I added Wink of Stella/ Clear shimmer to the eyelet square edging and the "Congrats" die-cut.  Unfortunately, this does not show up in the photograph.  I popped my quilt square and little bear off the watercolor wash background with foam dimension pieces cut to fit just inside their outside edges.  I finished the card with the velvet rose ribbon and knot (which looks darker than in RIL) and with a yarn tuff in the quilt center.

Take a peek below at my finished baby congratulations card for my youngest daughter!


Ingredients:  Papers:  Stampin' Up Whisper White cardstock, My Favorite Things Tiny Hearts Brights (pink), Tim Holtz Watercolor Paper.  Stamps: Stampin' Up A Little Wild.  Dies: Stampin Up Quilt Builder, WRMK Lifestyles: Nesting Eyelet Squares (may be discontinued), Impression Obsession: Congrats.  Stampin' Up Embossing Folder: Quilt Top.  Wink of Stella: Clear (eyelet square/ congrats).

Wednesday, September 5, 2018

Zinnia Hugs for a Daughter!

My lovely daughter, Jackie, had a birthday right after my knee surgery last spring.  I was unable to make cards for several months for many reasons, but primarily because I couldn't climb stairs to my craft room or sit and stand with my leg down for any extended period of time.  I have to confess I was so out of it, being under the influence of pain medications, that I totally forgot that I hadn't given her a card or her annual birthday check!  These forgotten items finally occurred to me several months after I was off prescription medication.


She never mentioned it, but I did after several months along with an apology.  She, of course, totally understood.  My goal was always to make her a belated card (now really belated) with a nice little check for a fun shopping trip and presented at a dinner out.  I even bought a new Marianne Zebra die to use for her card, because Zebras and their black and white pattern is one of Jackie favorites.  Well, long story...it still hasn't been done with all of life's interruptions, along with trying to keep somewhat timely with my present day card requirements as well.


About a month ago, I saw that cirque du soleil, Volta, was coming our way.  Daughter Michele and I made a week-long vacation trip to Las Vegas about two years ago, and one of the shows we saw was cirque du soleil, O...my what a marvelous production!  Jackie has never been to a cirque show, so I thought what a wonderful surprise to buy tickets for her and my daughter-in-law as part of their birthday presents.  Daughter Michele and several of her friends are coming along as well for a fun and festive girl's night out with a meal tucked in too!

My daughter-in-law's birthday fell during our recent family camping trip, and she received her birthday card there with her Volta ticket enclosed.  I needed to give Jackie her ticket as well, and I didn't have time to make my planned zebra birthday card, because it would take too much time while shopping and packing for our camp trip. 


A quick card was needed, and I really wanted to make it fit for my last letter to complete the Splitcoaststamper Alphabet Challenge, Round 8. . . Letter Z (which her zebra card would have been perfect).   I looked up things that start with "Z," and I found zinnia flowers start with "Z". . .duh!  I hadn't even thought about that because I had been so focused on Z for zebra!  


I looked up zinnia images and found they come in a myriad of colors even white!  There are many varieties of white with several reminding me of a daisy.  Ah, light-bulb time!  I remembered a card design that I made at a Dar Peterson card class that had a big white daisy punch on it, which looked a lot like those white zinnia, except zinnia are fuller with more petals.  I thought to myself, this might be doable with just a little bit of tweaking!   You have to forgive me. . .my work career required quite a lot of document editing, and my mind runs in that mode on automatic!  See several white zinnia pictures I incorporated just below.


I pulled out the the unfinished card kit designed by Dar, and decided it could be modified easily to fit my "Z" requirements AND a card for daughter too!  My modifications started by adding two more layers of petals to fashion the daisy into a zinnia.  I also changed the word-die sentiment  to "hugs" and added another care layer with a white base.  My next step was to design an inside that complimented the front and compose a short little verse to fit the occasion.  Take a peek below and see the final version of my daughter's card inside and out with all changes complete. 


Ingredients:  Stampin' Up products:  Cardstock--Whisper White, Night of Navy, Daffodil Yellow.  Patterned DSP--Delightful Daisy.  Dies--Lovely Words Thinlits (modified).  Embossing Folder--Petal Burst.  Punches--Daisy (three petal layers); 1/2" Circle.  Ribbon: 1/4" Double-Stitched/ Daffodil Yellow.  3/8" Facet Gem.  Other:  EK Punch--Victorian Medium Photo Corners.  Chatterbox verse (computer).  Size:      4-1/2" x 5-3/4".  (Thanks to Dar Peterson for the base card design idea).

Monday, November 20, 2017

The Birth of Christ!

JOYFUL NEWS!

THIS CARD IS NAMED A 

SPLITCOASTSTAMPERS' FAVORITE 

OF THE WEEK ENDING - NOVEMBER 25, 2017


Well, I'm still on a roll for using my re-cycled gift wrap stash.  The next paper I want to use is super great...it's a matte foil with shinier polka dots.  I'm excited to see how it looks as foil cardstock is so expensive and re-cycled gift wrap isn't!

I also want to enter some challenges on Splitcoasterstampers, so I decided to check out several before I got started and get some design mojo going on how best to use my gold foil.  This resulted in being able to enter five challenges.  Check out the story below on how the design and construction evolved with my card, which you can just see below.

Ingredients:  Papers: Stampin' Up cardstock--Basic Black; Gold foil dot re-cycled gift wrap.  Die: Lifestyles--Labels 9 (discontinued); Cottage Cutz--Nativity Silhouette, Birthday (modified to Birth), Christening (modified to Christ), Thinking of You (used only "of").  Ink--Stampin' Up Craft White.  Wink of Stella--Black.  Technique: Yarn Block (for snowy night sky).  Stash: rhinestones.  Size:  4-3/4" x 6".  

The Story
For the Splitcoaststampers challenges, I definitely wanted to try to catch up on the Alphabet Challenge, specifically for Letter B with the double challenge, Letter Y: use a Yarn Block, which means to wrap yarn around a block or chipboard, then dip in paint or ink to make a pattern on your card.

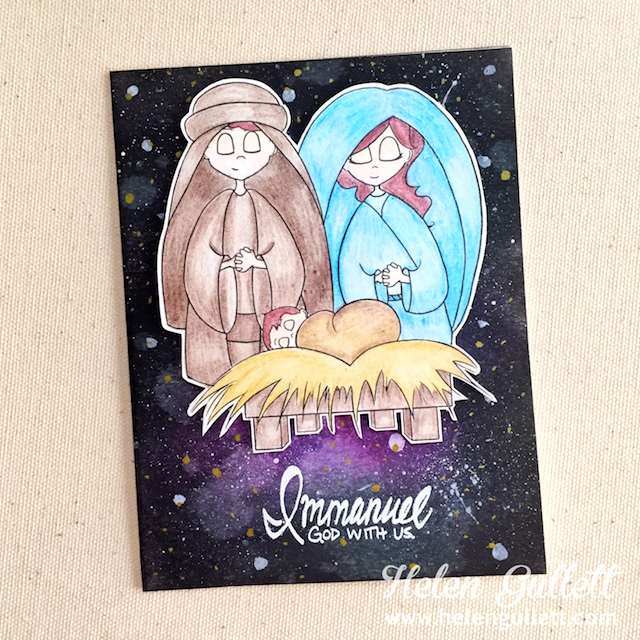
After looking at the Featured Stamper challenge and visiting byHelenG.'s gallery, I chose this card from her gallery as my inspiration:


I knew then, that ny card's Alphabet Challenge Letter B would be all about the Birth of Christ.  To meet the Yarn Block requirement for the Alphabet Double Challenge, I decided to make a snowy black sky as my background.  I cut two piece of chipboard 1-1/2" x 5" and adhered them together.  I wrapped a single layer of fine yarn with a metallic thread running through it around my chipboard "block."  I used the narrow edge of the chipboard with yarn and my Stampin' Up Craft White ink.  Holding both ends of the chipboard piece at each end, I inked up the yarn on the edge and gently stamped a diagonal pattern on my black cardstock from diagonal corner to diagonal corner.  I made sure to ink up my yarn each time before touching it to my cardstock.  I turned the cardstock around 90-degrees and applied the inked yarn again diagonally across the paper from diagonal corner to diagonal corner in an opposite angle as the first application.  The finished product was a lot of  snowy white speckles all over my cardstock.  I was please...it was exactly what I was looking for.

With Virtual Stamp Night coming up in early December, our hostesses are featuring some pre-VSN challenges.  The first challenge is to make a monochromatic card; therefore with my gold foil re-cycle gift wrap in mind, I decided to use gold as my color with black as my neutral instead of white.  Therefore, to keep my nativity monochromatic, I deviated from the Featured Stamper's colorful card.  I decided to use a black silhouetted nativity scene with an underlying shaped, gold foil mat. 

I will also enter in the Free-4-All Challenge - Birthdays are Best.  My card celebrates the birth of Christ.  Finally, the fifth challenge will be the Use It Challenge requiring us to use old, forgotten or never used items from our stash.  Three of the four dies I used have been in my cardmaking stash for over a year and have never been unwrapped.

Friday, October 27, 2017

New Hat for Spooky Kitty!

HAPPY MAIL RECEIVED!  

THIS CARD IS NAMED A

SPLITCOASTSTAMPERS FAVORITE OF THE

WEEK ENDING - OCTOBER 28, 2017!!


I need to make some Halloween cards, but I also wanted to enter some challenges on Splitcoasters this week.  I found several challenges to inspire me and give me ideas, and ended up with four challenges to enter.  I found my actual idea through this week's Inspiration Challenge, and a Halloween pumpkin pillow (see below).   Knowing what I needed to meet the requirements for the other three challenges made it easy to fit each one as I created my card. 


The Inspiration Challenge brought to mind a card I made several years ago, and I so loved that Poppystamp Kitty Cat Face die that I knew just what I wanted to do.  I decided to take my original card and re-design it, adding to it and dress it up a bit more.  My first card was done super quick because I needed to have it ready in just a few hours to send it along with the Halloween Witch Deco Wreath my daughter and I made for the younger daughter/ sister.  I was motivated to try my hand at a little more intricate version of the same card with new colors and added embellishments.


I came upon a Cottage Cutz Witch Hat die that I bought last year and didn't get a chance to use it.  I thought it would make a darling hat for my little kitty's head.  This time I decided to use lime green glitter paper for the cat's eyes and the moon, star, and brim of my witch hat.  I added two layers of glitter paper to my card base before adding the card front, and then added a few sequins to dress it up even more.  I am much more pleased with this second version, though the first was still cute!  What's not to like about the cute cat's face!


Finished the instead design and verse and now it ready to be sent off to my Mom in California.  I think she will enjoy her sparkly Halloween card.  Take a peek below:


Recipe:  Darice cardstock: Midnight Black.  The Paper Company cardstock: Victoriana 5-pack (tan).  Recollections Glitter Pad: Haunted (orange/ lime).  SU: Seasonal framelit dies (spooky - Holiday 2015).  Poppystamps die: Kitty Cat Face.  Cottage Cutz dies: Witch Hat.  Pretty Pink Posh: sequins. Size 5" x 6-1/4".

Monday, October 17, 2016

Birthday Balloons for a Sister-in-Law Birthday!

Now for my last female family birthday card for early days in October.  This next card is for my husband's sister who lives in Utah.  I chose a card that I made at a girls' get-together given by my Stampin' Up upline, Liz Thayer, for a few of us back in March of this year.  I know I say this a lot, but it's true every time. . .I absolutely loved this card. . .everything about it.  These Stampin' Up shades of aqua blues are my very favorite:  Pool Party and Bermuda Bay.  If Liz had thrown in Coastal Cabana, then I would have been over the moon!  LOL

I finished every part of this card's assembly at our fun little get-together with Liz.  I was thrilled she used the Irresistibly Yours dsp, which is a white pre-embossed paper to be sponge colored whatever shade you wish.  We, of course, sponged ours with Pool Party ink.  The only thing left to finish my card completely was to create a suitable inside design and birthday verse, and these I was able to do in May while in Mt. Shasta, California.  It is ready to be sent off to Judy for her birthday, and I think she will be delighted with her card.


Ingredients:  Stampin' Up products:  Cardstocks--Pool Party, Bermuda Bay.  Pattern--Irresistibly Yours dsp.  Stamps--Kinda Eclectic (sun), Balloon Celebration.  Ink--Pool Party (balloons/ sun/ distressing), Bermuda Bay (birthday/ balloon sprinkles/ verse).  Punch:  Balloon Bouquet, Curvy Corners (inside/ retired).  Dazzling Diamonds Glitter adhesive.  Metallic Silver cord (2015 Holiday).  Sequins--2013-2015 In-Color Asst. (2014-15 Annual).  Papertrey Ink stamps:  Tuck In Birthday (verse).  Size:  4-1/4" x 5-1/2".

Thursday, October 6, 2016

A 12th Year AA Birthday

My oldest son celebrates his 12th year of sobriety, and he credits his recovery for all the help he has received through attending Alcoholics Anonymous meetings and events.  He values the message in the Serenity Prayer and incorporates its words into his life on a daily basis.  I always like to honor his hard work and mark this special milestone in his life by making him one of my handmade cards.

I had just finished a birthday card for his younger brother, in which I chose to use the Mariners baseball team as the theme of his card design.  I made him a birthday cupcake of Mariners baseballs (which will be posted on October 6th), and thought it would be clever to use a cupcake on David's card as well.  I would use the birthday coins received each year to mark how many years of sobriety the person as achieved.  


I went online to search for images of 12-year coins and found a gold and red one that would go nicely with the color scheme of black, red, and gold foil, on which I had already decided.  I would use the back of the coin with the Serenity Prayer as the cupcake's frosting and the front of the red coin to represent the cherry on top.  Take a look below at my finished card inside and out.  I think David will be very pleased with his 12-Year AA birthday card.


Ingredients:  Stampin' Up cardstock: Basic Black, Gold Foil.  Pattern: Graphic 45 Renaissance Faire/ Enlightened.  Google online images:  Red AA birthday coin-front and back, cupcake liner.  Cottage Cutz Expressions die: Birthday; Sugar & Cream Alphabet/ Numbers.  Stampin' Up punch: Curvy Corners (retired).  Cuttlebug EF: Happy Birthday.  Wink of Stella-Clear.  Computer-made verse.  Size: 5" x 6".

Tuesday, September 27, 2016

Birthday Niece #2 is a BIG Two!

This is my second great niece with a late September birthday, and she will be a GREAT big two-years old.  I had the chance to spend a little time this spring getting acquainted with Addie, and she is a delight!  She has such a funny little personality, and she is just as cute as she can be with her big blue eyes and her gigantic smile.  


I just love making children's cards because they are so much fun, and it gives me a feeling of  joyfulness during the entire process.  It allows the years to slip away and brings back fun childhood memories.  While in this nostalgic mood, I reminisced about how my brother and I used to look forward to Saturday morning cartoons, where one of our favorites was Mickey and Minnie Mouse and their adventures.  


Thinking about Addie with her adventuresome personality, I thought it would be fun to make her a really cute, little, girly Minnie Mouse card, but I needed a little help getting my children's cardmaking  mojo going after being on a sympathy card binge of late.  I went on line to check out Minnie cards on Pinterest, but found there weren't a whole bunch to choose from.  A few used embossing folder texturing and I like that idea, as it reminded me of my "happy birthday" embossing folder that I had used earlier this year on my young boy "Minion" card.  With mojo arriving, I decided on a pink Minnie rather than the traditional red, adding to my desired girly look.  Take a look below at my finished Minnie card inside and out!  I think it will bring smiles and giggles of delight when viewed by its recipient.


Ingredients: Stampin' Up cardstock: Whisper White, Basic Black, Melon Mambo.  Dies: MemoryBox Stitched Scalloped Circles; Spellbinders Classic Circles; Cottage Cutz Expressions-Birthday, Girl. EK Punches:  Circles-2-1/2," 1-3/4," 1," Victorian Corner (modified).  Cuttlebug Happy Birthday Embossing Folder.  Ribbon:  Stampin' Up 1/2" Scallop Dots-Melon Mambo (retired); 1/8" Taffeta-Melon Mambo; Offray 3/8" Black & White Dot.  Uni-ball White Gel Pen.  Stash: Button, Rose Embroidery Floss.  Size:  5-3/8" x 6".

Wednesday, September 21, 2016

Bee Happy. . .Sweet Friend!

I am planning to attend my Stampin' Up mentor's Totally Lovin' Christmas annual event on October 1st.  She had a special fee running for those that signed up and paid at her last Birthday Bonanza event in August, but refused to take payment from me.  Her reasoning, when I don't pay her directly, I have been in the habit of mailing my payment, accompanied by a specially designed card just for her.  She said she was feeling deprived, because she had not received any lovely handmade cards from me in a very long time, so she would much rather receive my payment via mail.  She said I would get the special rate, but only if payment was accompanied by one of my handmade cards.  Now, I ask you, is that bribery or what. . .LOL!

I was feeling the pressure to really get with it and perform at the top of my game, but I had so many commitments and cards to make with absolute deadlines that it took almost a month before I could begin Liz's card.   Meanwhile, while making  my other needed cards, my creative juices were flowing in the background around numerous ideas for Liz's special card.  

I finally got down to finalizing the design for Liz's card.  Since she is such a sweet friend, I decided to incorporate a bumblebee embellishment die-cut that I made a few years ago at a store that had AccuCut dies for use.  Using this bee, I would make a "Bee Happy" card.  I added Wink of Stella Clear to my bee's vellum wings and to the flowers, but the picture does show off the shimmery wings very well.  Take a look below at my finished card front and coordinating inside design with my little "bee" verse.


 Ingredients:  Stampin' Up cardstocks:  Basic Black, Crushed Curry.  Black & White digital stripe.  Flower pattern: scrap.  Vellum.  Grafix Lt. Chipboard.  AccuCut die: Mini Bumblebee.  Little B work die.  Pretty Pink Posh: Stitched Borders 1.   EK punch:  Trumpet Flower Corner.  Wanelo Washi Tape.  Petaloo Darjeeling flowers.  Prima leaves.  SU Bermuda Bay Baker's Twine.  Wink of Stella: Clear.  Computer verse.  Size: 4-3/4" x 5-7/8".

Sunday, September 18, 2016

Retirement Congratulationns Are in Order!

My friend and cousin-in-law has just retired after many years working for Koch Industries.  She will now join the ranks of us who enjoy everyday being Saturday and can go to bed at night and not have to set the alarm for tomorrow morning!  To commemorate this milestone in her life, I wanted to make and send her a congratulations retirement card.  I love black and yellow together so that is the color scheme I decided to use.  I hope she is careful to following the suggested things to do during retirement found in the card inside. . .one of which is to relax!  Take a look below at my finished card inside and out.


Ingredients:  Stampin'Up cardstock: Daffodil Yellow, Basic Black.  MFT dies: Flutter of Butterflies.  Cottage Cutz Expressions dies: Congratulations (modified).  Sizzix Original die: Frame-Scallop Oval.  Stampin' Up punch: Curvy Corners (retired).  HugSnug: Goldenrod.  Darice Frosted Gems.  ColorBox: Chestnut Roan (distressing).  Patterned paper scraps.  Size: 4-3/4" x 6".

Monday, September 12, 2016

An 11-Year Anniversary Celebration!

My oldest daughter is celebrating her 11th anniversary in the first half of September, and I wanted to make her a very feminine card this year.  Usually, I try for a middle-of-the-road card that sort of suits a man as well without being too masculine, but their cards have had fish, crossword puzzles, camping, two candied apples in a jar, and more...not really a girlie card; whereas, suitable for a man.  I decided this year Michele deserved one that was made with just her in mind.  Take a peek below at my finished card, which though made with Michele in mind, is for her husband as well!


Ingredients:  Stampin' Up papers:  Shimmery White card base, Gold Foil, Gold Glimmer, Fancy Foil Vellum (hearts).  Bazzill Platinum Shimmer Vellum.  Cottage Cutz Expressions dies.  EK Scallop Scalloped punch.  Stampin' Up Curvy Corner punch (retired).  Offray 3/4" Gold Glitter ribbon.  Stampin' Up Gold/White Metallic Twine.  Stash:  Mini pearls, Shimmery sheer flower, Gold leaves.  Size:  5-1/4" x 6".  

Saturday, August 13, 2016

Getting Well After Surgery. . .

My son's girlfriend recently had surgery and spent a day in the hospital.  She's in that after-surgery rough patch where the pain becomes worse and nothing seems to be going the way you think it should.  I wanted to send some meals and a little homemade get-well card to cheer her up and to let her know that we are thinking about her and hoping she feels better real soon.

I'm still in my vintagey mood, so I put together what I call a simple vintage card, using soft-colored patterned papers, distressing, layering and embellishments to dress it up.  I love word dies and this lower-case "get well" word die that I recently purchased will be perfect for my style of card.  Take a look below at my finished card creation, showing both the front and the decorative inside with a little "get well" verse made up just for Katrina!


Ingredients:  Stampin' Up cardstocks: Blushing Bride, Soft Sky, Very Vanilla.  Iralamija Music Notes digital paper.   Darice Opulent Opal Glitter paper.  Currugated paper: DCWV sask.  MFT dies: Corners (modified).  Paper Smooches die: Get Well.  Papertrey Ink die: Large Scallops.  Accu-Cut die: Bird.  Stampin' Up Pearls.   Hug Snug seam binding ribbon. Computer verse (Fonts: DaddyO 14/ Shelley 10.5).  Size: 4-3/4" x 6".  

Tuesday, August 2, 2016

Two Celebrate Their 10th Anniversary!

My youngest son and his wife celebrated their tenth anniversary in late July. . .it's difficult to believe ten whole years have gone by.  It was time to make them a special card to note their special day.  This year I decided on what I call a slightly vintage card style.  I love the vintagey look as long as it isn't way over the top, so my vintage-like cards tend to be low key.  Take a look at what I came up with below:


Ingredients:  Stampin' Up cardstock: Pool Party, Basic Black.  Pattern paper: stash.  Cottage Cutz Expressions word dies.  Bird Silhouette: Silhouette Graphics (PaintShop Pro modified).  Wilton 4-inch Doily.  Prima flower.  Hug Snug: seam binding ribbon (hand bleach/ crumpled).  Computer-made verse.  Size: 4-3/4" x 6".

The Story & Other Tidbits

Following is an explanation on the making of this card as I do not think the picture makes it totally clear.  Just a note to start: each of the layers are approximately 3/8" smaller than the layer below it both in width and height, and I sized and cut all layers prior to assembly.


To start, I cut my aqua cardbase to 4-3/4" x 6" and adhered the smaller black mat layer to it.  Next, I cut the chevron block patterned paper along its zigzag pattern so that it would be shorter than the aqua damask patterned paper that I planned to use as a layer below it.  I adhered these two patterns together so that 1/3 of the damask was exposed above the chevron blocks and 2/3 of the damask would show below.  I then positioned my half doily on the left of this patterned set, folding over a bit of the raw edge to the underside of the papers, and adhered the doily to the patterned set.  I was now ready to pop-up this set of patterned papers onto the black mat layer.  Once all four layers are adhered and popped-up adding the final touches to finish the card can begin! 


I positioned and adhered my black cardstock, happy anniversary die-cut toward the bottom right as shown.  I tied two pieces of the pink crinkled seam binding ribbon into a bow and adhered with a bit of hot glue.  Next, I attached my leaves with mini glue dots, and affixed my rose with a bit of hot glue.  

The final piece for my card front was to make my black silhouette bird family.  I cropped my family from a Googled jpeg-image filled with numerous silhouetted bird types, choosing exactly which birds I wanted to use.  I dropped my cropped image into PaintShop Pro and modified my bird family a bit.  There were two babies in the nest, and I decided I only wanted one, so using the software's tools, I erased one baby and made the nest smaller.  Next, I moved the Mama and Daddy birds closer to the baby's nest and shorten the branches on both side, eliminating a few leaves.  My last step was to save my new jpeg-image and then copy/paste it into a Word document to re-size for my card.  I printed it on white cardstock and fussy-cut it out to adhere to my card front.  

My last step as is traditional in my cardmaking was to finish the inside so that it complimented my card front.  I found the John Keats quote on line, which I love.  I also decided to incorporate my bird family to the inside as well.  I copy/pasted the verse into a Word document, sizing it to fit, and I found the perfect fonts to add the closing happy anniversary sentiment along with my son and daughter-in-law's names.  My bird family was also copy/pasted several inches below the verse.   Once I printed my Word document, I cut it to fit inside the card, distressed the edges, and adhered it inside the card.  I fussy-cut more of the chevron block patterned paper to decorate my verse at the top and bottom.  I think Mark and Ginger will really like their handmade card from Mom along with a dinner certificate for a night out.

Sunday, June 19, 2016

A Day to Honor Fathers!

Our four children and spouses will arrive at our home on Father's Day bringing the goodies to make a magnificent barbecue dinner to celebrate my husband and myself.  You see...as I was traveling on Mother's Day to spend time with my 90-year old mother on her day, my day was planned to be celebrated with my husband on Father's Day.  We are willing to share our days with one another!

I wanted to make a special Father's Day card for my husband to not only celebrate him, but to thank him for allowing me a long vacation away to visit my family in California. ( I have to say, I was a busy gal, and enjoyed every minute of it!)  I have had the Stampin' Up Traveler stamp set for some time, and I have been itching to use it, but have never taken the opportunity.  I won a second copy of this very stamp set at a stamping event, which I brought down to share with my mother.  This was perfect. . .I'd use her set while visiting.

The stamp I wanted to use is the vintage locomotive, and I had in mind to emboss it to fit my black, white, and red card theme.  I used the Perpetual Birthday Calendar stamp set to form my background in Real Red and Smokey Slate. . . modifying it just a bit.  By using my MISTI stamping tool, I was able to wipe off half the red ink with a baby wipe and yet still be able to repeat-stamp to get a rich impression.  I was also able to re-position for the gray to enlarge that area.  I have to say, I just love my MISTI stamping tool.   Take a look at my finished train card below...it really is black, white and red in RIL...don't know why the picture picked up pink and charcoal)!  I think my husband will be very pleased with his Father's Day card.


I finished off my husband's Fathr's Day card by crafting an inside to coordinate ith the outside creation, and I fashioned a little verse fitting this special occasion.


Recipe:  Recollections cardstock: Black, Pewter.  Patterns: DCWV Bella Armoire Stack.  Stampin' Up products:  Red Glimmer Paper; Stamps--Traveler, Perpetual Birthday Calendar; Inks--Real Red, Smoky Slate; Embossing Powder--Black; Dies--Finishing Touches Edgelits-Pinked (retired).  Cottage Cutz dies: Expressions--Happy, Father's Day.  Recollections: Red Pearls.  EK punch: Scallop Corners-Medium (inside).

Thursday, December 24, 2015

Christmas Greetings of Peace - Christmas X10 - Card #8!

In the post, I will be presenting card #8 from the Christmas X10 cardmaking event, which is a card made by one of our hostesses, Dara Peterson.  I love Christmas cards made with blacks, navys, grays, and silvers, and this one meets all of the qualifications to love it!  The only change I made from the original design was to add a silver mat layer between the navy cardbase and the gray card front base.


Just a note: in stamping your black silhouette scene, when your stamp is photopolymer, as this stamp set is, do NOT use StazOn black ink, which is a petroleum based product, and it is not compatible with polymer.  It is best to use Memento Tuxedo Black ink.  


The night sky is achieved by sponging lightly in a vertical downward stroke from the top of your scene's sky down to the tree line, lighting the pressure on your stroke as you move toward the horizon.  It also helps to place a piece of scrap paper under your white scene cardstock and starting your stroke on that scrap paper and then lightly moving onto your scene's cardstock.  This helps to alleviate sponging stroke marks.  Repeat your strokes until you achieve the depth of coloring you desire.


I love the end result of this card, and I think my addition of the silver glimmer layer absolutely adds to this cards already beautiful look.  And now, it is time for the reveal. . .see below.


Recipe:  Stampin" Up products:  Cardstock--Night of Navy, Smokey Slate, Basic Gray, Basic Black, Whisper White, Dazzling Diamonds Glimmer.  Stamps: To You & Yours (scene); Holly Jolly Greetings (on earth).  Ink:  Memento Black, Night of Navy (sponged).  Dies:  Hearth & Home Thinlits (window).  Christmas Greetings Thinklits (peacy).  (Thanks Dara Peterson for this wonderful card design.)

Sunday, November 15, 2015

Hugs & Kisses for the Bride!

My youngest daughter, Jackie, is getting married, and the hostesses for her bridal shower party are my oldest daughter, Michele, and my son's wife, Ginger.  They have been very busy for the past month and a half planning the menu for the invitation design, the luncheon, the games and entertainment for the guests, and prizes to be won.  


Ginger came up with a vision of theme for the shower invitations, which she thought would be fun to craft ourselves.  This, or course, is where I entered into the planning as well!   From her ideas of having a gatefold card to use Jackie's wedding colors of black and red, she thought it would be elegant to add a black and white damask patterned paper and add ma wedding dress to the front of the card.  I thought a doily-fold wedding dress would be just right and the "sisters" agreed after they saw my completed dress.  I tweaked Ginger's other ideas here and there and came up with a suggested card design.  It took a lot of collaborating between the three of us before we settled its a final design.  We were all excited to see a sample card putting all our ideas together.


I shopped for supplies, meanwhile deciding to use a larger doily than most of the design instructions that I found on Pinterest, because it was to represented a long wedding gown.  When the sample card was completed and several changes made, we were excited to get together to make up our little beauties to send out to our guests.  I prepared and cut multiple card parts and we were ready for the next step to convene one Saturday morning over a month ago and "whip" out multiple replicas of our sample invitation card.  Michele has made a few cards with me in the past, so she had a good idea that this would not be a one- or two-hour job as Ginger thought.  Much to Ginger's surprise, Michele was very right. . .we needed about five hours to get them all done!


Michele and Ginger planned the luncheon menu and shopped together for ingredients, plus game prizes.  The main course was able to be assembled ahead and frozen until ready to bake.  They got together on another Saturday to complete these task and brainstorm the decorating ideas and games to be played. 


Michele and I have been working on the house and party decorations.  I was happy to lend my papercrafting and computer graphic skills, plus oodles of papercrafting tools to make her ideas become a reality.  It has been an exciting and fun time brainstorming ideas to come up with our finished products!  Once decisions were made on basic ideas, I went to work using my computer skills complete everything from signs for the Mimosa Bar, game instructions to game parts using papercrafting tools.  Once the parts and pieces were designed and printed, Michele and I worked together on at least four different occasions to assemble all the parts.


Last night, after coming home from another night of shower crafting and decorating, it dawned on me that the shower was the next day, and I had not had time to sit down and create a card to go with Jackie's shower gift.  Oh my!  I could see another late night looming!  


I got busy and whipped up this simple card below, which borrows the wedding colors and the bridal shower theme.  For a "short-timer" card.  This is what I call a card that is made with very little time. . .a just get it done card. . .create the design quickly, do it fast. . .no procrastinating allowed.  For the very little time that I had in the wee hours of the morning, I was pretty please with my results.  Also, when the card was finished, I realized it could make a good Valentine's Day card as well.  Jackie always loves almost every card I've ever made, so I'm pretty sure she will like this one too.


Below is a peak at the inside, using the outside theme to create the inside design.  I used my computer to whip up it's little verse.


Recipe:  Stampin' Up cardstock:  Whisper White, Basic Blake, Red Glimmer paper.  Recollections: Black Glitter.  Recollections: Hollywood  & Vine (damask).  MFT Die-namics: Layered Hearts; Photo Corners.  Cottage Cutz die: Hugs & Kisses.  Stash: Offray ribbon. Computer-made verse.  (Size: 5-1/4" x 5-1/4" square).