Showing posts with label SU dsp stack. Show all posts

Tuesday, May 31, 2022

Farmyard Favorites for Father's Day!

  Father's Day is coming, and the Virtual Stamp Night Mini Sneak Peek was held just a few days ago.  The first one wants your card theme to be farm animals...like in Old MacDonald's farm.  I'm thinking someway I will build a Father's Day card out of this challenge.

My son-in-law is such a good Dad!  His daughter, and my middle granddaughter, was three this past March.  From the time she was three months old, he has taken her to oodles of animal places and events...zoos, summer fairs, petting zoos, etc. You name it, if it's within 50-miles of their location (even on vacation), he will find an animal place to take Sienna.  As a result, she just loves animals, has no fear, and you can see why. Her first favorite was a cow, and one of her first words was moo-moo! 

I'm a lover of "simple" vintage cards (those without too much frou-frou), and for some reason, I've not made many vintage cards in the last few years. I went to my stash, because I remember a vintage cow image that I almost made into a card a few years ago.  I had to scrap the idea at the last minute, because I forgot to take the image and any papers with me to a retreat where I planned to make the card! I had even mounted it on homemade script paper that I made prior to leaving that talks about medieval farming as I needed a computer and printer to do so. Using it now, was just a matter of deciding the layout, design, and papers!  I actually copied my design layout that I used on the replacement card. Take a peek at my finished card below with its vintage slant!
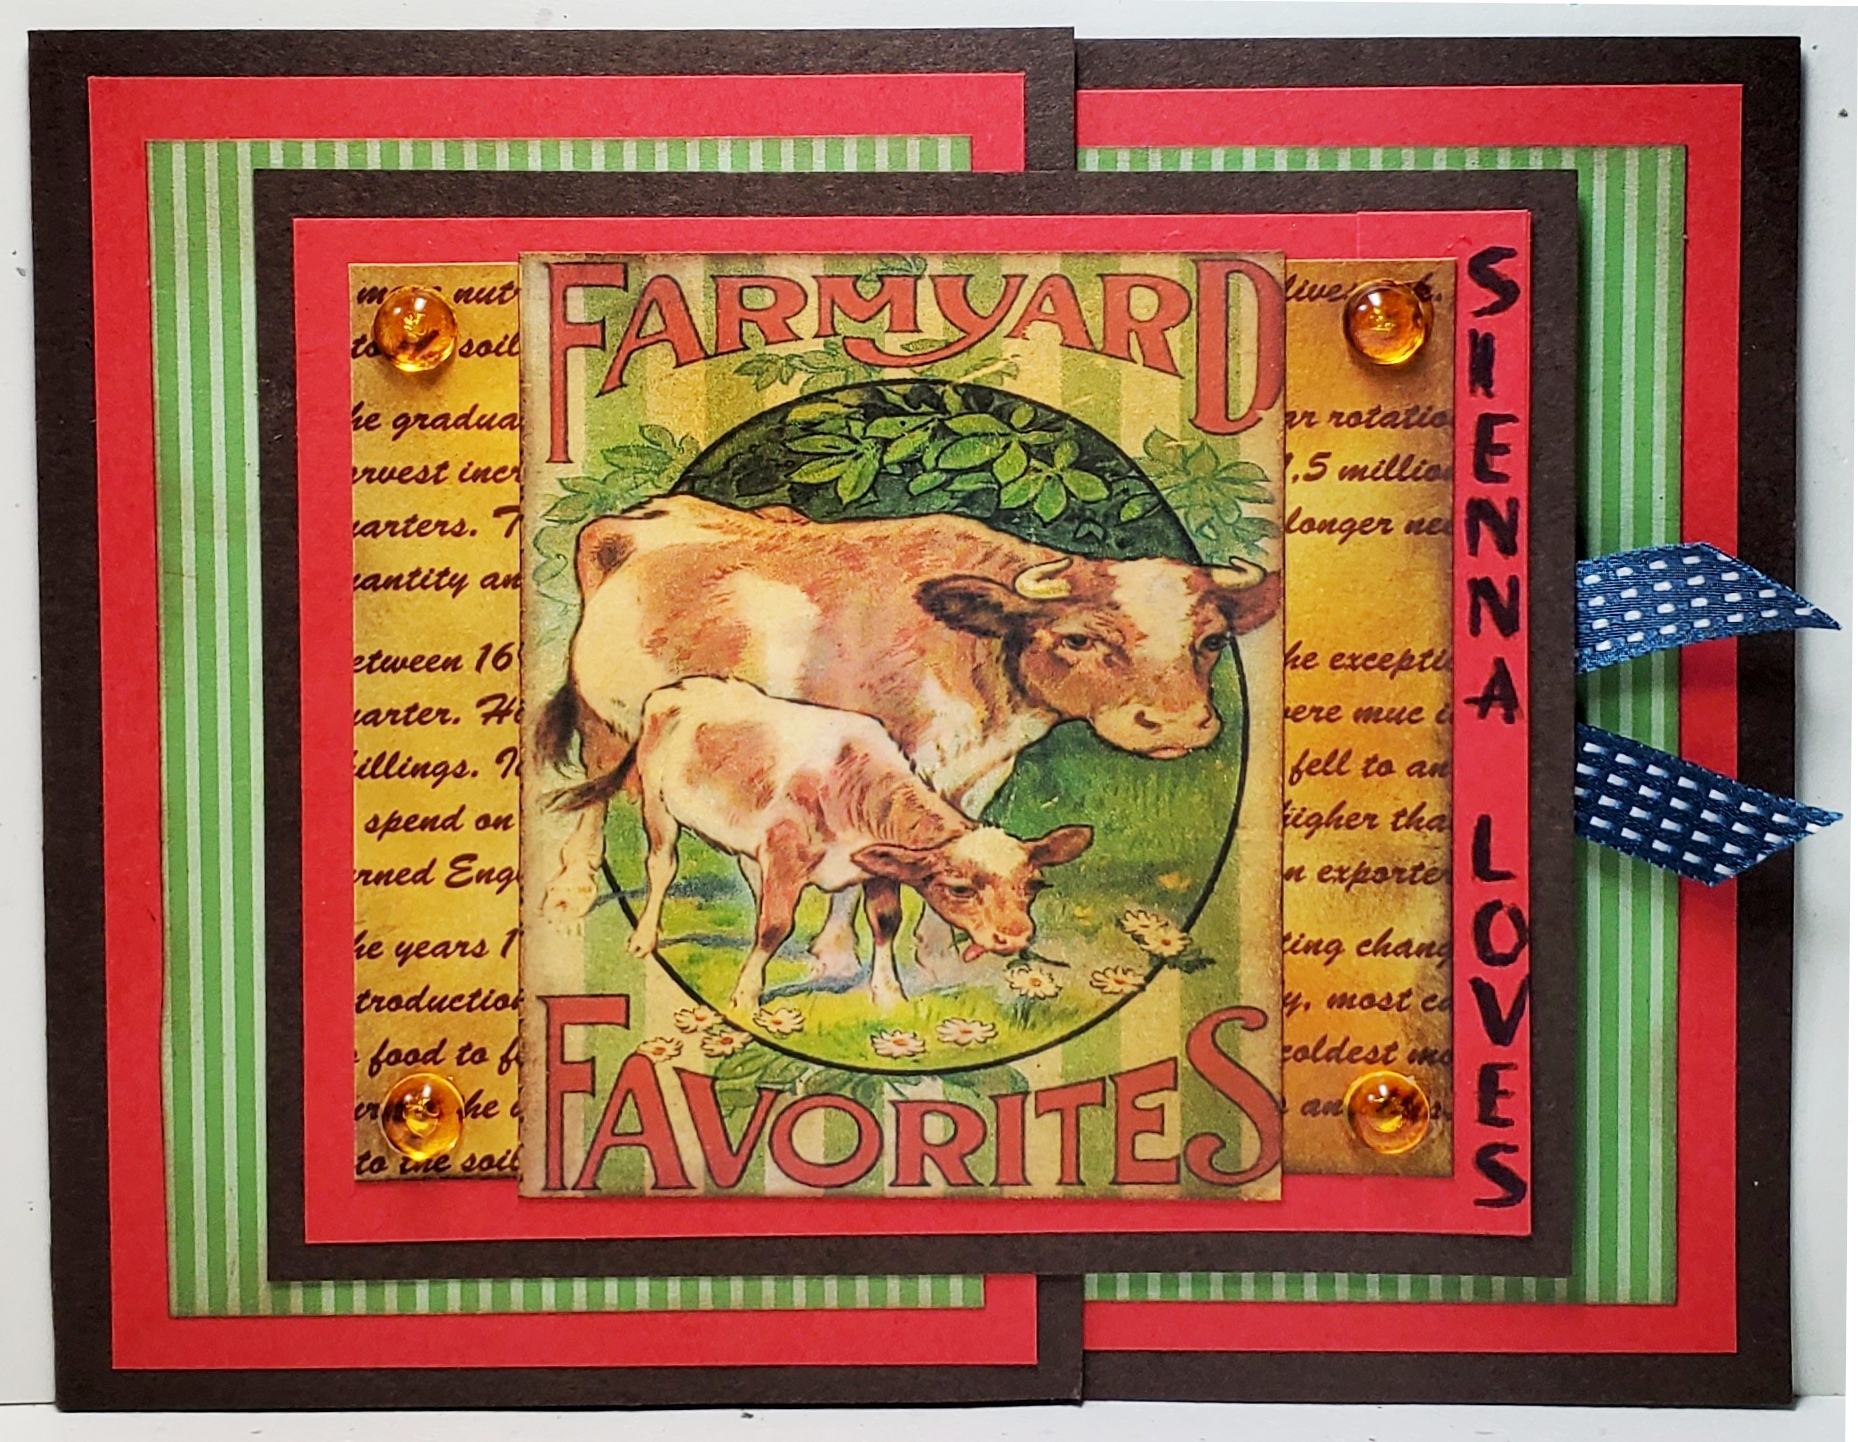
(NOTE: The ribbon peeking out the right side is attached to the gift card holder.  It's a blue ribbon seal for a First Place Dad!)

Ingredients: Stampin' Up: Cardstocks--Early Espresso, Poppy Parade, And Very Vanilla. Patterned DSP--2012-2013 DSP Stack--Wild Wasabi Stripe. Inks--Soft Suede, More Mustard, Chocolate Chip.  Other: Patterned Paper--Medieval English Farming Script (homemade/ink distressed). Vintage Farmyard print (stash). Gems--Robin's Nest DewDrops-Golden. Technique--Short Front Flap Card. Chatterbox computer verse. 4-3/4" x 6."

Thursday, September 30, 2021

Sweet Belated Birthday Wishes!

Several of my crafting friends have birthdays in October, and I needed to get to my crafting table.  With so many cards to do, time was of the essence, I decided to CASE one of my own cards that I ran across recently while browsing my own blog.  I found my gumdrop card from 2018 that made me smile then and again when I revisited it now after three years!


Even though I got my friend's card started early enough, I did not quite get the sentiment attached and the inside finished so still missed her birthday.  I was unhappy that I couldn't get her card done in time, but unfortunately, my youngest granddaughter decided to pass me her nasty cold and flu on to me after one day of taking care of her.  I was down and out for over 10 days!  I even got a Covid test to be sure I wasn't even sicker than I thought, but fortunately, that was negative!  


When I was better, I was up against organizing and packing things I needed for a crafting event with nine of my super-close crafting friends.  We have all been looking forward to this fun time after a two-year hiatus due to Covid!  We have waited until we were all vaccinated and able to make reservations and be able meet King/ Snohomish County Covid restrictions/ requirements!  I really wanted to get the gumdrop card finished so I could at least take it with me as a belated offering!


When finally finished, I was super pleased with it even though it was the second time around.  It is such a cute, super happy card... so colorful and festive!  Here is a look at the repeat rendition of this card that I hope my friend will enjoy as much as I did when I spot it in my picture gallery once again and while making it a second time around!


Ingredients: Ingredients:  Stampin' Up products:  Cardstock-Crushed Curry, Lemon-Lime Twist, Real Red, Tangerine Tango, Whisper White; 2011-2012 DSP Stack (Bashful Blue Dots).  Stamps: Goody Goody Gumdrops.  Spellbinders Dies: Venise Lace Rectangles; Octagon Classic Nestabilities; Octagon Scallop Nestabilities.  Copic Markers.  Stash: Gold Iridescent Glitter; Gold Rhinestones; 3/8" Offray Plaid Stitched ribbon; Horizon Friendship Thread (Harlequin).  Chatterbox sentiment/ verse.  Size: 6" x 4-3/4". 

Wednesday, January 20, 2021

Love & Prayers Bring Healing & Comfort

I needed two sympathy cards right after Christmas and the New Year, and my sympathy stash is ZERO!  I was in the middle of fulfilling my New Year's resolution to make at least 60 Christmas cards by the end of January before putting my Christmas materials away.  I had just finished a card design idea a  few days ago, based on a My Favorite Things sketch from April 2018...MFTWSC382.  I felt my new design would actually make an excellent sympathy card made exactly like I was planning to make the Christmas card.  


The cards are made from the Stampin' Up Feels Like Frost paper scraps, which was carried over from the 2019 Holiday mini catalog to the 2020 catalog. I got busy and changed my new card design yet again to use up all the leftover kit pieces, plus cutting a few more in order to make two cards the same.  One would be given locally and the other mailed to Denver, Colorado, so neither would ever know they received cards with the sames style.  


My design change involved using an envelope flap at the top of the card where I would place the sentiment.  It is actually adhered not a flap.  I used white cardstock and sponged it with Balmy Blue ink.  I added the sentiment with the computer/ printer and then measured and cut the triangle-shaped envelope flap to fit the card top.  On these two sympathy cards, unfortunately, I measured wrong, and the flap ended up too short to go all the way to the top of the card according to my design.  Not to worry, I placed it an inch lower from the top and added the planned ribbon band and bow onto the cardstock layer above instead on the flap.  Though I think I'll like it better almost all the way to the top as I will do on the Christmas cards, I decided it really didn't look too bad this way.  I used Stampin' Up's Snowflake Splendor Holiday ribbon, which is a sparkly iridescent white normally, but I colored blue it with the broad nib of a blue shade  of Copic Marker to coordinate with the blue shades in the card.  I randomly popped on some rhinestone sparkly gems, made a little sympathy verse for inside, and the card was done.

Take a peek below at both my modified Christmas card design made into a Sympathy card and the inside design and verse below:


Ingredients:  Stampin' Up products:  Cardstock--Balmy Blue, Night of Navy, Silver Glimmer; Patterned paper--Feels Like Frost 6x6 dsp; Ink--Balmy Blue; Ribbon--1/4" Snowflake Splendor.  Basic Rhinestones.  Other:  Punch--EK Victorian Corners; Copic Markers (color ribbon); Chatterbox computer sentiment/ verse; Size--4-3/4" x 6".

Wednesday, August 22, 2018

Pssst. . .Missed It!

Sister-in-law #4, one of my husband's sisters, had a birthday toward the end of July.  It totally snuck up on me and slipped on by before it even came to mind.  It took me almost an entire month to remember and that was only because her sister's came in August.  That's when I rememeber I had forgotten to make a card for the sister in July!  Of course, had I looked at my Cardmaking Date calendar this would not have happened, but I think our extremely hot summer has fried my brain!  So, I really needed to get to work fast!

I thought I would do a sweet little belated card with a bit of humor and use a gumdrop stamp that I borrowed from a friend.  My gumdrops would come in a myriad of colors in all shades of the rainbow with a little gold glitter to give them a bit of sparkle.  I used several mat layers all in different colors to coordinate with my colored gumdrops.  I popped a little hexagon tag with a sentiment "pssst. . .missed it" and tweaked the tag with a little red glittery heart just because I thought it needed a little embellishment to perk it up.

I finished my gumdrop card front and also the inside design with a little belated birthday apology verse, and it's ready for the mail.  Take a peel below. . .it's pretty "sweet!"


Ingredients:  Stampin' Up products:  Cardstock-Crushed Curry, Lemon-Lime Twist, Real Red, Tangerine Tango, Whisper White; 2011-2012 DSP Paper Stack (Bashful Blue Dots).  Stamps:  Goody Goody Gumdrops.  Spellbinders Dies: Venise Lace Rectangles; Octagon Classic Nestabilities; Octagon Scallop Nestabilities.  Copic Markers.  Stash: Gold Iridescent Glitter; Gold Rhinestones; 3/8" Offray Plaid Stitched ribbon; Horizon Friendship Thread (Harlequin).  Chatterbox sentiment/ verse.  Size: 6" x 4-3/4".  

Monday, March 21, 2016

Easter Brings A Dahlia-Fold Cross!

I went to a card class this past week-end hosted by Dara Peterson and Luci Kirschbaum, a team two Stampin' Up demonstrators in my area.  Most of our samples to make were miscellaneous 3D items (a berry basket, a bunny box, and a candy purse), but there was one card designed by Luci that featured the Dahlia-Fold Technique, using punched and folded circles.  Most Dahlia-fold circles are made into flowers, but our sample introduced this technique used to make an Easter cross.  

I love this technique and it isn't very difficult.  I especially like the look of it in the form of a cross, which is so perfect for Easter cards.  If you are interested in learning the Dahlia-Fold technique, it can be found on YouTube, Pinterest and Splitcoast Stampers, and here is a link to Splitcoast Stampers:  http://www.splitcoaststampers.com/resources/tutorials/dahlia_fold/


I did make a few minor changes to my card rather than making it exactly like Luci's, but my card still retains the look of the original design.  My first change was actually to correct an error I made in stamping and embossing my papers.  Now, you all probably remember the rule. . .stamp before embossing?  Well, guess what. . .I forgot all about the little EASTER sentiment in the lower right corner and away I went embossing, and making my Dahlia fold cross.  After I had it all assembled, I realized my mistake.  


To fix the problem, I decided to stamp the EASTER part of my sentiment on a small piece of Whisper White cardstock and punch it out with my Washi Label punch.  I wanted my word background much smaller than that the Washi Label punch provided, but not to worry. . .I had an idea.  After I stamped my EASTER word with the Mint Macaron coordinating ink and then punched it out, I cut the label narrower and then punched the ends shorter by lining it up and punching again to achieve my desired length. . .first on one side and then the other.  A little trick I learned long ago in order to handle a short and/or small piece of paper in a punch is to use a post-it note and stick it to your paper piece, which allows you to maneuver and position the small paper piece easier in the punch.  I think I like the way my EASTER turned out even better than the original design where it was stamped directly on the card front with the embossing on top.


My next change was to add a Mint Macaron layer between the card base and the card front.  This picked this color in the mini resin flower, the EASTER ink color, and the happy die cut.  Adding this layer did require me to cut a new and larger card base.  My final change was to add a bit of sparkly glitz by using glitter adhesive on my happy die-cut word and to the mini resin flower.  I'm likening my results, and I thank Luci for the original design that I tweaked just a bit!


I finished off my card by creating an inside coordinating design and finding the perfect Stampin' Up stamp for its verse.


Recipe:  Stampin' Up Products:  Papers - Cardstocks--Crumb Cake, Mint Macaron, Whisper White; Pattern-2015-2017 In-Color DSP Stack/ Crumb Cake dots.  Stamps--Crazy About You; Suite Sayings (verse).  Ink--Mint Macaron, Crumb Cake (insde).  Hello You Thinlit dies/ happy.  Softly Falling Embossing Folder.  Punches: 2-1/2" Circle (cross base); 2" Circle (cross side/top arms); Washi Label (Easter sentiment); Curvy Corner punch (inside).  2015-2017 In-Color Blossom Accents.  Dazzling Details Glitter Adhesive.  Recollections Pearls.

Saturday, February 6, 2016

Bloomin' Love & Happy Hearts!

I went to a cardmaking gathering hosted by my Stampin' Up upline, Liz Thayer, where she provided us with three card designs to make as a make-n-take.  It was a fun gathering of just six ladies who made the hour trip south to visit Liz and see her new home that they purchased about six months ago now.  We, of course, each brought a dish of food and Liz provided the beverages.  What a fun way to spend the afternoon.


One of the cards we made was a Valentine card using the new Stampin' Up Bloomin' Love stamp set, with lots of lovely popped layers to which I decided to add a white cardbase as another layer.  This card's colors are soft and elegant and the bottom Crumb Cake layer is texture embossed with the Happy Hearts embossing folder, which adds to the wonderful three-dimensional aspects of the card.  Thank you Liz Thayer for this lovely design. . .it was great fun to make! 


Now on to finishing the inside of the card so that it is ready to send off to someone special for Valentine's Day.  I brought the soft and elegant colors into the inside and embossed my Crumb Cake layer with the same Happy Hearts embossing folder as the front.  I printed my verse onto the Blushing Bride pink layer and added the My Valentine stamp from the Bloomin' Love stamp set.  I finished off the corners with a little embellishment and it was ready to go.


Recipe:  Stampin' Up papers:  Cardstocks--Whisper White, Crumb Cake, Blushing Bride, Dazzling Diamonds Glimmer; Love Blossoms dsp stack (2016 Occ.).  Stamps--Bloomin' Love (2016 Occ.).   Ink--Crumb Cake, Blushing Bride, Rose Red (inside).  Embossing Folder--Happy Hearts.   Love Blossoms Embellishment Kit (2016 Occ.).  Punch--EK Scroll & Hearts Edger.  Pearls.  Computer-made verse.  Size--4-1/2" x 5-3/4".

Sunday, April 26, 2015

My Brother Has A Birthday!

My brother is having a milestone birthday in early, early May, and he will suddenly be two years old than not just one, as he reaches the beginning of another decade!  I am on a cardmaking spree right now trying to get all of my early May cards completed before I leave for my four-day Girls' Get-Away Cardmaking Retreat, which is my present to myself for Mother's Day.  I know it will be oodles and oodles of fun, laughter, and hilarity as those are the kinds of ladies who are going.  I predict a thoroughly marvelous time!


Back to my brother's card for his birthday.  I made a card similar to this one last spring, which was inspired by a Liz Thayer design.  My previous card sported a mustache, and while my brother has a mustache and a beard, just a mustache didn't seem like him as he has never had just a mustache.  I decided his card would be stamped just as the stamp comes with cake and candles.  My card, as in the previous version, has more paper layers than Liz's original, but I retained the collage of masculine-oriented paper patterns.  I'm sure my brother will love his card, and he will know I've been thinking about him as I was making his card and getting it ready for the mail.


The inside creation has now been completed and designed to coordinate with the outside, and I've added a humorous verse about aging that I think my brother will enjoy.


 (Card inspired by a Liz Thayer design and modified by me.)
Recipe:  Stampin' Up papers:  Basic Black cs, Soft Suede cs, Very Vanilla cs, 2013-2015 Neutrals dsp stack (Chevron-Soft Suede/ Scallop-Crumb Cake), Modern Medley dsp.  SU stamp: See Ya Later.  Memento Black, SU Soft Suede (distressing).  SU Early Espresso Chevron ribbon, pearls.EK Photo Corner punch (inside). Size: 5" x 6-1/4"