Showing posts with label Corners. Show all posts

Tuesday, February 26, 2019

Watercolor Wings for a Beautiful Insect!

A good friend and Splitcoaststamper (SCS) teammate had a birthday right before Valentine's Day.  Unfortunately, I had thumb basal joint surgery at the beginning of February, and my left hand is still in a cast almost to the elbow to allow healing where The basal thumb bone was removed and replace with tendon plaiting to act as my future thumb cushion.

Four days after surgery, I managed to finish a card for another friend with an earlier birthday.  It was already designed with its pieces already stamped and the selected  patterned paper cut to size.  I just needed to select my cardstock colors, do a little mat layer die-cutting, fussy-cutting, and gluing to finish.  But I did find it stressed my hand and caused some added pain.  It was a message to me I was doing too much too soon as I had previously been relatively pain free!  I needed to wait a few weeks longer before trying it again.  This week-end was the time so my birthday card would not be any later.

Per my usual mode of operation, I caught my SCS challenge list up to date, and then I browsed for ideas and inspiration.  I really liked the pattern paper collection used on my previous card, because I love the blues and greens color combination.  It seemed I was destined to stick with them, because one of the first things I spotted in the SCS Inspiration challenge was a canvas in very similar hues with butterflies!  
I'm really tired of winter, so building my card design around a beautiful spring insect, the butterfly, was perfect!   You may wonder the focus on an insect?  One of the challenges I wanted to enter this card into is the SCS Alphabet Challenge for Letter "I".


I decided to used the same paper collection, Naturally Eclectic, though different paper patterns, plus I focused on a light blue and green instead of navy and green.  Take a peek below at the finished inside and outside designs...not bad totally one-handed!


Ingredients:  SU Products:  Cardstock--Whisper White, Bashful Blue (ret.), Emerald Envy.  Patterns--Naturally Eclectic/ 2018; DSP Stack-Subtles 2012-2013/ Bashful Blue Dots.   Stamps (ret. 2018)--Watercolor Wings; Sweet Cupcake (sentiment).  Ink--Lemon Lime; Emerald Envy.  Punch--SU-Banner Triple; M. Stewart-Butterfly Trio.  Die--Leafy Eyelet Scallop.  SU Basic Pearls (Copic colored).  Chatterbox sentiment/ verse.  Size: 4-3/4 x 6".

Friday, November 23, 2018

Thinking You Much Better Real Soon!

One of my lady friends that I met at my September Girls' Get-Away has had a set back in her health.  I wanted to send her a card to let her know I've been saying some prayers and having positive thoughts to wish her much better real soon!  I had a few Splitcoaststamper challenges to get done in my on-going challenge catch-up goal, and with a few of those in mind, I set about to design and make a card for my friend.

I needed to use a shade of yellow called Xanthic in order to finish the Alphabet Challenge in Round 9, and with this in mind, I search for a dress on the Inspiration Challenge website with at least some yellow that could inspire me for the rest of my card.  I found the perfect floral dress. Now, I knew my card had to have flowers.  My layout idea and focal point were inspired by the Featured Stamper challenge, plus I had several old challenges to complete that required a stamped frame, plus an old technique.  I had some good ideas. . .my mojo getting juicy, so it was time to find some papers and get started.  Take a peek at my finished card below, I think she will enjoy the card, and I know I will enjoy crossing off some more completed challenges on my list!


Ingredients:  Papers:  SU cardstock--Basic Black, Gumball Green, Daffodil Yellow; SU Vellum; Patterned Paper--Basic Grey/ Origins.  Stamps:  SU--Serene Silhouettes (white flower stems), Lovely Wishes (frame flower); Our Daily Bread Designs--All Mother's (sentiment).  Inks: Memento--Tuxedo Black; SU White Craft Ink; Versamark.  Dies: Sizzix Labels Collection (frame).  Punches:  SU--Curvey Corner Trio (retired), Bitty Butterfly (retired).  SU Black Embossing Powder.  SU 2mm pearls.  SU Simply Clay:  Simply Pressed Clay, Buttons & Blossoms Simply Pressed Clay Mold (2013-14 both retired).  Stash: Bitty flower brad.  Copic markers: coloring for clay + brad.  Chatterbox verse.  Size:  5-3/8 x 6-1/8 inches.

Sunday, November 12, 2017

Christmas Medallion has Pzazz!

LOVE THIS KIND OF NEWS!

THIS CARD IS NAMED A 

SPLITCOASTSTAMPERS' FAVORITE 

OF THE WEEK ENDING - NOVEMBER 18, 2017


I'm needing to catch up on more cards for this Christmas season as well as my Splitcoaststampers' Alphabet Challenge.  I'm way behind in both categories!  Letter "M" is the current alpha challenge and it just opened with a bonus challenge added to use Letter"N" in the form of material with a nap or the Nib of your marker.  


I wanted to work those requirements into a Christmas theme, and I already had something brewing in my head using more of my Christmas gift wrapping paper from my re-cycle stash.  By planning carefully, I was able to fit my card into three Splitcoaststampers' challenges.  


While making this card, I learned that with the MISTI stamp tool, I can actually stamp a sentiment on gold glittery paper as long as it is the type that is fairly smooth without much of a nap, BUT you have to stamp over and over at least 10 times to get more and more depth of color and be patient to let it dry well.  I was going to use a gold shimmer vellum, but I did not have Navy embossing powder and the Stampin' Up ink did not dry well on the gold shimmer vellum so that I could use clear embossing.  


TIP:  When working with wrapping paper, which tends to be thin, I cut a 6" by 6" square of gift wrap and adhered it with my Scotch 3M tape runner to cardstock scraps to give it thickness and body.  If I used more than one scrap, I used scotch tape on the back side over the seam to be sure it was stabilized.  I also made sure I ran a double row of tape on the sides to allow for trimming my 6" square to fit any card size I planned to make, plus I ran a few tape rows toward the center horizontally and vertically.


Even with all my adjustments and changes as I put this card together, I'm pretty happy with the finished look. . .take a peek below, and then see "The Story" of making the card below the card picture.


The inside design and verse are under construction...check back later for posting.


Ingredients:  Paper:  Stampin' Up Night of Navy cs; DCWV Glitzy Glitter Stack (gold); Christmas re-cycle gift wrap (navy/ gold embossed).  Stamps: Stampin' Up--Hang Your Stocking (sentiment).  Ink: Stampin' Up Night of Navy.  Dies:  Stampin' Up Layering Circles Framelits (scalloped).  Punches:  Stampin' Up--1-3/4" circle; Curvy Corners (retired).  Stampin' Up Foil Snowflakes (medallions).  Ribbon: 7/8" Offray Shimmery Sheer--yellow (color modified with Copics: Y28/ YR23).  Size: 4-3/4" x 6".


The Story

I started my card with the look of a present or gift in mind and used a sheer shimmer ribbon vertically and horizontally like gift wrap.  I didn't have the exact color I needed, but not to worry...I colored my pale yellow ribbon using the wide angle nib of my Copic marker pens YR23 and Y28 to colorize it to the perfect gold!  Now, my card fits the Alphabet Challenge Letter "M" for Medallion and bonus Letter "N" to use material with a nap or the Nib of your marker.


I saw that the July Dirty Dozen Christmas Challenge asked you to create card with presents in mind...bows, boxes, old wrapping paper, or great a gift.  Old wrapping paper works just great for me!

For the yearly 2017 Christmas Card Challenge, my card does not fit any of the specific categories for the months, except December, which is "Anything Goes!"  Fortunately, in this challenge, we are given the monthly themes for the entire year, and we can post to any of the months at any time!  So, hey, I'm early for something for a change!

Monday, August 28, 2017

Let It All Hang Out Birthday!

OVER THE MOON!!!

THIS WAS ONE OF TEN
OF MY 2017 CARDS RECEIVING
A 2017 SCS BEST OF FAVORITES!!

GOOD NEWS!  THIS CARD IS NAMED A SPLITCOASTSTAMPERS 

FAVORITE OF THE WEEK ENDING - SEPTEMBER 2, 2017!!


We are celebrating my daughter-in-law's birthday a little late this year, because we were camping when her birthday arrived.  It seemed only fitting to celebrate her and my birthday celebration together since we are only two weeks apart.


I made her a special card with my new Penny Black kitty stamp called an Uplifting Occasion!  I thought I'd add a little humor by doing a play on words in the birthday verse I composed.  I also like the idea of livening up the card with the Starburst Background technique.  Here is a Splitcoaststampers link to their tutorial: http://www.splitcoaststampers.com/resources/tutorials/starburstbackground/


Take a peek below at Ginger's finished card, inside and out.  I think she will be delighted and get a laugh as well!


I thought I would enter my card into several Splitcoasterstamper's challenges:  Free for All: FA392 - choose your own "National Day".  My day will be National "Let It All Hang Out" Day; Dirty Girls' Monthly July Themes:  "Time to Relax."  Mine will me three challenges provided: CT0717 - make your showing how you Relax; WORD0717: make your card using things that fit NAPS - N=Nestablities, A= Aroma, P= Penny Black stamp, and S=Sponging; DINSP0717 - inspiration photo: a hammock.  Now, that was fun!


Ingredients:   Cardstocks:  Recollections--Essentials (Violet), Soft Side (Lt. Orchid)-inside; SU Sweet Sugarplum. Patterns: Recollections: Purple Ditsy Floral; K&Co.-Watercolor Bouquet-Purple; Floral Bouquet; Lang-West Plaza (damask/ sponged); DCWV Collage Art Stack (words/ sponged).  Darice: Foam Sheet.  Stamp: Penny Black-Uplifting Occasion.  Ink: Memento--Tuxedo Black; Copic Marker coloring.  Die: SU-Oval Framelits (lrg scallop).  Punch: EK Scallop corner-inside.  SU: Glimmer Enamel Dots. Bath & Body Works-Magic in the Air/ Diamond Shimmer Mist. Computer-verse. Technique: Starburst Background. Size: 5" x 6-1/4".

Saturday, August 12, 2017

Queen of the Gold Star Club!

BRINGING ME A SMILE!  

THIS CARD IS NAMED A

SPLITCOASTSTAMPERS FAVORITE OF THE

WEEK ENDING - AUGUST 13, 2017!!


My oldest son wanted me to make a card honoring the very first winner of his computer gaming challenge that he started almost ten years ago.  It will soon be the Gold Star Club's anniversary, and the card will go to the very first winner of the very first challenge question.  


My son had some very particular things he wanted the card feature.  It had to be gold, glitzy, have a large predominant star, and feature some stardust.  Not particular at all, right?!!  So, with these requirements, I got started.  Below is the result of my endeavors on behalf of the Gold Star Club!  David was thrilled and he thinks the woman, who had the correct answer first, will be as well:


Ingredients:  Papers: SU Naturals cardstock (retired); Recollection Shimmer-Brown; Best Creations: Glitter cardstock-Dark Gold; Paper Pizazz-Funky Stars on Yellow; DCWV Shimmer Stack-Bronze Pumpkin; Bazzill Dotted Swiss-Honey. Spellbinders: 5 Stars. SU Framelits-Holiday Collection-mini stars (retired). Sizzix Sizzilits Swirls (modified). WRMK Deco Corner Chomper.  Darice Rhinestones. Computer-generated sentiment. Handmade sentiment banner mats.

The Story

As mentioned above, about ten years ago, my son, David, started what he called the Star Challenge for his online gaming friends.  He would present a challenge question, and his gaming friends were allowed five chances to answer the puzzle correctly.  If they were successful, they were entered as member of the Gold Star Club.


The very first challenge presented was a two-part question: to name the voice speaking (a pre-recorded interactive part of the challenge) and the title of the game, which was a vintage computer game that he played as a young boy.  It took six months for some one to come up with the correct answers.  Strangely enough, on the very day the correct answer came in via email, a second correct answer followed within a few hours from two members, who didn't know each other and lived in different states!!  It was amazing that no one could guess the name of the voice or the name of the game correctly for over six months and then two were successful on the very same day within hours of one another.  These two winners became the first and second members of the Gold Star Club.  


Further challenges have been offered throughout the ensuing years, but none have taken so long for the correct answer to be presented.  The first person to correctly guess the very first challenge holds the Gold Star Club crown, because she not only answered it correctly, but one her very first try; therefore, she will receive this card honoring the ten-year anniversary of her win!  My son and I both hope she enjoys her card!

Monday, July 31, 2017

An Anniversary Twosome Sail With the Breeze!

I'M SMILING AGAIN!  

THIS CARD IS NAMED A

SPLITCOASTSTAMPERS FAVORITE OF THE

WEEK ENDING - AUGUST 6, 2017!!


We are celebrating our youngest's eleventh anniversary this year!  WOW! is it difficult to realize it has been that many years since this lovely couple married.  But, these two also celebrated the birth of their first child just a few months ago, so now it is easier to recognize that they've been married a few more years than five or so!  I wanted to make them a special card celebrating their first anniversary with Miss Callie Page in attendance as well.  Take a peek below at the finished card front and inside with my composed verse via the computer: 


THE BACK STORY!

I recently purchased this whimsical die-cut from Spellbinder, named Dandylion, which depicts the dandelion's seed head after flowering.  I thought I'd use it as an anniversary card with the two little seedlings sailing off in the breeze as a couple to begin their own family.  I dare say my imagination is a bit whimsical today!


My background is made with Stampin' Up re-inkers in Tempting Turquoise, Wild Wasabi, Daffodil Delights, and a touch of Lemon-Lime Twist, and the Danylion die-cut is made using black glitter paper.  I made the sentiment using my computer and printing directly onto my finished watercolor background.  I decided to add a perky little sheer ribbon and bow, and pop the watercolor front and its black mat up off the Tempting Turquoise cardbase.  I'm pretty happy with my watercolored background since I have not used this technique much, and I'm not totally comfortable with it yet.


Splitcoaststamper's is also hosting their annual Dare to Get Dirty Challenges for their members who are SCS Fan Clubbers.  Since we are not supposed to mentioned what the basis of the challenge is, I will just say this one is for the very first challenge initiated by *Understanding  Blue (*the hostess' SCS nickname).  There is a color challenge going on as well, which requires the use of the three colors I chose for my card, so it will be entered that challenge as well.


Ingredients:  Stampin' Up products: Cardstock--Tempting Turquoise, Basic Black, Watercolor paper; Inks--Tempting Turquoise, Wild Wasabi, Daffodil Delight, Lemon-Lime Twist.  Darice core'dinations Glitter Silk-black.  Die: Spellbinders Dandylion.  Ribbon: Stash-3/8" Offray.  Computer sentiment.  Size: 4-3/4" x 6".  Inside: EK Medium Scallop Photo Corner punch; SU: Daffodil Delight cs; Computer verse.  Technique: Watercolor...Let It Run.

Friday, July 14, 2017

Tweeting a Belated Happy Birthday to a Dear Sister-in-Law!

WOW!  I'M EVEN MORE GIDDY!  

THIS CARD IS NAMED A

SPLITCOASTSTAMPERS FAVORITE OF THE

WEEK ENDING - JULY 16, 2017!!


Take a peek below at the card that I designed and sent off as a belated birthday for one of my sister-in-laws on my husband's side of the family.  Also included below is the verse and complimentary design I created as well.  Then, follows The Story behind the creation.


The Story

With the slow recovery from my knee replacement surgery, I am so far behind, and I have missed so many birthdays and other events with my inability to climb stairs to my craft room.  Some are so far back, I will just have to let them go this year and concentrate on keeping up to date in the future.  Yet, I have several sister-in-laws' birthdays that I've missed, and I would really like to send them belated wishes if I can without getting behind with upcoming celebrations.

My sister-in-law, Dianne, is the wife of one of my husband's younger brothers.  They were married within a year of our marriage, and we spent a lot of time together as couples in the early years of our marriages.  This was before we each began a round of transfers around the country due to career promotions, etc.  We have never ended up residing in the same state in more than 30 years.  Just a few years ago, this younger brother passed away from a heart attack, but Dianne is still very much a part of the family, and she is always included in every reunion and get-together!

Since I have a new goal in cardmaking to try to enter more Splitcoaststampers' challenges, I thought I would focus my card design around at least one challenge's requirements.  I chose the Inspiration Challenge IC605 - Dessert Bies: Macaroons & Meringues, but ended up being able to use it in the Alphabet Challenge as well from its tag.   For the Inspiration Challenge, I went to the Pinterest inspiration board set up for the challenge.  Oh my, I learned a lot about macaroons.  While my stomach realized it was hungry and began growling loudly the longer I looked over those delicious-looking, beautifully, colorful morsels that can be any color in God’s Earth from soft pastels to bold and vibrant dark splashes of color!!  Below are the three particular pictures that inspired my card:


When I first start creating a card design, if I don't have a particular idea already in my mind, I check out my leftover, partial card pieces to see if there is anything that inspiring me to use it.  I found a yellow tag with pink ribbon and an uncolored birdie stamp tacked to a patterned dsp.  It was pretty bright and cheerful, but had a thanks sentiment stamped at the bottom of the birdies, which was actually part of the original stamp.  I thought...hmmm...trim off the sentiment and make the tag shorter to fit the shorter image.  Then, I separate sentiment tag with belated birthday might fit below the tag...I was in business and started rolling right along!

The little dsp attached had a bit of navy in the flowers; therefore, navy had to be the cardbase after seeing those lovely navy macarons (see above).  I switched out the pink tag ribbon for navy, and then I chose mat layer colors to add to the tag and dsp and layers to add to my cardbase.  Daffodil yellow would be my top layer and I decided embossing it would dress it up and make it more interesting and even better, crop the layer corners with my WRMK Deco Corner Chomper.  

When I began assembling, I popped up the tag and its layers on the yellow layer,  and then decided to pop up the yellow and Melon Mambo on the cardbase.  Before reattaching the stamped birdies to the tag, I colored them with Copic markers and finished with Clear Wink of Stella to add sparkle.  Because my tag was pretty small, I decided to use the Washi punch (SU retired) and modify it by shortening it and only used a one-word sentiment to keep its size in balance with the tag.  I'm pretty satisfied with my card for Dianne...take another peek above!


Ingredients:  Stampin' Up products: Cardstocks-Night of Navy, Melon Mamo, Daffodil Yellow.  DP: Gingham Garden.  Stamp-For the Birds (retired), Happy Birthday Gorgeous (sentiment).  Ink: Memento-Tuxedo Black, Wink of Stella-Clear.  Embossing Folder: Perfect Polka Dots (retired).  Punches: Washi Label,    1/4" Circle punch.  Ribbon: 3/8" Denim.  White Baker's Twine.  Other products:  Copic Markers; Darice: Foam Sheets.  Computer-verse.  Size: 4-3/4" x 6".

Friday, July 7, 2017

Lights, Action, Shine...A Son-in-Law's Birthday Celebration!

I'M GLEEFUL!  THIS CARD IS NAMED A

SPLITCOASTSTAMPERS FAVORITE OF THE

WEEK ENDING - JULY 9, 2017!!


My oldest daughter's husband is have a milestone birthday this month...the pressure is on!  I wanted to make something really different, and I had just the thing.  I recently bought a darling Lantern die from SugarPeas, and I have been dying to use it.  Since Don and Michele like to camp a lot, I thought the lantern would be perfect for Don.


In addition, I wanted to try and meet some of the challenge requirements on Splitcoaststampers.  As it turns out, I will be able to meet three different challenges with the card I designed for Don.  It will meet the July 6th - Ways To Use It: utilizing stars in your card, the Alphabet Round 7 Challenge: Letter L...some type of light, and the Gallery Monthly Theme for April 2017: #1 - Background Check requiring focusing on the card's background by using a background technique, special paper, etc.


For my background, I decided to make a watercolor background with a night sky and lantern light.  This will be only the third time that I've actually watercolored a background, but this time it will have a totally different style as it is not at all random.  I wanted a light burst of yellows and oranges to represent the lantern light and a night sky with stars.  


I watercolored all over with Crushed Curry ink and then darkened the yellow in the area where the lantern light would be shining using upward brush strokes.  My next color for the lantern light was an streaked application of Strawberry Slush in upward brush strokes as well.  My next step was to make my galaxy-type night sky around the lantern light.  Once again, I used flicked brush strokes, but smaller, toward my lantern light.  The colors and the order I applied them over the yellow base was: Old Olive, Island Indigo, and lots of Night of Navy to finish.  I added stars to the night sky by using a paint brush and flicking it with finger snaps to sprinkle my stars in random sizes, but all very small, using White Pearl Metallic Folk Art acrylic paint watered down.  


I must say it was a challenge.  I had to do a trial run and then re-make my final piece to get my lantern light in exactly the right area without the night sky bleeding to far into it.  All in all, I'm happy I challenged myself, and I'm pretty pleased with my result.  I think Don will be pleased as well.  Take a peek below at my finished card inside and out!


Ingredients:  Stampin' Up supplies:  Papers--Basic Black cs, Gold Foil, Watercolor paper;  Stamps--Balloon Adventures (verse); High Tide ("Shine" masked); Inks--Crushed Curry, Strawberry Slush, Old Olive, Island Indigo, Night of Navy; AquaPainter.  Other supplies:  Stamps-MFT/ At the Movies; Die-Sugar Pea/ Lantern; Wink of Stella-Clear (lantern light + sentiment words). Folk Art-White Pearl Metallic Acrylic paint.  Techniques:  Watercolor background; Paint Flicking (stars); Stamped Verse.  Size:  4-3/4" x 6".

Thursday, June 15, 2017

Graduation with Total Honors!

I'M GIDDY!  THIS CARD NAMED AS A

SPLITCOASTSTAMPERS CAS FAVORITE

WEEK ENDING - JUNE 18, 2017!!

Boy, you can't ask for much more!  Daughter Jackie just graduated today from the University of Washington with her Bachelors of Science Nursing and with summa cum laude 4.0 honors throughtout her journey to complete her B.S.N.  We are soooooo proud of her...I'm about to bust!

I decided to make Jackie's graduation card in UW colors...purple and gold...unfortunately, the picture shows it up more blue than purple...but really it is purple.  As I did not have any purple papers that were remotely appropriate, I went on Etsy and found some digital paper that I like in purples and gold.  Even though the paper looked purple and gold on the computer screen, they were navy blue and with white fleur de lis.  My next task was to move the two pieces into my PaintShop Pro program and re-color them to the appropriate colors,  That was finally achieve and I resized the papers in Word so the fleur de lis were smaller and the crown in the gold paper were also smaller.

After printing them, I decided to try something I've been thinking I should try.  About three months ago, when I was in Bath & Body Works, I saw a body mist named Magic in the Air, a diamond shimmer mist.  When I sprayed it on the paper sample piece, it put a beautiful shimmery mist all over the paper (and smelled good as well), and I thought, "Wow!  That would be great to use on cardmaking papers."  Now was the time to try it out, and it worked beautifully.  I sprayed it over all the papers and stamped images, except the graduation hat and the gold glimmer stars and tassel.  Unfortunately, the photo shot of the card does not show it off, but it's truly wonderful.  I see I will never have to buy Shimmer White cardstock again, because I can make my own!!!!  Take a peak at Jackie's finished grad card inside and out...I think she will love it.


Ingredients:  Cardstocks: Recollections Cardstock Essentials-purple; Stampin' Up Gold Glimmer (stars/ tassel), Naturals Ivory (retired); Clair Tales Purple & Gold Damask 06 & 07 (color-enchanced); DCWV Glitter Stack-golden yellow.  Stamps: Stampin' Up--Bravo (colored w/Copics).  Inks: Memento-Grape Jelly, Paris Dusk (two-step stamping).   Dies:  MFT-Stitched Star; Stampin' Up-Balloon Framelits (tassel); Impression Obsession-Instant Photo Corners.  Punch: Stampin' Up-IB Accents/ Star.  Bath & Body Works-Magic in the Air/ Diamond Shimmer Mist.  Computer-verse.  Size:  4-7/8" x 6".

Saturday, June 10, 2017

Graduation Congratulations!!

A long-time friend of my daughter's son is graduating from high school...boy how time flies!  His mother and grandparents hosted a graduation barbecue picnic in their backyard, and we were invited to attend.  I wanted to make Cody a special graduation card for this big event in his life.


I chose 2 Cute Ink's digital graduation squirrel image, because all the while Cody was growing up, he had a favorite gray squirrel that he even named that lived in Grandma's backyard.  Cody was sure that this squirrel came back every spring to visit with him by running up on  the deck and beckoning and chattering to him each time the squirrel saw him in Grandma's backyard.  I thought it only fitting that his squirrel friend be featured on his graduation card.


I tried my Heidi Swapp Minc foil transfer machine on the "congratulations" tag, using the Royal Blue foil and backed it with a royal blue and Crushed Curry cardstock enchanced with the Clear Wink of Stella pen to given the background a bit of glittery sheen to match the foil sheen of the greeting.  That was lots of fun.  I'm anxious to try more cards using my new Minc machine.  Take a peek below at Cody's "squirrely" graduation card!


My final step was to find just the right verse to add to my card's inside design created to compliment the card front.  I was able to craft Cody's verse from an inspiration that I found on the Internet...I think it has just right message for this special young man.


Ingredients:  Cardstocks: SU-Whisper White, Crushed Curry; Recollections-Royal Blue.  Darice Core'dinations: Dark Blue Plaid. 2 Cute Ink Digi: Squirrely Graduate.  Copic Markers.  Dies:  MFT-Stitched Oval Scallop Frame; Spellbinders-Scalloped Ovals LG.  Punches-EK Scalloped Edges; Scallop Photo Corner (inside).  Minc: Foil transferred sentiment tag; Minc Transfer Foil: Royal.  Wink of Stella: Clear.  Computer-made verse.  Size: 5" x 6".

Friday, February 10, 2017

Valentine for My Hubby!

MORE HAPPINESS!  ANOTHER CARD NAMED AS

SPLITCOASTSTAMPERS FAVORITE OF THE

WEEK ENDING - FEBRUARY 19, 2017!!


Valentine's Day is in a few days, and I finally finished my husband's card.  He is getting a second hot air balloon card in a matter of just a few weeks to make sure this Bucket List item is complete.  I made his first air balloon card for his birthday just a few week's, which shows just how versatile this new stamp/die bundle, "Lift Me Up," from Stampin' Up is. 

I wanted my color combination to be black, red, and white.  I had in mind to make my night sky in black, and I also wanted it to be a bit glossy so I tired something I was not sure was going to work, but it worked wonderfully.  I covered the entire black cardstock layer with Versamark ink, making sure is was thoroughly and evenly cover by pressing the stamp pad down over the entire area of the cardstock and then wiping the pad in long strokes over the entire surface again..  I sprinkled it with clear embossing powder and heat set it, making it glossy.  I pressed it overnight in a cardstock paper stack with several few books on top to make sure it was flat and level.


I envisioned puffy clouds in my night sky and decided to use the retired SU embossing folder Cloudy Day, because it has tiny embossing dots that make the cloud forms.  For some reason, this folder has the clouds positioned vertically rather than horizontally on the folder.  As I wanted to cover the entire paper with clouds, I placed the paper in the folder so the clouds would cover from side to side.  This left the bottom half of the paper outside the folder, so I made sure it didn't run all the way through the rollers and over the edge of the folder, which would cause the folder edge to crease my paper midway cross.  Next, I turned my black paper and re-positioned the unembossed side into the folder.  I tried to match the cloud impressions as closely as I could to those already embossed, and then I ran it through the Big Shop, again, just to the edge of the folder, but not over it to prevent a crease.  It turned out surprisingly well, and as my air balloon would cover a great deal of the mid-section of the embossed clouds, I did not feel it would show at all where the clouds were not formed quite right!

I decided on a patterned paper for my red color.  I chose a white mini dot on a red background, and I decided on Shimmery White for my card base.  I dressed up the corners with rounded corners and used the eyelet Curvy Corners punch on my black glossy top piece for the red to peek through.  I used the same papers for the balloon colors under the black patterned balloon die-cut overlay.  I colored the black balloon die-cut with Black Wink of Stella to give it a bit of sparkle. 


After roughly laying out my pieces, I decided to add some vellum clouds.  With my chosen sentiment being "love is in the air," I thought a large red glitter heart on my air balloon and smaller ones on each vellum cloud would finish off my card very nicely.


Take a peek below at my finished Valentine air balloon card, both inside and out.  I think my husband will be well pleased.


Ingredients:  Stampin' Up products:  Cardstocks--Shimmery White (cardbase), Basic Black, Real Red, Vellum.  DSP Stack-Brights.  Stamps-Lift Me Up (front sentiment), Sealed with Love (inside sentiment), Valentine's Love (hearts-inside/ retired).  Die:  Up & Away framelits (balloon, clouds). Punch: Curvy Corners (retired). Embossing Folder: Cloudy Day (retired). Embossing Powder: Real Red Glitter.  Other:  Zutter Corner Rounder punch.  Recollections: Foam Glitter Hearts; Charcoal Anthracite Embossing Powder,  Dies:  Papertrey Ink-Clouds/ Hero Arts-Cloud.

Monday, January 9, 2017

Splitcoaststamper's Best of 2016 Favorites!!!!!!!!!!

EXCITEMENT GALORE!!!!

SPLITCOASTSTAMPERS BEST OF 2016 FAVORITES


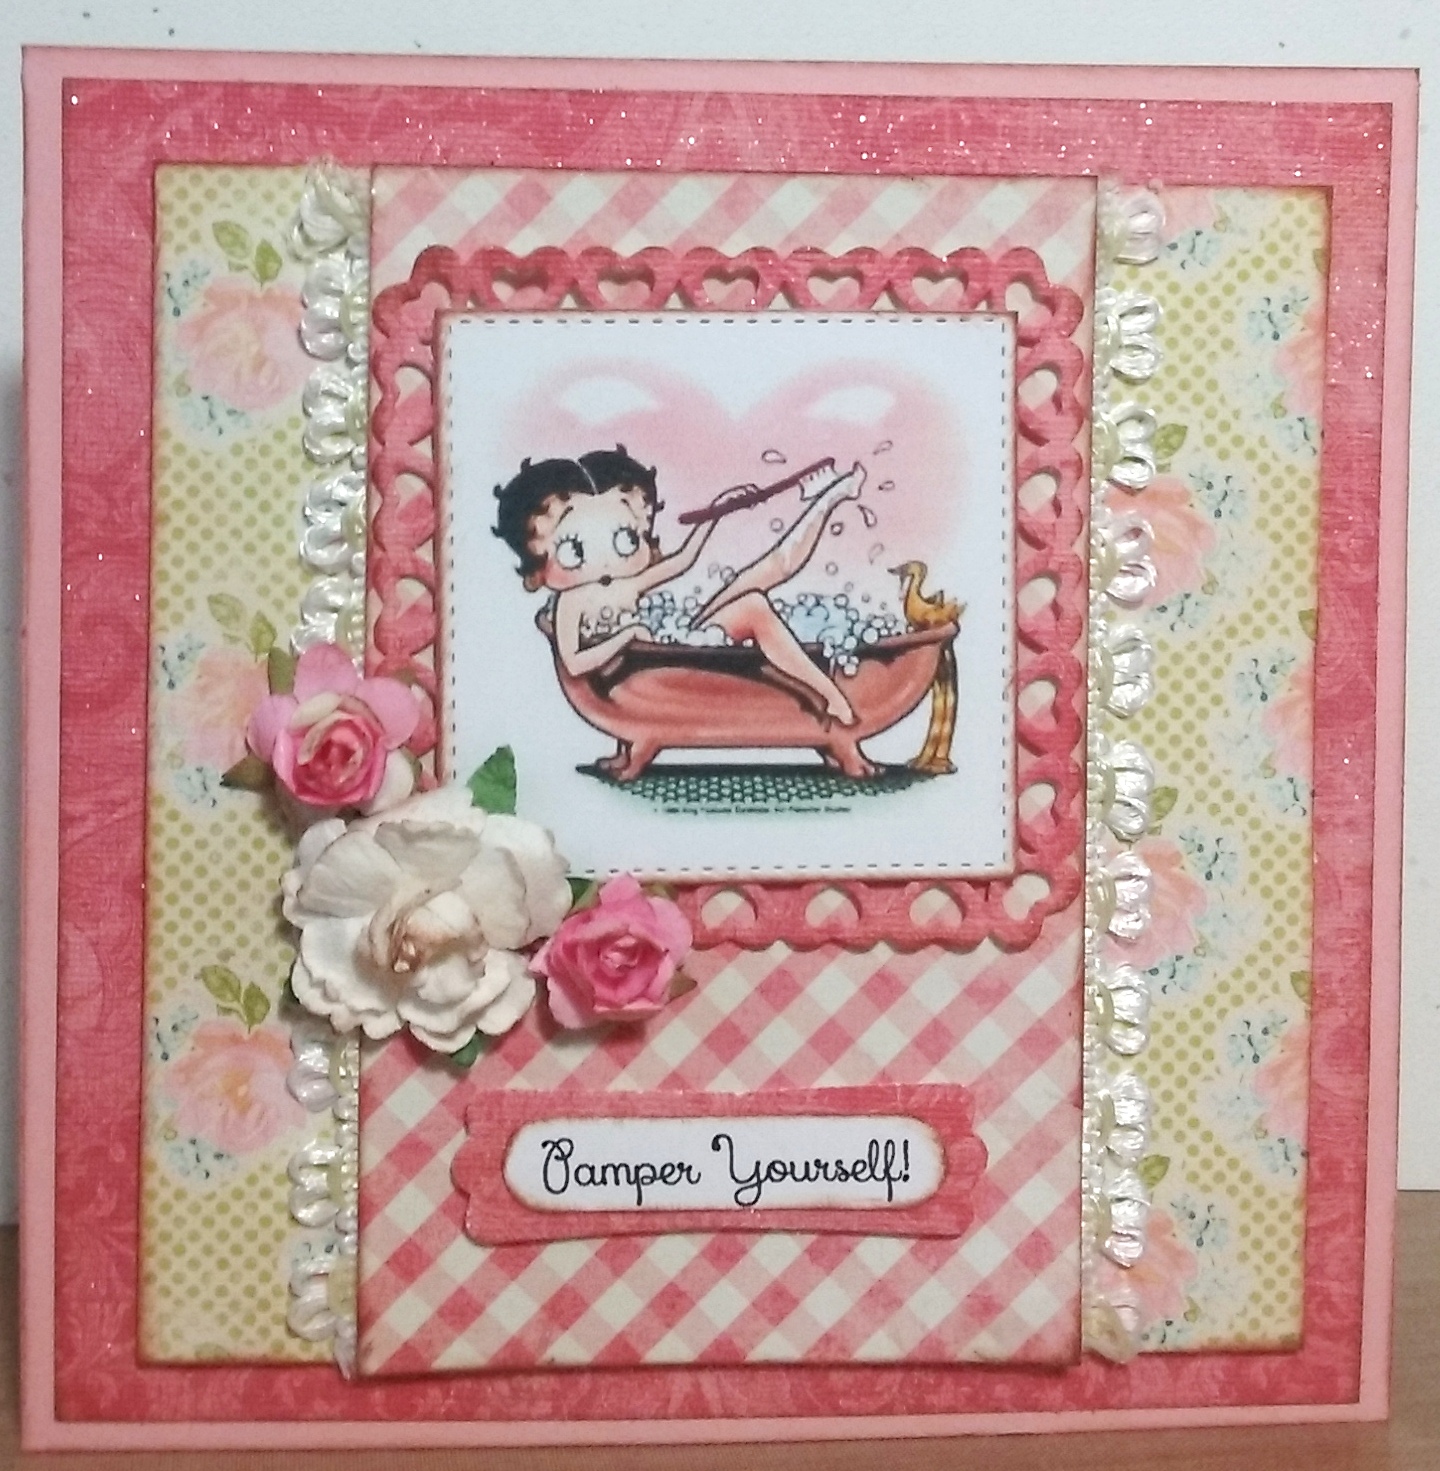
I am over the moon!  I have just been notified that my vintage-style BETTY BOOP card that I made for my daughter Michele's birthday this year at the end of June and was a Splitcoaststampers' Weekly Favorites for the week ending July 3, 2016, has now been chosen as one of their Best of 2016 Favorites!!  I can not even tell you how surprised I am. . .I did not even know that they had this award.  I just assumed, "Okay, how marvelous, my card was a Splitcoaststampers Weekly Favorite."  Can I say again, I'm over the MOON!

So, I thought I would repost this little beauty to refresh your memory if you read my blog often or to bring it to your attention if you missed its original posting and are now reading this one. (See below.)  I am also posting a link CLICK HERE back to that post as there is a story why the title of the post is, HAPPY CELEBRATIONS FOR "BETTY!" when my daughter's name is actually Michele.


Ingredients:  SU cardstock: Blushing Bride.  DCWV Old World Stack (glitter applied).  Authentique: Promise collection/ Six (floral).  My Mind's Eye: The Sweetest Thing collection/ Honey "Love" Fond (check).  Dies: Spellbinder's-Heart Squares; MFT-Stitched Squares STAX.  SU punches: Modern Label; Word Window (both retired).  Recollections flowers.  Elmer's Craft Adhesive Spray.  Martha Stewart Glitter: Crystal Fine.  EK punch: Basketweave Corner.  Computer-made sentiment and verse.  Size: 5-1/2" square.  (Splitcoaster Thread: Weed Ending 7-3-16/ #142).

Sunday, December 25, 2016

Two More for Santa's Sleigh Ride!

Well, MERRY CHRISTMAS TO ME!
My Black, Gold, & White Glitzy Santa's Sleigh (2nd below) has been chosen as a
SPLITCOASTSTAMPERS WEEKLY FAVORITE FOR THE
WEEK ENDING JANUARY 8, 2017!

My last two Santa's Sleigh bundle cards would be for my youngest two children. Jackie (and her new husband, Josh).  Jackie, my third child, always wanted to make gingerbread cookies, gingerbread houses,  and other Christmas cookies when she was young.  She love to put on the frosting and decorate them with all sorts of candies.  I found the perfect piece of Christmas paper, which was all about those gingerbread men jumping out of the oven saying, "Run, run as fast as you can; you'll never catch me for I'm the gingerbread man!"  Take a peek below at Jackie's card. . .I'm sure she will love it!


My final Santa's Sleigh card would be for my fourth child, Mark and his lovely wife, Ginger.  I thought I'd switch back for whimsical to elegant.  I seems to really love working with black and white on my Christmas cards, and I had purchased a Recollections stack of lovely papers that were all about black and white!  I really wanted to use one of these elegant papers so I selected one from the stack for my focal paper, and I was ready to begin.  Searching for the perfect Christmas three would be my theme for this card. . .a lovely Christmas tree to delivered to their door a wonderful sleigh and cute little reindeer.  Take a look below at this fourth card. . .I'm so pleased with the way it turned out, and I think Mark and Ginger will be equally pleased!


Ingredients:
Gingerbread Sleigh:  Stampin' Up products - Cardstocks: Shimmery White, Burnt Brown Sugar.  Stamp/Die Bundle: Santa's Sleigh; Joyful Christmas (sentiment).  Dies:  Swirly Scribbles thinlits.  Gumball Embossing Powder (retired),  Other - Cardstocks--Recollections: Christmas Green; Darice Core-dinations-Opulent Opal (white glitter); Recollections Foil-Brillant; Pattern: Pinecone Press-Holly Holly.  Gingerbread Men:  Fussy-Cut/ Pinecone Press-Baked with Love.  WRMK Corner Chomper/ Deco.   Size: 4-3/4" x 5-1/2".

Black & White:  Stampin' Up products - Cardstocks: Basic Black, Burnt Brown Sugar, Shimmery White, Copper Foil.  Stamp/Die Bundle: Santa's Sleigh; Joyful Christmas (sentiment).  Dies: Swirly Scribbles thinlits.  Punch: 1-1/4" Circle.  Clear Embossing Powder,  Black & Metallic Thick Baker's Twine.  Other - Ink: Memento Tuxedo Black.  Papers: Darice Core-dinations-Opulent Opal (white glitter); Pattern: Recollections Holiday Glimmer.  Wink of Stella--Clear (on sleigh black).  WRMK Corner Chomper/ Deco.   Size: 4-3/4" x 5-1/2".

Tuesday, December 20, 2016

More Christmas Tags to Cards Conversions

I got out the Christmas tags that I made last year at Dar and Luci's 2015 Christmas Tags class, which I fully intended to turn into card, but didn't get that far last year.  As I made these tags, I kept in mind that they would become part of a card, so that I modified lengths if needed, etc.  Take a peek below at more of my finished card made from these tags.


My first two tags were designed by Dar Peterson.  The only change I made to the first tag was to make my layers with narrower edges with the goal in mind to shorten the tag, making it more usable on a card front.  I began with a white card base and added a Real Red mat layer on top.  I found some pretty green holly berry paper to use for my center panel directly under the tag, adding a punched border in gold foil to its edges.  I really love the richness of all the red, greens, and gold together. . .it makes for a lovely card.

Ingredients:  Stampin' Up - Cardstocks: Whisper White, Real Red, Old Olive, Always Artichoke, Gold Foil.  Stamps: Your Presents (package stripe/ sentiment - 2015 Holiday).  Dies: Banners framelits; Mini Treat Bag (bow); Top Note BigZ (inside-retired).  Gold Embossing Powders: Gold; Real Red.  Other - Punch: EK Arrow Border;/ Victorian Corners.  Computer verse.  Size: 4-3/4" x 6".

With the second of Dar's tags, I made the tag exactly as she designed it because it was the perfect size just the way it was.  I decided on a red cardbase with a gray mat layer, but decided to dress it up the gray with my own stamped silver metallic snowflakes.  I found a mini red Christmas print that would coordinate nicely with the tags delicate diagonal stripe.  It would be the card's center panel, and  I added a petite decorative punched edge to its edges.  With the tag sentiment being "do not open before Christmas," I had to be a little innovative with my inside verse.  Take a peek below at the finished card with the inside designed and verse to compliment its front.


Ingredients:  Stampin' Up - Cardstock:  Real Red, Basic Gray, Whisper White, Silver Foil.  Kit: Oh, What Fun Tag Kit (silver snowflake/ tag background-2015 Holiday).  Stamps: Oh, What Fun!; Endless Wishes (snowflakes).  Ink: Real Red. Encore Metallic Silver (retired).  Home for Christmas Enamel Dots (2015 Holiday).  Real Red Thick Baker's Twine.  Other - Echo Park paper: 'Tis the Season.  Recollections punch: Mini Snowflake.  Pink Posh silver sequins.

My second two tag cards were designed by Luci Kirschbaum.  I made several changes to the tag.  I shortened the tags length, scalloped the bottom edge, added a Real Red mat under layer, and changed to a Christmas star ribbon rather than Baker's Twine.  Once all these changes were completed, I was ready to start on my card design.  I chose a Cucumber Crush green cardbase and added a real read mat layer and then topped these layers with a diagonal striped paper with rounded corners.  I banded the card face toward the bottom third tying it in a ribbon knot with the same ribbon used in the tag.  I was really happy with my perky ribbon tagged card.


Ingredients:  Stampin' Up - Cardstocks:  Cucumber Crush, Real Red, Whisper White (inside).  This Christmas Specialty dsp/ stripe.  Stamps: Peaceful Pines (+ Peaceful Pines framelits); To You & Yours Too (stars-2015 Holiday).  Ink:  Cucumber Crush, Real Red, Memento Tuxedo Black.  Punch:  Scalloped Tag Topper; Itty Bitty Accents-Star (inside-retired).  Stash: 5/8" Christmas Grograin ribbon.  Sequins.  Size: 4-3/4" x 6".

 My last tag card was also designed by Luci Kirschbaum, and my alterations to it was, once again, to shorten it a bit to better fit the card front and to add a silver glitter paper mat backing to the entire tag, not just behind the star punch-outs.  I decided my card design would have a Shimmery White cardbase with a Night of Navy mat layer under the silver-striped vellum.  I banded the card horizontally with a one-inch navy bank trimmed with a silver glitter punched border at the top and the bottom.  I finished it with navy blue rhinestones (colored with Copic markers) on all corners.   I finished off the card with an inside design to compliment the card front and added a Christmas verse using my computer.


Ingredients:  Stampin' Up - Carstocks: Shimmery White, Night of Navy, Silver Glimmer.  Fancy Foil Vellum/ Silver Stripe (retired).  Punch: Scalloped Tag Topper; Confetti Stars Border.  Dies: Wonderful Wreath framelits; Top Note BigZ (retired).  Other:  Punches: EK-Arrow Border.  Recollections-Mini Snowflake.  Rhinestones colored with Copics.  Computer-made Verse.  Size: 4-3/4" x 6".

Sunday, December 11, 2016

Liking That Christmas "Believe" Tag

I so liked my first card design made to accommodate the "Believe" tag I made at the Christmas tag-making event last year, that I decided to try other vellum patterns with my black and gold card. (Credit for the :"Believe" tag design belongs to Luci Kirschbaum...thanks Luci).   Check out my two additional black and gold creations with different vellums, which is your favorite?  (To see my first "Believe" card, see my post of December 6).


 But, why stop there...next I tried two more vellum patterns with a navy and silver version.  Now, which do you like...the black version or the navy version.  I have to admit, though the navy and silver are very nice, I still like the black version best.


Ingredients:
Black & Gold:  Stampin' Up products:  Cardstock--Basic Black, Whisper White, Gold Foil.  Winter Wonderland Vellum dsp stack (2015 Holiday).  Stamps--Lighthearted Leaves (sentiment-2015 Holiday).  Dies--Stars framelits.   Metallic Sequin Asst.  Black & Gold Thick Baker's Twine.  Ink--Memento Tuxedo Black.  Other:  EK punches--Victorian Corners, Arrow Border.  Stash--assorted brands of washi tape.  Dies--Savvy/ Ribbon Group (inside).  Size: 4-3/4" x 6".

Navy & Silver:  Stampin' Up products:  Cardstock--Night of Navy, Whisper White, Gold Foil.  Winter Wonderland Vellum dsp stack (2015 Holiday).  Stamps-- Lighthearted Leaves (sentiment-2015 Holiday).  Dies--Stars framelits.  Metallic Sequin Asst. (Navy = Copic colored).  Navy & White Baker's Twine.  Ink--Night of Navy.  Other:  EK punches--Victorian Corners, Arrow Border.  Dies--Savvy/ Ribbon Group.  Size: 4-3/4" x 6".

Monday, December 5, 2016

"Believe" Tag Becomes a Lovely Christmas Card

Once again, from the Christmas tag-making event that I attended last year, hosted by Dar Peterson and Luci Kirschbaum, I modified and turned a beautiful black and gold tag, whose original design must be credited to Luci.  This was my favorite of all tags, and I'm not sure why.  Maybe, it had to do with its black and gold colors, or the sentiment "Believe," or the stars..., OR, maybe it was a combination of all three!

First, I had to shorten the tag by over an inch, resulting in finished length of  4-3/4 inches.  Its original length was just too long to fit onto a card unless I wanted to make a very tall and narrow card, which I did not.  I actually like the tag shorter, as it caused all of the elements into a a more compact display with less white space.  To be able to shorten the tag, I moved the "Believe" sentiment closer to the toward the top, rearranged the metallic stars, and I made the washi tape angle just a bit more shallow.  My final touch was to make my tag string a bow instead of straight strands.  I liked the result just as well as the original...so I was ready to begin with making it into a card.

My card base would be black, and I found a gold metallic, small dot vellum that looked just right for the design I had in mind.  I added a black band across the lower half edged in a gold foil petite border punch and finished off the vellum corners with gold foil.  I am very happy with my card design and stoked with how well it displays this lovely tag.  (Thanks Luci for tag design that inspired my card).


Ingredients:  Stampin' Up products - Cardstock: Basic Black, Whisper White, Gold Foil.  Winter Wonderland Vellum dsp stack (2015 Holiday).  Stamps: Lighthearted Leaves (sentiment-2015 Holiday).  Dies: Stars framelits.  Winter Wonderland Washi (2015 Holiday).  Metallic Sequin Asst. Black & White Baker's Twine.  Ink: Memento Tuxedo Black.  Other - EK punches: Victorian Corners, Arrow Border.  Dies: Savvy Ribbon Group (inside).  Size: 4-3/4" x 6".

Friday, December 2, 2016

Poinsettia for Christmas

At one of the cardmaking events hosted by Stampin' Up demonstrators Dar Peterson and Luci Kirschbaum, we made a poinsettia card, which was designed by Luci.  


I decided to make a similar card with some modifications for my Christmas card-giving stash.  I used the same color scheme, but added an additional mat layer of gold glitter paper, which I carried over for my poinsettia stamens as well.  I added more large and small petals to my poinsettia with the goal of a bigger and fuller flower.  I also used the Curvy Corner punch on each of the card front corners, which allowed the gold glitter paper to peek through the three eyelet holes.


My poinsettia card will travel all the way to Texas to bring Christmas wishes to one of my husband's many relatives.  Take a peek below at my version of Luci's original lovely design.  I think I'm pretty happy with the results along with my interior creation and verse to compliment the outside design.


Ingredients:  Stampin' Up products:  Cardstocks--Shimmery White, Real Red, Old Olive.  2016 Brights Background Stack stripe.  Stamps--Reason for the Season.  Ink--Real Red.  Punches--Festive Flower Builder; Curvy Corner punch (retired).  Dies--Layering Ovals framelits; Top Note BigZ (retired).  Other: Darice Opulent Gold Glitter paper.  Craft Medley sequins/ red.  Computer verse.  Size: 4-3/4" x 6".  (Thank you Luci Kirschbaum for the design inspiration).

Wednesday, November 30, 2016

Merry Christmas Tag Card Travels to the East Coast!

I went to a Christmas tag-making event last year hosted by the Stampin' Up duo, Dar Peterson and Luci Kirschbaum, where we made ten different Christmas tags.  As I do not need Christmas tags for many package, I have developed a method to turn the tags into cards, and this was my plan for these tags.

Sometimes, because of size or dimension, the tags will need some sort of modification in order to make them into cards.  The merry Christmas tag designed by Luci was modified just a pinch before I designed a card for it.  First, I shortened its length to 4-1/2" long.  Next, the top corners of the tag were punched with the Curvy Corners punch, and I decided to add the same feature to the bottom two corners.  The remainder of the tag remains the same as the original design, and it is ready for my card.

I incorporated red foil, also used for the tag star, as straight border edges along my printed paper middle panel.  This middle panel is paper from the This Christmas Specialty dsp from the 2016 Holiday catalog.  I used an additional center strip of red foil bordered by scalloped edges, using one of the patterns in the three trees, which came from the Cherry on Top paper stack.

My tag card is finished and ready to send to my cousin who lives all the way across the United States on the East Coast.  I am sure she and her family will be pleased with their homemade card sent from Washington State.  Take a peek below at the finished front and inside designs.


Ingredients:  Stampin' Up products:  Cardstock--Whisper White, Cucumber Crush, Real Red, Red Foil.  Patterned--Cherry on Top stack; 2016-2018 Brights Backgrounds stack/ Real Red diagonal stripe; This Christmas Specialty dsp.  Dies--Perfect Pines framelits; Christmas Greetings thinlits.  Punches--Itty Bitty Accents-Star; Curvy Corner Trio (retired); Scalloped Edge Border (retired); Top Note BigZ (retired).  Gold Metallic Cording.  (Thank you Luci Kirschbaum for the tag inspiration).