Showing posts with label Wink of Stella-Clear. Show all posts

Saturday, March 19, 2022

Bringing Comfort in Loss

One of my Splitcoaststamper friends recently lost her mother, and I wanted to send her a sympathy card in the hope of bringing her comfort, knowing that her friends are thinking about her and sending lots of prayers.


I had a challenge I needed to complete that required a clean and simple style card, using only a small percentage of the front card surface.  Now, this is really a challenge for me since clean and simple is definitely not my style, though I often like cards others have done that have this style.  I would certainly agree that this style lends itself well to sympathy cards; therefore, I thought I'd give it a go.


I'm actually pretty happy with my finished card, and I hope my friend will find it brings that comfort and peace I'm hoping for her.  I do have to admit, I just had to add a very petite mat layer border provided by the card base and in a color pulled from the ink-blended, masked circle behind the bird. Take a peek at the finished card below, both inside and out:


Ingredients:  SU Melon Mambo cs, White Metallic Shimmer cs (Amazon). SU stamps: Best Bird (2016-2018). SU dies: Flourish Thinlits (2016-2018/ trimmed). SU Inks: Daffodil Yellow, Calypso Coral, Melon Mambo. Melon Mambo flicked splatters. SU punch: Curvy Corner Trio (2015-2017inside). SU sequins: Iridescent Assortment. SU: Blending Brushes. Wink of Stella/ Clear. Chatterbox sentiment/ verse. Size: 4-1/2 x 6 inches.

Saturday, October 9, 2021

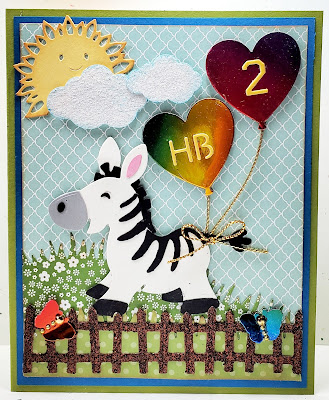
A Lovable Birthday Zebra for Evie!


Ingredients:  Stampin'Up: Cardstock--Lucky Limeaide, Pacific Point Blue, So Saffron; Patterned Papers--2013-14 Subtles Dsp Stack-Pool Party, 2016-17 Subtles Dsp Stack-Wild Wasabi, 2012-13 Subtles Dsp Stack-Certainly Celery; Ribbon--Gold Metallic Cord; Gems--Gold Metallic.  Other--Dies:
Marianne Collectables--Zebra-Donkey; Cottage Cutz Sun & Clouds; My Favorite Things--Frightful Fence; Lawn Fawn Party Balloons; IO Dies--Small Grass die, Insect Set (butterflies); Lawn Fawn--Grassy Hillside; Memory Box--Varsity Numbers; Poppystamp--Happy Birthday Banner Flags (Letters); Glitter--Impress Sparkle;  Wink of Stella/ Clear. Chatterbox verse--computer. Size: 4-3/4 x 6-inches.


CARD STORY & CONSTRUCTION NOTES

My youngest granddaughter will be turning two in mid-November, and I wanted to get her card finished early so I would be absolutely sure to have it on time!  Her birthday party theme this year will be butterflies.  

I had been fiddling around with my Marianne cute little zebra die many months ago when I was making last year's granddaughter birthday cards.  At that time, I die-cut the parts for several  zebras and though this little zebra girl turned out just as cute as I thought she would, I decided to go for 3D ballerina girls instead!  I got side-tracked and never quite decided what I was going to do with the little zebra, so she's been lurking around my craft for all this long while!  

I recently came upon a challenge that basically said to use up those items in your stash (or laying around) that were finished or partially finished or just throw them out.  I spotted the little zebra, and I knew I did not want to throw her out; therefore I was motivated to find her a home! 
 
Though a zebra did not exactly fit the butterfly theme, I thought I'd be able to fix that if I incorporated some butterflies flitting around a zebra card scene.  I even recycled a rainbow foil birthday party hat that this same birthday granddaughter had previously worn at a party.  Though it was torn a little, I'd been saving it as the perfect recycle paper to somehow use on a card for her.  The balloons and flitting butterflies I planned were the perfect thing!  Take a look at Evie's finished card below.  I'm pretty pleased with the results and think she will LOVE it!

Monday, July 5, 2021

Magical Birthday Wishes!

My oldest daughter's birthday is at the end of June, but we delayed her family birthday celebration until mid-July as my husband (her father) had knee replacement on her birthday, and a week later, he ended up returning to the hospital for another week with gastric complications.  By mid-July, we were ready to host a barbecue to celebrate Michele and her Dad's continued recovery.  Needless to say, I needed to finish her birthday card!


I have written several times about our little unicorn, Michele's 20-month old, little daughter, so dubbed during her stay in the NICU after her birth.  Because her veins were so small, her care team inserted her intravenous application into a vein in her head, which stuck up almost straight up, giving her the look of a unicorn with its cute little horn.  My inspiration for Michele's card came from this scenario.  I have acquired a multitude of stamps and dies with a unicorn theme because of this story that became part of our lives, and I thought it time the mother of our unicorn received her very own  unicorn card!  Take a look at Michele's finished card both inside and out!


Ingredients:  Stampin' Up products:  apers--Bermuda Bay cs, White Glimmer, Vellum. Stamps (2019-21)--Leave a Little Sparkle, New Wonders. Dies--Stitched Shapes--sm. circle. Embossing Powder--White. Ink--Smokey Slate. Ribbon--1/4" Snowflake Splendor (2020 Holiday). Wink of Stella-Clear. Glitter--Iridescent (ret.)  Other: Paper--Recollections 12x12--Mom's Diner/ Salt. Copic Markers. EK punch--Victorian Corners. Chatterbox Computer Verse. Size: 4-3/4 x 6-inches.

Sunday, January 31, 2021

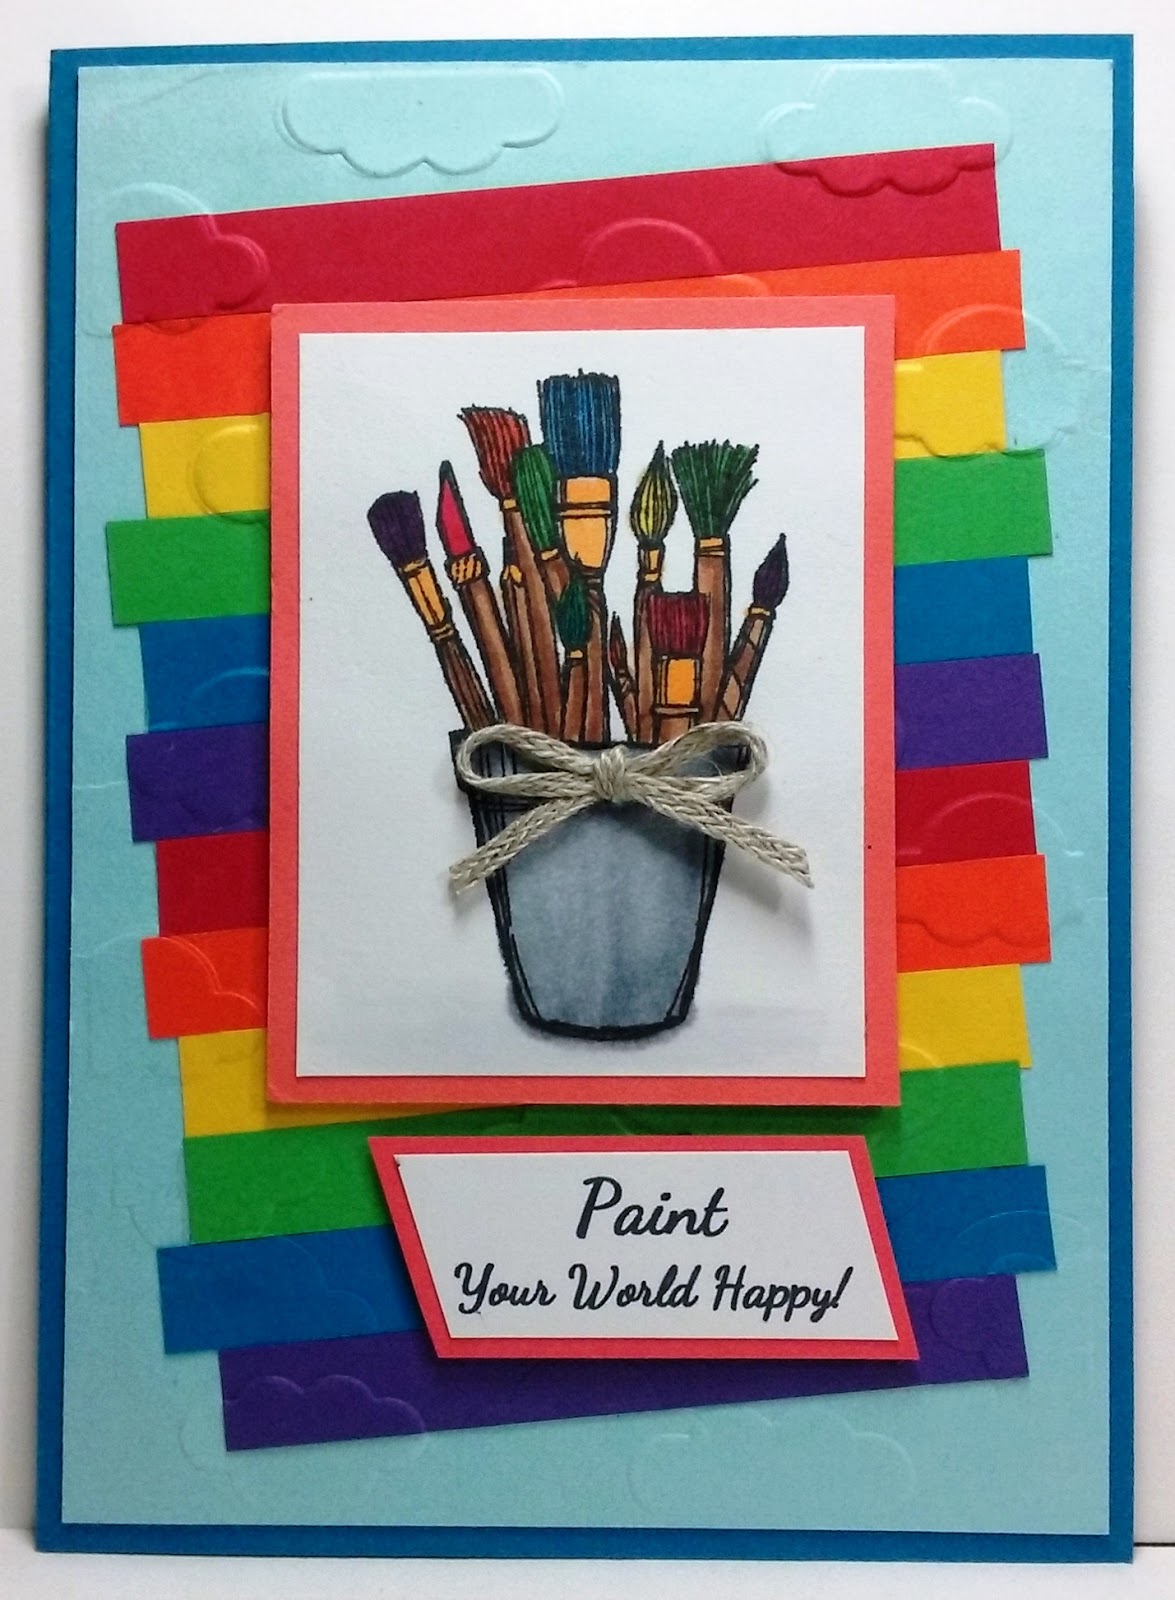
Paint Your World a Happy Rainbow!

Moving on with Splitcoaststampers' Virtual Stamp Night Mini Challenge.  Challenge #3 was posted at 7:00 p.m., ET and was entitled: Always Be A Rainbow.  Our hostess asked us to be inspired by the song Rainbow by Kacey Musgraves and create a card with a rainbow or using all the colors in a rainbow.


I chose to go with the idea of using all the colors in a rainbow rather than an actual rainbow.  The song is a bit sad, but also depicts another way to see your life, as there's always a rainbow in your life if you just look.  I decided my card would choose a happy rainbow with the sentiment Paint Your World Happy!  Note that it depicted crafting paint brushes...aren't we all happy when we are crafting, thus the sentiment works perfectly!  This little happy card will be for my friend, Sandy, whom I am missing during this long, never-ending social distancing. See the finished card below:


Ingredients:  Stampin' Up products:  Cardstocks:  Pacific Point, Balmy Blue, Real Red, Tangerine Tango, Daffodil Delight, Cucumber Crush, Pacific Point, Concord Crush, Poppy Parade, Whisper White.  Stamps--Crafting Forever (2017-19/ retired).  Trim--3/16" Braided Linen.  Wink of Stella--Clear.  Other:  Embossing Folder--Darice--Cloudy Sky.  Copic Markers.  Chatterbox sentiment (computer).  Size: 4-1/2" x 6-1/4."

Wednesday, December 25, 2019

Christmas...Joy to All!

This is my ninth card from the Totally Lovin' Christmas kit by Liz Thayer.  It is another with only minimal changes, which enhance, but do not change the overall look of the card.  My changes and/or additional are listed below.

1) I increased my card size from the traditional A2 size (4-1/4" x 5-1/2") to my favorite A6 sizing (4-1/2" x 6-1/4").  I did need to cut all new all the paper pieces larger and restamp my Christmas tree, but since I was donating the original kit pieces to my Mom, this was okay).

2) I decided to dry emboss the pink mat layer to add depth and texture.  I have to say, I really think this added tremendously to the card look!  

3) I colored my tree flowers with Copic markers, which I always thinks gives a more clear and beautiful look with shading control.  

4) I added Wink Of Stella-Clear to add a touch of shimmer and mini pearls to each flower...I love these additions to the look!  

5) I eliminated the loopy silver thread in the upper left corner between the silver foil layer and tree stamp layer.  I didn't see any beauty added with the thread, and with my additions of embossing, shimmer, and pearls, I thought it a bit too much.

I am really thrilled with the final look of this card.  That added embossing was a perfect idea if I don't say so myself!


Recipe ingredients:  Stampin' Up products:  Cardstocks--Whisper White and  Blushing Bride.  Champagne Foil.  Stamps-=-Shine Bright (tree/ sentiment - 2019 Holiday/ p. 28).  Embossing Folder--Filigree Frames (retired).  Basic Pearls--2mm/ 1/16".  Gold Faceted Gem (smallest)--tree topper.   Punch--Curvy Corners (inside/ retired).  Other:  Copic coloring--Tree trunk--E21, E23, E27; Leaves--G82, YG67; Berries--RV29.  Flowers--RV00, RV11, RV34.  Wink of Stella--Clear.  Pink Posh sequins.  Chatterbox verse.  Size A6--4-1/2 x 6-1/4 inches.

Thursday, December 5, 2019

Christmas Wrapped in Holiday Spirit!

I'm onto my third Totally Lovin' Christmas modification...a cute little present snowman.  This one was a bit too plain for me, and the Soft Sea Foam green didn't do much for me with the blue.  I put my re-designing thinking cap on, and my soft green became a pinked white glitter paper center panel, my little snowman got a lot of fussy-cutting, and he changed his hat color too.   I decided he needed a navy cardbase with a silver foil mat layer between the Seaside Spray front panel, which surely need a bit of snowflake embossing to bring out some lovely texture.  My sentiment needed a pick-me up with a navy matting to coordinate with the new cardbase color.

I kept the layout with modifications, added new papers, dry emboss texturing, some glitter, foil, and a popped up fussy-cut snowman...it's done, and I am pleased.  This card surely must go to my snowman-loving friend! 


Meanwhile, when I saw the "square" snowman, I was thinking about a Splitcoaststamper challenge I was sure I'd seen requiring using things with squares.  My geometric snowman would surely fit!  Take a peek at the finished card below, both inside and out.


Ingredients:  Stampin' Up products:  Cardstock--Night of Navy, Balmy Blue, Silver Foil, Whisper White.  Stamp: Lots of Cheer (snowman/ sentiment).  Dies: Finishing Touches Edger (pinked).  Embossing Folder: Snow Burst (2011 Holiday).  1/4" Metallic Seaside Spray ribbon (2019 Holiday).  Other:  Colorbox Glitter paper--Fresh Snow.  Inks--Memento Tuxedo Black.   Colorbox Charcoal Cat Eye (ink distressing).  Punch--EK Victorian Corners.  Copic markers--Snowman/ B000, B21, B32, O; Hat/ B91, B95, B97; Ribbon/ R00, RV23, R83.  Scarf/ YG13.  Carrot/ YR18.  Wink of Stella-Clear (ribbons).  Size: 4-3/4 x 6 inches.   (Thanks to Liz Thayer for original design idea that I took the liberty of modifying).

Friday, November 29, 2019

Joyful Season

Here's another redesigned Christmas card from Liz's November Totally Lovin' Christmas.  I did quite a bit of rearranging, adding and subtracting, basically changing the card design almost entirely.  I used the original stamped wreath image, but colored it with my Copic markers, and the red glitter strip with the bell, though I moved the bell upward about an inch.   I made the wreath panel into a 2-1/2-inch square rather than a 3-inch rectangle and repositioned it near the top rather than at the bottom.  I did leave the red glitter mat layer beneath.
.
I enlarged my card to an A6 size by adding a new cardbase layer, and added festive patterned Christmas paper for the top front layer.  I added Clear heat embossing to this paper to give it some sheen.  The patterned paper really perked up the card and brought it to life.  I chose a new and larger sentiment stamped on the same green as the cardbase and added it to a red glitter mat layer shaped with a decorative die.  I popped both the wreath and the sentiment up off the patterned paper front.

I am delighted with the finished look and like all the additional sparkle and sheen.  I then created a decorative inside design to coordinated with the outside.  Take a peek below at the finished card inside and out!


Ingredients:  Stampin' Up products:  Cardstock--Whisper White, Pear Pizzazz, Red Glimmer paper.  Stamps--Lots of Cheer (wreath/ sentiment).  Dies--Labels Collection.  Linen Thread. Mini Jingle Bells (2019 Holiday).  Other:  Patterned paper--Candy Candy/ Holly Stripe/ unknown.  Zutter corner punch.  Copic markers--Wreath Bells--G40, G21, YG68, G07; Ribbon--R01, R32, R37, R39 (lots of blending).  Wink of Stella Glitter Pen--Clear.  Chatterbox verse.  Size: 4-1/2 x 6-1/4.

Monday, October 28, 2019

Sympathy for the Loss of a Son!

A kind and thoughtful lady that I met, probably, ten years ago, who is my Mom's Stampin' Up demonstrator, lost her 16-year old son due to a car accident a few months ago.  I was unable to make a sympathy card for her son due to recovering from hand surgeries.  So, I had to be satisfied with sending thoughts and prayers to her and her family, as well as joining a Facebook condolence post on her behalf, but I made a note that I really wanted to make her a card in the future as soon as I was able.


Meanwhile, I had a card idea started "brewing" in my head based an Easter card made by my Stampin' Up demonstrator, Dar Peterson, several years ago.  I loved her idea of the pretty oval floral-printed vellum oval, which reminded me of a church stained glass window, that she used as the backdrop for the cross on her card.  I thought it would make a lovely feature for a sympathy card.  At the same time, I was reading up a little on the Splitcoaststamper challenges available at the time, especially the Inspiration Challenge, which I always like to enter.  I found a metal scroll, rustic cross and a light blue cross ornament, which reminded me of a scrolled lattice background stamp that in blue might make a lovely oval vellum "window" for my masculine sympathy card.  I searched through my background stamps and found the lattice-style stamp that I was thinking of and place it on my craft table as a reminder for the future when my hands were better.


My hand recovery came about just before my four-week visit to my Mom in California in October and November.  Before I left, I tried out my vellum oval "window" idea and made several ovals to take with me.  Space was limited as I was flying.  While there, Mom and I got busy making cards to try and catch-up on missed occasions and also to build our Christmas card stashes.  I specifically worked on my three needed sympathy cards...the first being the one for this lovely Stampin' Up friend's sorrowful loss.   


Using Dar's original design as an idea base, I made several modifications to her card to make it fit for a sympathy card, plus make it a "more me" card.  I enlarged my card by adding more color layers with a different embossing folder pattern, plus a different color treatment, ribbon style, and sentiment layering dies.  I also added Copic color to my dove, stamped my lattice-patterned oval vellum "window" using a background stamp in Baja Breeze ink, added a scallop mat layer, and composed my own sentiment and interior verse.  Take a peek below at the finished card inside and out!


Ingredients:  Stampin' Up products:  Cardstocks--Whisper White, Dapper Denim, Vellum-Translucent.  Stamps--Serene Garden (dove).  Dies--Crosses of Hope (cross), Layering Ovals.  Ink--Baja Breeze (oval window), Sahara Sand (dove)  Embossing Folder--Stripes.  Other:  Stamps--Just Rite Modern Lattice Background stamp (oval window).  Dies--Spellbinders Grommet Tags w/modified ends using Spellbinders Classic Triple Scallop Edges. Ribbon--Offray 5/8" Stitched.  Punch: EK Victorian Corners.  Copic coloring--dove.  Wink of Stella-Clear (dove wings).  Chatterbox sentiment/ verse.  Size:  4-3/4 x 6 inches.  (Thank you Dar Peterson for the wonderful card design from which my card evolved).

Saturday, March 10, 2018

Miss Callie's First Birthday!

My granddaughter is having her first birthday!  Oh, how exciting and so much fun to make her a one-year old birthday card!  I've been busy making ice-cream cakes for the birthday party event, so have left myself little time to get her birthday card finished!  I did start on it because I wanted to try a technique that I've been eyeing for more than a year called Faux Tile Sponging, which is similar to Delft Tiling, except you don't stamp a pattern on the tiles to get a similar look to Delft pottery.  The two techniques are similar in that you do make a diagonal grid scored background on both and sponge ink onto scored grid by using a mask over your score lines and sponging color onto the edges of your tiles. 


Before I figured out what cute focal point I wanted to use or planned my layout design, I visited the Splitcoaststamper challenges forum to see what inspiration I might find.  I planned to use the Alphabet Challenge, Round 8, Letter Y for yellow, but when mojo arrived from the Inspiration Challenge, I decided to go with Letter G for giraffe!  I found the foundation for my layout by visiting the Featured Stamper's gallery of Bronwyn Eastley.  I did modified Bronwyn's original layout quite a bit to make it fit my baby theme for my card!   Take a look below at granddaughter Callie's birthday card, plus the inside design with Grandma's created verse.  I'm thinking she will like it, especially when she's around four to five years old!


Ingredients:  Stampin' Up cardstock:  Very Vanilla, Lemon-Lime Twist.  Stampin' Up Ink: Daffodil Yellow, Lemon-Lime Twist.  Precious Moments Coloring Pages digital image.  Copic Markers.  Wink of Stella-Clear.  Die: unknown/ gift.  Ribbon: stash.  Stampin' Up Pearls.  Technique: Faux Tile Sponging.  Size: 4-3/4" x 6".

Tuesday, February 6, 2018

A 2018 Valentine for Mom!

It's time to make a Valentine card for my Mom!  I sure miss her...with all my knee and hand issues starting over two years ago, I've missed three of my traditional semi-annual trips to visit her.  I will not be able to go until this coming fall due to my second knee replacement in March!  Mom will be a spry 93-years old in August, 2018.  We always spend lots of time cardmaking together on my visits, along with my sister who lives in the same town in California!  We usually schedule a week-long girls' get-away to Mt. Shasta...what wonderful memories!


I pulled out some of my old unfinished Liz Thayer card kits and their pictures to see what I might use and get them out of my too full "To Do" box.  I found this little gem that I never put together during my knees "hiatus."  I love the paper colors and Liz's design, so my plan was to keep it quite similar, but add a little here or there to put a little "me" into it.  Then, I would design a complimentary inside and verse to finish it off.


I re-cut and enlarged the white cardbase and added a Crisp Cantaloupe layer between the base and the black layer to add more color.  (I saved the old cardbase to cut and use for the inside card verse).  I added rhinestone gems to the four corners, the banner points, hearts, and sentiment circle, but the bones of the design still shine through.


Now that Mom's card is finished, it really reminded me how much I loved the Valentine Stampin' Up products I bought in 2015 and 2016 but never had the opportunity to use.  I will check out some Splitcoaststamper challenges to see if any of them fit, as I already had the colors, papers, and design ideas before beginning my card.  Take a look below at the finished card inside and out.  I think Mom will be pleased!


Ingredients:  Stampin' Up papers:  Cardstock--Whisper White, Basic Black, Crisp Cantaloupe (retired); Patterned dsp--Stacked with Love.  SU stamps: Hello Life (2016-retired).  SU: Happy Heart EF.  SU punches: Itty Bitty Accents Pack (2016-retired); 1/2" Circle; 2" Circle; 2-1/4" Scallop Circle.  SU-Rhinestones.  Wink of Stella-Clear.  Computer-composed verse.  Size: 4-1/2' x 5-5/8".

Friday, July 7, 2017

Lights, Action, Shine...A Son-in-Law's Birthday Celebration!

I'M GLEEFUL!  THIS CARD IS NAMED A

SPLITCOASTSTAMPERS FAVORITE OF THE

WEEK ENDING - JULY 9, 2017!!


My oldest daughter's husband is have a milestone birthday this month...the pressure is on!  I wanted to make something really different, and I had just the thing.  I recently bought a darling Lantern die from SugarPeas, and I have been dying to use it.  Since Don and Michele like to camp a lot, I thought the lantern would be perfect for Don.


In addition, I wanted to try and meet some of the challenge requirements on Splitcoaststampers.  As it turns out, I will be able to meet three different challenges with the card I designed for Don.  It will meet the July 6th - Ways To Use It: utilizing stars in your card, the Alphabet Round 7 Challenge: Letter L...some type of light, and the Gallery Monthly Theme for April 2017: #1 - Background Check requiring focusing on the card's background by using a background technique, special paper, etc.


For my background, I decided to make a watercolor background with a night sky and lantern light.  This will be only the third time that I've actually watercolored a background, but this time it will have a totally different style as it is not at all random.  I wanted a light burst of yellows and oranges to represent the lantern light and a night sky with stars.  


I watercolored all over with Crushed Curry ink and then darkened the yellow in the area where the lantern light would be shining using upward brush strokes.  My next color for the lantern light was an streaked application of Strawberry Slush in upward brush strokes as well.  My next step was to make my galaxy-type night sky around the lantern light.  Once again, I used flicked brush strokes, but smaller, toward my lantern light.  The colors and the order I applied them over the yellow base was: Old Olive, Island Indigo, and lots of Night of Navy to finish.  I added stars to the night sky by using a paint brush and flicking it with finger snaps to sprinkle my stars in random sizes, but all very small, using White Pearl Metallic Folk Art acrylic paint watered down.  


I must say it was a challenge.  I had to do a trial run and then re-make my final piece to get my lantern light in exactly the right area without the night sky bleeding to far into it.  All in all, I'm happy I challenged myself, and I'm pretty pleased with my result.  I think Don will be pleased as well.  Take a peek below at my finished card inside and out!


Ingredients:  Stampin' Up supplies:  Papers--Basic Black cs, Gold Foil, Watercolor paper;  Stamps--Balloon Adventures (verse); High Tide ("Shine" masked); Inks--Crushed Curry, Strawberry Slush, Old Olive, Island Indigo, Night of Navy; AquaPainter.  Other supplies:  Stamps-MFT/ At the Movies; Die-Sugar Pea/ Lantern; Wink of Stella-Clear (lantern light + sentiment words). Folk Art-White Pearl Metallic Acrylic paint.  Techniques:  Watercolor background; Paint Flicking (stars); Stamped Verse.  Size:  4-3/4" x 6".

Saturday, June 10, 2017

Graduation Congratulations!!

A long-time friend of my daughter's son is graduating from high school...boy how time flies!  His mother and grandparents hosted a graduation barbecue picnic in their backyard, and we were invited to attend.  I wanted to make Cody a special graduation card for this big event in his life.


I chose 2 Cute Ink's digital graduation squirrel image, because all the while Cody was growing up, he had a favorite gray squirrel that he even named that lived in Grandma's backyard.  Cody was sure that this squirrel came back every spring to visit with him by running up on  the deck and beckoning and chattering to him each time the squirrel saw him in Grandma's backyard.  I thought it only fitting that his squirrel friend be featured on his graduation card.


I tried my Heidi Swapp Minc foil transfer machine on the "congratulations" tag, using the Royal Blue foil and backed it with a royal blue and Crushed Curry cardstock enchanced with the Clear Wink of Stella pen to given the background a bit of glittery sheen to match the foil sheen of the greeting.  That was lots of fun.  I'm anxious to try more cards using my new Minc machine.  Take a peek below at Cody's "squirrely" graduation card!


My final step was to find just the right verse to add to my card's inside design created to compliment the card front.  I was able to craft Cody's verse from an inspiration that I found on the Internet...I think it has just right message for this special young man.


Ingredients:  Cardstocks: SU-Whisper White, Crushed Curry; Recollections-Royal Blue.  Darice Core'dinations: Dark Blue Plaid. 2 Cute Ink Digi: Squirrely Graduate.  Copic Markers.  Dies:  MFT-Stitched Oval Scallop Frame; Spellbinders-Scalloped Ovals LG.  Punches-EK Scalloped Edges; Scallop Photo Corner (inside).  Minc: Foil transferred sentiment tag; Minc Transfer Foil: Royal.  Wink of Stella: Clear.  Computer-made verse.  Size: 5" x 6".

Friday, July 22, 2016

My Sister-In-Law July...Number Two's Birthday!

My second sister-in-law birthday in July's card is due.  This one is for my husband's sister, Jeanie, who lives in Colorado.  Her card was one that I decided upon and set aside after I finished it at my Mt. Shasta Cardmaking Girls' Get-Away.


Ingredients:  Stampin' Up products:  Cardstocks--Blackberry Bliss, Old Olive, Whisper White, Gold Glimmer.  Pattern: Wildflower Fields dsp (2016 SAB).  Stamps--Friends & Flowers (2016 Occasions); Perfect Pairings (2016 SAB).  Inks--Blackberry Bliss, Old Olive.  Punches--Festive Flower Builder; Curvy Corner Trio (inside/ modified).  Wink of Stella-Clear.  Metallics Sequins.  (Thank you to Luci Kirschbaum for her original design inspiration).  Size: 4-5/8" x 5-3/4".


The Card's Story & Other Tidbits

The original card design belongs to Luci Kirschbaum and was presented at a cardmaking event in January of this year, sponsored by Luci and her side-kick, Dara Peterson.  It was a delight to be able to take a look at the new Occasions mini catalog and the Sale-A-Bration Freebie brochure.  Luci's card design uses stamp sets from both of these publications, and though simple, it is eye-catching and very appealing.  I just love the color Blackberry Bliss, and I am so sorry to see its two-year availability culminate at the end of May.


I finished off this card at my Mt. Shasta get-away in May and decided it would be ear-marked for Jeanie's birthday.  I had not finished it at the card event in January, because I wanted to add a bit more color as it just seemed too white for me.  My solution was to add two mat color layers:  the new Blackberry Bliss cardbase instead of white, and an Old Olive layer.  I also wanted to add some Old Olive leaves to my flower.  


When I added Wink of Stella-Clear to my flower petals to add some sparkle and shine, my stamping ink was evidently not quite dry, so it smeared and filled in the stark white petals with a light, blackberry-sponged look.  I rather liked it; therefore, I did not feel the need to re-make my flower again.  This was one of those moments where a mistake was not a mistake at all, but a happy event.  On that note, I think Jeanie will be very pleased with her homemade birthday card.

Tuesday, December 22, 2015

Jolly Stars (Totally Lovin' Christmas #6)!

I'm rolling along finishing another card that I started at Liz Thayer's Totally Lovin' Christmas cardmaking event!  This one if full of jolly stars, and indeed, we did have a jolly time making cards, seeing old friends, and socializing as we made Liz's superbly designed cards.

I have to confess that I can seldom make a card exactly as it is designed and presented at an event such as this.  For some reason, when I see an already designed and finished card, my creative mojo starts zinging into my mind, and I have all sorts of ideas of how to tweak or change a card just a bit to make it more me.  Everyone has their own style and ideas in cardmaking, and I hope my hostesses do not take offense if I don't end up with the exact same card as designed.  One thing I know for sure, I love larger than A2 sized cards and I also like more layers of color than many other do.  My changes usually incorporate adding layers, which ultimately makes the card a bit larger.


On this Jolly Stars #5 card, I was not fond of the Iridescent embossed smaller stars, it changed the color too much, and made it so they didn't quite match the shades intended.  I thought I'd try clear embossing, which turned out so well that I decided to clear emboss the larger stars as well.  While I was at it, I embossed the Jolly greeting with Cherry Cobbler embossing powder rather than just stamping it in Cherry Cobbler ink.  Next, I decided the layers needed to have a bit more of an edge between layers, and also I felt it needed a white layer to set off the Mossy Meadow and the Red Glimmer papers.  Thus, I added white as a bottom layer making it my new cardbase.  My final addition was to add Clear Wink of Stella all over each of the stars and to the Crumb Cake band to add a bit of shimmer.

For those of you who are not familiar with the "Winks," they are a liquid brush pen that adds a coat of thin shimmer gloss to any surface by painting it on with its brush tip.  It comes in many colors, clear, black, gold, and silver to name a few.  Spoiler Alert:  the new Occasion mini catalog, which will be introduced on January 5, 2016 and run through May 31st, introduces the Wink of Stella Clear and Gold pens for purchase.  I know you'll like them.  Unfortunately, it doesn't really show up all that much in my card photo, but you certainly can see it when you view the actual card!


Recipe:  Stampin' Up products:  Cardstock--Whisper White, Mossy Meadow, Crumb Cake, Cherry Cobbler, Red Glimmer.  Merry Moments dsp.  Stamps--Oh, What Fun.  Star Framelit dies (size #1/ #2; #1 = smallest).  Decorative Label punch.  Clear Embossing Powder.  1/4" Real Red Cotton ribbon.  Other:  Clear Wink of Stella.  (Thanks Liz Thayer for the original card design).