Showing posts with label Copic coloring. Show all posts

Tuesday, September 27, 2022

A Spooktacular Birthday! ("Spooky Treats" Sept. 2022 Paper Pumpkin Alternative)

Believe it or not, this card started with the thought that I needed to make a birthday card for my son-in-law, which falls in mid-October. I began by perusing my Splitcoaststamper challenge list to see which challenges might spark ideas for my card design. I happened on a spider card in the Featured Stamper challenge that gave me the idea to do something about Halloween for his card as he loves really getting into Halloween and finding spooky places to visit to celebrate this holiday. This got me started with all kinds of other ideas about using the new September Paper Pumpkin Spooky Treats kit and making an alternative design card, etc. All ideas gathered from selected challenges eventually jelled into this Halloween card for his birthday: 


Ingredients: Stampin' Up: Cardstock--Basic Black, Pacific Point, Crushed Curry, Whisper White scraps. September 2022 Paper Pumpkin (plaid, spider, ghost, stars). Punch: 2" Circle. Embossing Folder--Square Lattice. Other: Core'dinations Core Couture--Black Tie glitter paper. Dies--Spellbinders Petite Scallop. Ink--ColorBox Cat Eye-Charcoal (edge distressing). Punch--EK Medium--Victorian Corner; Copic Markers--Spider re-color. Chatterbox sentiment & verse (computer-generated/ Font-Phantom Fingers). Size--Slimline = 3.75 x  8.75-inches.       


PAPER PUMPKIN SEPT. 2022 - SPOOKY TREATS - ALTERNATIVE DESIGN

This kit is all about Halloween treat boxes, but I decided my alternative would be a card instead. I used the plaid intended as a treat box and trimmed it for the slimline card front. To the plaid, I added a Pacific Point cardbase and a Black Glitter cs mat layer. I replicated a larger version of the white w/black scalloped edge sentiment circle, included in the kit, with a Black Glitter scalloped die-cut overlayed with a 2" white punched circle to host the kit's spider, web, and ghost die-cuts on my card. After adhering my three scalloped circles to the plaid card front, I embedded them by embossing the entire plaid card front plaid and circles with a retired Square Lattice EF. I adhered the spider, web, and ghost onto card front circles. I adhere the Black Glitter mat layer to the Pacific Point cardbase, and added my plaid card front on top. I printed my sentiment "We've Arrived!" onto Crushed Curry cardstock and fussy cut each words into a rickety, weathered, and distressed sign. Voila...there is my alternative design for the new Paper Pumpkin...definitely not a treat box!

Monday, July 5, 2021

Magical Birthday Wishes!

My oldest daughter's birthday is at the end of June, but we delayed her family birthday celebration until mid-July as my husband (her father) had knee replacement on her birthday, and a week later, he ended up returning to the hospital for another week with gastric complications.  By mid-July, we were ready to host a barbecue to celebrate Michele and her Dad's continued recovery.  Needless to say, I needed to finish her birthday card!


I have written several times about our little unicorn, Michele's 20-month old, little daughter, so dubbed during her stay in the NICU after her birth.  Because her veins were so small, her care team inserted her intravenous application into a vein in her head, which stuck up almost straight up, giving her the look of a unicorn with its cute little horn.  My inspiration for Michele's card came from this scenario.  I have acquired a multitude of stamps and dies with a unicorn theme because of this story that became part of our lives, and I thought it time the mother of our unicorn received her very own  unicorn card!  Take a look at Michele's finished card both inside and out!


Ingredients:  Stampin' Up products:  apers--Bermuda Bay cs, White Glimmer, Vellum. Stamps (2019-21)--Leave a Little Sparkle, New Wonders. Dies--Stitched Shapes--sm. circle. Embossing Powder--White. Ink--Smokey Slate. Ribbon--1/4" Snowflake Splendor (2020 Holiday). Wink of Stella-Clear. Glitter--Iridescent (ret.)  Other: Paper--Recollections 12x12--Mom's Diner/ Salt. Copic Markers. EK punch--Victorian Corners. Chatterbox Computer Verse. Size: 4-3/4 x 6-inches.

Friday, June 4, 2021

A Ballerina for Amara's Birthday, Too!

My oldest son's fiance has two adult children. Her daughter has a daughter who was born between my granddaughter #2 and granddaughter #3.  She is a wee little thing, and my granddaughter #3, who is five months younger, is at least three inches taller!  We consider Amara our adopted granddaughter #4, and she needed a birthday card for her second birthday in early June.  Needless to say, she needed a ballerina birthday card as well!


To decide what colors her ballerina would feature, I asked what colors of clothing Amara looked the very best in...the answer was turquoise (aqua) and yellow.  So, a two-tone card Amara would get.  I used an SU retired Tempting Turquoise cs and Crushed Curry.  patterned paper I chose was a little pale, so I sponged Daffodil Delight ink over the surface.  Since I made the last ballerina card for Evie, I purchased the body parts that I spoke of in the first ballerina card made (see it here: A Ballerina Birthday for Callie!); therefore, this little girl has real arms and a real torso, and legs, which are hidden below her clothing!  Other than these added body-shaped parts, there is very little difference in construction.  Take a peek below at Ballerina card #4 in light turquoise and yellow:


Ingredients:  Stampin' Up products:  Cardstock--Crushed Curry, Tempting Turquoise (ret.), Whisper White.  Patterned Paper--All Abloom dsp stack (2014-15).  Ink: Daffodil Delight (sponging).  Pearls-mini--Copic colored.  Other:  DCWV Glitter stack--Turquoise-oval frame/ Yellow-skirt.  American Crafts POW--Marine Glitter paper (bodice/ balloon).  Dies--Alina Crafts--Ballerina, Doll Body Set; Spellbinders--Floral Ovals, Petite Ovals Large; Lawn Fawn--Party Balloons; MemoryBox--Varsity Numbers; Autone dies (Amazon): Balloon Message Strings (happy birthday sentiment). EK punch--Victorian Corners (inside).  Ribbon--Offray 1/2" Turquoise Organza (lengthwise 1/2 cut).  Copic Markers.  Wink of Stella: Black   Stash--Balloon strings--Lyon Sparkly Mini Yarn; Glitter Tulle--turquoise/ yellow.  Chatterbox Verse.  Size: 4-3/4" x 6-1/4".

Thursday, April 1, 2021

God's Peace at Christmas!

This is another of my January New Year's resolution Christmas cards.  It was also another 2019 card kit from my Stampin' Up mentors, Dar Peterson and Luci Kirschbaum.  Its original design was presented by  Dar, and again I did some modifications that came to mind when I looked at the pieces. 


Those who read my blog regularly know that my favorite card size card is more like an A7 (4-3/4 x 6-1/4 inches) than the standard A2 card (4-1/4 x 5-1/2 inches).  I really like a 4-3/4 x 6-inch card the very best, which does not fit an "A" anything, and that is was I chose for this card.   So, of course, my first step was to cut a larger cardbase.  I decided on a white base, rather than starting with the Melon Mambo as in the original design.  Also, I exchanged Dar's silver layer for green, Call Me Clover.  I really wanted to bring out the green in the ribbon, and I achieved adding more color as well.  Next, I cut my vellum layer with a cross-stitch edged die to add a bit more texture and interest.  I'm not sure, but I think the original was colored on top of the vellum, but I chose to color with Copics on the backside of the vellum instead.   I retained the rhinestones in the four corners, but I Copic-colored them to a nice warm gold to coordinate with the gold embossing.  Take a peek below at my finished rendition...it will go into my Christmas stash for 2021 cards.


Ingredients:  Stampin' Up products:  Cardstocks--Whisper White, Melon Mambo, Call Me Clover, Vellum.  Stamps--God's Peace (candles/ sentiment--2019 Holiday).  Embossing Powder--Gold.  Rhinestones.  Other:  MemoryBox die--Cross-Stitched Frame Border Die.  Copic Markers.  Chatterbox verse (inside).  Size--4-3/4 x 6 inches.

Monday, February 15, 2021

Ladybug Birthday Greetings!

 I have several birthdays in February that I like to make cards for...one is for a dear friend and cardmaking buddy.  To lift her spirits and mine during this glum COVID pandemic, I thought we might both be in the mood for something lighthearted and whimsical.  This Little Ladybug stamp/ die set should be perfect for Carla, who loves to garden.  These little friends can be placed in her garden to multiple and flourish to eat to their heart's content while keeping her garden free of aphids come spring when it is full production!


If you've been reading my blog of late,  you know that I've had no creative mojo for months upon months.  In the last six months, I have resorted to kits, both homemade and purchased, and using them to try and spark my interest.  Another thing you may know from reading me in long ago posts, with a card kit, I just can't make the cards as they are designed.  They always spark ideas that I think I might make the card even better or will change something to make it a more me card!  Once an idea is sparked, I just can't resist, and I just have to try it out!


I have an old card kit from the Stampin' Up 2020 Sale-A-Bration freebie catalog, that I've only made one card with, using my own alternative design with the aqua kerchief paper.  I have not yet touched the red kerchief paper, and I thought it would be perfect with the cute little ladybug stamps.  Of course, this will be my own total alternative card design rather than one that came with the kit itself, which all feature popped flower designs with the die-cuts provided.


With this card, I got in some Copic coloring while creating my own card design...haven't done image coloring in many a month!  Take a peek below at my finished Red Kerchief paper alternative card design, both front and inside:


Ingredients:  Stampin' Up products:  2020 SAB Kerchief Card Kit (red kerchief paper / stitched sentiment die-cut); Cardstock--Basic Black, Real Red, Whisper White, Garden Green, So Saffron (inside); Stamps--Little Ladybug;  Dies--Stitched Scalloped Rectangles;  Ink--Memento Tuxedo Black.  Other:  Copic Markers (ladybug coloring); MFT /die-namics--Fresh Cut Grass; EK Punch--Medium Scallop Corners.  Pretty Pink Posh--gold small sequins.  Size--4-3/4" x 6.

Sunday, January 31, 2021

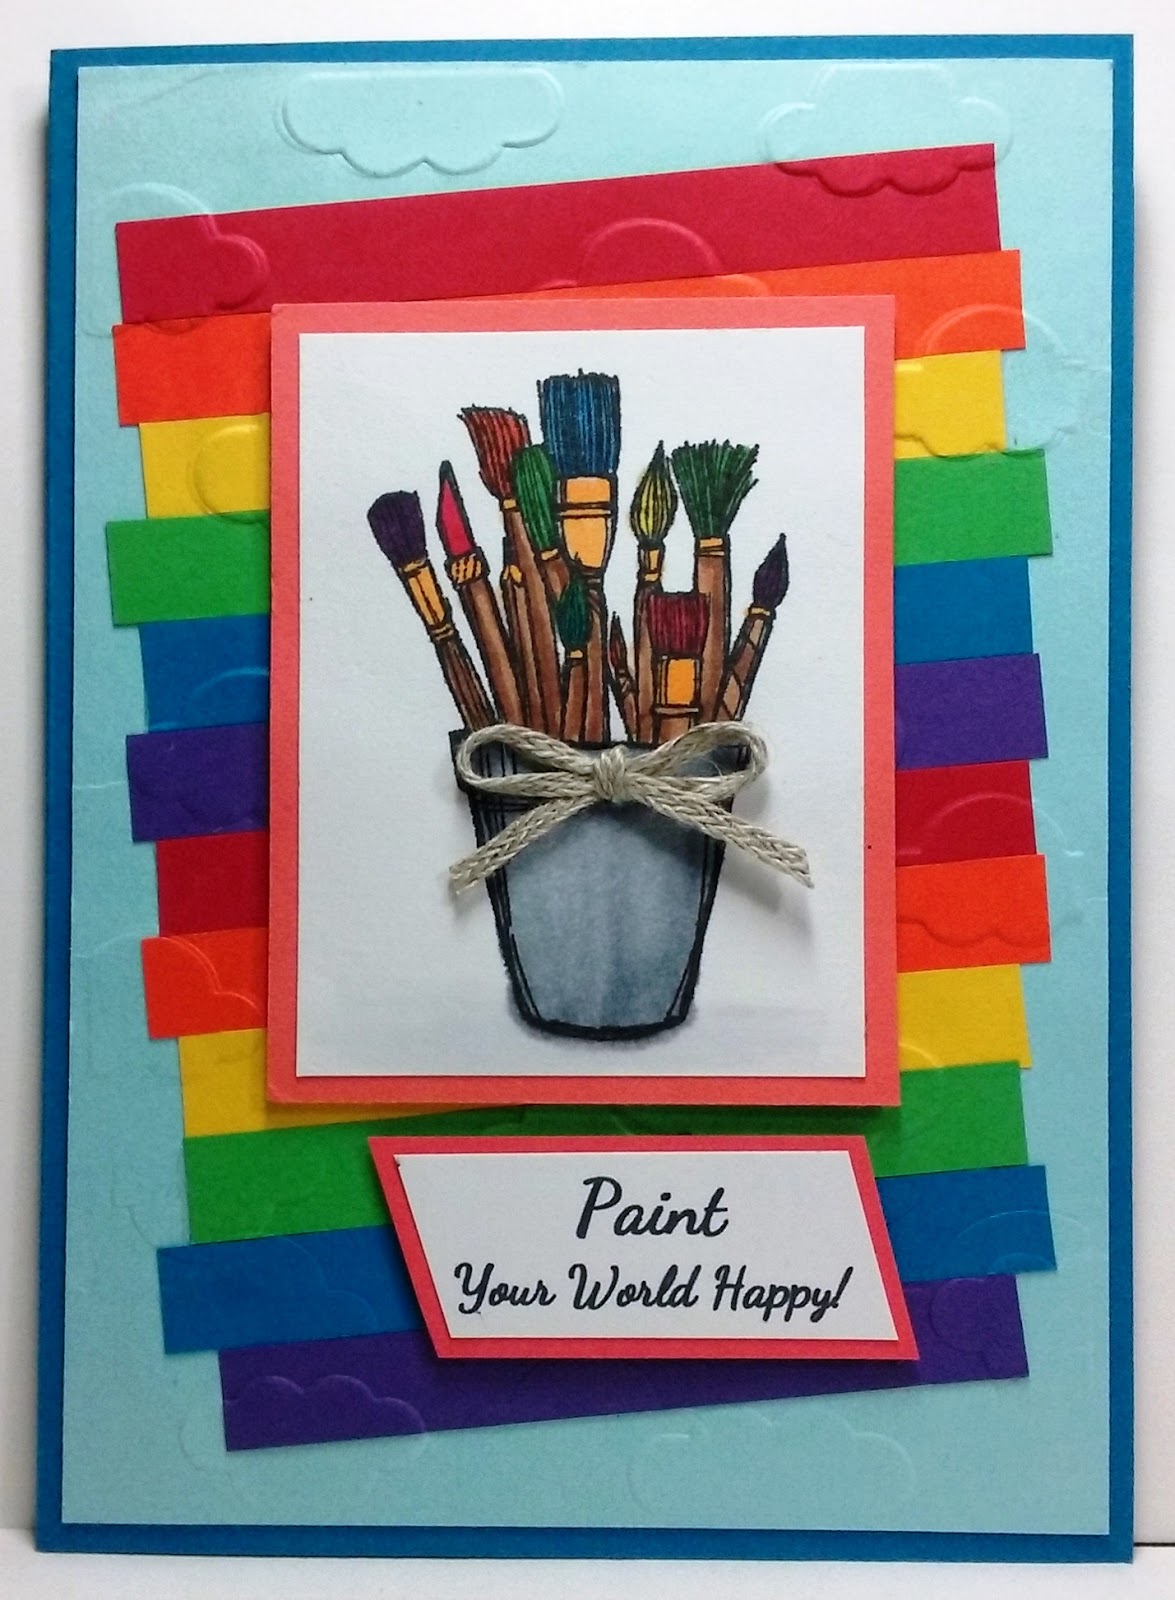
Paint Your World a Happy Rainbow!

Moving on with Splitcoaststampers' Virtual Stamp Night Mini Challenge.  Challenge #3 was posted at 7:00 p.m., ET and was entitled: Always Be A Rainbow.  Our hostess asked us to be inspired by the song Rainbow by Kacey Musgraves and create a card with a rainbow or using all the colors in a rainbow.


I chose to go with the idea of using all the colors in a rainbow rather than an actual rainbow.  The song is a bit sad, but also depicts another way to see your life, as there's always a rainbow in your life if you just look.  I decided my card would choose a happy rainbow with the sentiment Paint Your World Happy!  Note that it depicted crafting paint brushes...aren't we all happy when we are crafting, thus the sentiment works perfectly!  This little happy card will be for my friend, Sandy, whom I am missing during this long, never-ending social distancing. See the finished card below:


Ingredients:  Stampin' Up products:  Cardstocks:  Pacific Point, Balmy Blue, Real Red, Tangerine Tango, Daffodil Delight, Cucumber Crush, Pacific Point, Concord Crush, Poppy Parade, Whisper White.  Stamps--Crafting Forever (2017-19/ retired).  Trim--3/16" Braided Linen.  Wink of Stella--Clear.  Other:  Embossing Folder--Darice--Cloudy Sky.  Copic Markers.  Chatterbox sentiment (computer).  Size: 4-1/2" x 6-1/4."

Friday, January 3, 2020

Minty Softness @ Christmas...

This card is another take-off from a 2018 card design by Stampin' Up demonstrator Luci Kirschenbaum with these added modifications.  


1)  I loved the soft coloring of Luci's card, so I stayed with the Mint Macaron and White cardstocks, but I added a third layer of Copper Foil sandwiched between.  I really like the additional copper enhancements that I added besides the original copper-embossed bauble.


2)  I enlarged my card from the traditional A2 to A6 size (4-1/2" x 6-1/4").


3)  I changed to a simple Merry Christmas sentiment that I centered and copper embossed instead of the original Christmas/ New Year stamp in Mint Macaron that was offset to the right.  


4)  I used Copic Markers in different combinations of light to dark minty shades plus grays to color my copper embossed vellum bauble that plays peek-a-boo in the center of the lacy die-embossed aperture.    Take a peek below at my finished card:


Ingredients:  Stampin' Up Products:  Cardstock--Whisper White, Mint Macaron, Copper Foil, Vellum.  Stamps: Beautiful Bauble (die embossing) (2018 Holiday); Perfectly Plaid (2019 Holiday/ sentiment).  Dies: Detailed Baubles.  Punch: Curvy Corners (retired).  Embossing Powder: Copper.  Ribbon: 1/8" Coastal Cabana Tea Room.  EK Punch: Victorian Corners.  Copic Marker Vellum coloring.  Chatterbox verse.  Size-A6: 4-1/2"x6-1/4."

Monday, December 30, 2019

Christmas = a Star of Wonder...Star of Night!

This pocket card is my tenth and final Totally Lovin' Christmas card remake.  I used the color scheme and papers from the kit, but added quite a few additional papers and elements to satisfy my creative thoughts and edit ideas after taking a look at the original design.

Of course, again, I wanted my card to be the larger A6 size, and I wanted more color and pizzazz.  Here is a list of the changes I made:

1) I wanted a livelier color scheme, especially for the star panel that was the beautiful focal point of the front of the pocket card.  I chose a pretty Copic color close to Stampin' Up's Seaside Spray cardstock, which allowed me to add a new coordinating Seaside Spray cardbase and automatically enlarging my card as well.  My blue star with its added Navy highlights and a gold filigree gem in the center was so much more eye-appealing than the monochromatic grayish-blue star with its tiny clear rhinestone.  I was stoked with the look of the changes, and my juices were flowing!

2) The original star panel was backed with gold glimmer paper, but this was the only area the glimmer was used.  I wanted MORE for lots of sparkle and sheen.  I used the gold glimmer as a mat layer between the balmy blue cardbase and the navy plaid pocket, plus I added it to the sentiment pocket insert as described below in #4.  

3) The original design's pocket was all navy cardstock, using the navy/ green plaid as an accent rectangle on the lower front pocket only.  It just called for MORE!  I add the plaid to fill my pocket back and the entire front of the pocket, leaving the plain navy cardstock on the fold-over pocket flap only that hosts the ribbon band and star focal panel.

4) For my pocket insert, I left the navy cardstock as the bottom layer, but added a gold glimmer mat layer between the navy base and white sentiment panel.  I also added a gold glimmer half circle pull tab to the insert with a bitty navy star.  The original design used a silver brad added into the sentiment area as the way pull the insert out.  On the insert, I dropped below the sentiment at the top and added the navy Merry Christmas stamping, plus a little verse with a navy star at the bottom, leaving a space in the center for the sender's signature.


All these little additions changed the look of the finished card oodles, and I was really please with the results.  Check out the finished pocket card below...inside and out.


Recipe Ingredients:   Stampin' Up products:  Cardstocks--Night of Navy, Seaside Spray, Whisper White.  Patterns--Wrapped in Plaid (2019 Holiday p. 14).  Stamps--Shine Bright (star - 2019 Holiday p. 28); Star of Light (sentiment/verse - retired).  Ink--Night of Navy.  Ribbon--3/8" Cherry Cobbler Diagonal Stripe (2019 Holiday p. 25).  Gold Faceted Gem.  Other:  Paper--DCWV Gold Glimmer.  Wink of Stella-Clear + Gold (star spokes: clear/ overlaid in gold).  Copic coloring--star--B41 + B97.  A6 Size: 4-1/2" x 6-1/4".  

Wednesday, December 25, 2019

Christmas...Joy to All!

This is my ninth card from the Totally Lovin' Christmas kit by Liz Thayer.  It is another with only minimal changes, which enhance, but do not change the overall look of the card.  My changes and/or additional are listed below.

1) I increased my card size from the traditional A2 size (4-1/4" x 5-1/2") to my favorite A6 sizing (4-1/2" x 6-1/4").  I did need to cut all new all the paper pieces larger and restamp my Christmas tree, but since I was donating the original kit pieces to my Mom, this was okay).

2) I decided to dry emboss the pink mat layer to add depth and texture.  I have to say, I really think this added tremendously to the card look!  

3) I colored my tree flowers with Copic markers, which I always thinks gives a more clear and beautiful look with shading control.  

4) I added Wink Of Stella-Clear to add a touch of shimmer and mini pearls to each flower...I love these additions to the look!  

5) I eliminated the loopy silver thread in the upper left corner between the silver foil layer and tree stamp layer.  I didn't see any beauty added with the thread, and with my additions of embossing, shimmer, and pearls, I thought it a bit too much.

I am really thrilled with the final look of this card.  That added embossing was a perfect idea if I don't say so myself!


Recipe ingredients:  Stampin' Up products:  Cardstocks--Whisper White and  Blushing Bride.  Champagne Foil.  Stamps-=-Shine Bright (tree/ sentiment - 2019 Holiday/ p. 28).  Embossing Folder--Filigree Frames (retired).  Basic Pearls--2mm/ 1/16".  Gold Faceted Gem (smallest)--tree topper.   Punch--Curvy Corners (inside/ retired).  Other:  Copic coloring--Tree trunk--E21, E23, E27; Leaves--G82, YG67; Berries--RV29.  Flowers--RV00, RV11, RV34.  Wink of Stella--Clear.  Pink Posh sequins.  Chatterbox verse.  Size A6--4-1/2 x 6-1/4 inches.

Friday, December 13, 2019

Christmas Brings A Spirit of Peace

I'm working on my fifth card from the Totally Lovin' Christmas card.  I'd call this one a mini makeover!  I actually loved the design of this card and just wanted to make it my traditional, larger-sized card, closer to an A6 size (4-1/2" x 6-1/4") than the more common A2 size (4-1/4" x 5-1/2").  While I was at it, I had a few other tweaks I wanted to make.


To make my card larger, I added a new white cardbase and recut the original Garden Green cardbase into a mat layer to use between the cardbase and the dry embossed and ink-sponged birch trees top layer.  Rather than using Liz's choice of Crumb Cake for the embossed birch tree layer color, I substituted the retired Burnt Brown Sugar cardstock that has a more cinnamon brown look, giving it a more lively and cheerful look.  Sometimes, Crumb Cake just seems a bit blah to me.

I made four other minor changes:  1) I chose to Copic color my pinecones (E21, E23, E59) and fussy-cut the die cut edges down a bit more; 2) I used chunky glitter for my snowy effects rather than the snowfall puff paint. (I like the nice, chunky texture and sparky effect); 3) I added a few more pine branches peeking out from below the sentiment focal piece; and 4) I ink distressed the edges of the card giving it a more aged look.  All in all the card only has subtle changes, which does not change the overall look all that much!  Take a peek at the finished card both inside and out below.


Recipe Ingredients:  Stampin' Up products:  Cardstocks--Whisper White, Garden Green, Burnt Brown Sugar (retired), Red Glimmer paper.  Stamps--Peaceful Boughs--2019 Holiday.  Ink--Garden Green, Soft Suede.  Dies--Beautiful Boughs-leaves, sentiment frame--2019 Holiday.  Woodland EF-sponged w/ Soft Suede. 3/8" Red Grosgrain ribbon.  Chunky Glitter--2019 Holiday.  Holiday Rhinestones (inside verse corners).  Other products:  EK Punch--Victorian Corners.  Copic Markers--E21, E23, E59.  Size A6: 4-1/2 x 6-1/4 inches.

Thursday, December 5, 2019

Christmas Wrapped in Holiday Spirit!

I'm onto my third Totally Lovin' Christmas modification...a cute little present snowman.  This one was a bit too plain for me, and the Soft Sea Foam green didn't do much for me with the blue.  I put my re-designing thinking cap on, and my soft green became a pinked white glitter paper center panel, my little snowman got a lot of fussy-cutting, and he changed his hat color too.   I decided he needed a navy cardbase with a silver foil mat layer between the Seaside Spray front panel, which surely need a bit of snowflake embossing to bring out some lovely texture.  My sentiment needed a pick-me up with a navy matting to coordinate with the new cardbase color.

I kept the layout with modifications, added new papers, dry emboss texturing, some glitter, foil, and a popped up fussy-cut snowman...it's done, and I am pleased.  This card surely must go to my snowman-loving friend! 


Meanwhile, when I saw the "square" snowman, I was thinking about a Splitcoaststamper challenge I was sure I'd seen requiring using things with squares.  My geometric snowman would surely fit!  Take a peek at the finished card below, both inside and out.


Ingredients:  Stampin' Up products:  Cardstock--Night of Navy, Balmy Blue, Silver Foil, Whisper White.  Stamp: Lots of Cheer (snowman/ sentiment).  Dies: Finishing Touches Edger (pinked).  Embossing Folder: Snow Burst (2011 Holiday).  1/4" Metallic Seaside Spray ribbon (2019 Holiday).  Other:  Colorbox Glitter paper--Fresh Snow.  Inks--Memento Tuxedo Black.   Colorbox Charcoal Cat Eye (ink distressing).  Punch--EK Victorian Corners.  Copic markers--Snowman/ B000, B21, B32, O; Hat/ B91, B95, B97; Ribbon/ R00, RV23, R83.  Scarf/ YG13.  Carrot/ YR18.  Wink of Stella-Clear (ribbons).  Size: 4-3/4 x 6 inches.   (Thanks to Liz Thayer for original design idea that I took the liberty of modifying).

Friday, November 29, 2019

Joyful Season

Here's another redesigned Christmas card from Liz's November Totally Lovin' Christmas.  I did quite a bit of rearranging, adding and subtracting, basically changing the card design almost entirely.  I used the original stamped wreath image, but colored it with my Copic markers, and the red glitter strip with the bell, though I moved the bell upward about an inch.   I made the wreath panel into a 2-1/2-inch square rather than a 3-inch rectangle and repositioned it near the top rather than at the bottom.  I did leave the red glitter mat layer beneath.
.
I enlarged my card to an A6 size by adding a new cardbase layer, and added festive patterned Christmas paper for the top front layer.  I added Clear heat embossing to this paper to give it some sheen.  The patterned paper really perked up the card and brought it to life.  I chose a new and larger sentiment stamped on the same green as the cardbase and added it to a red glitter mat layer shaped with a decorative die.  I popped both the wreath and the sentiment up off the patterned paper front.

I am delighted with the finished look and like all the additional sparkle and sheen.  I then created a decorative inside design to coordinated with the outside.  Take a peek below at the finished card inside and out!


Ingredients:  Stampin' Up products:  Cardstock--Whisper White, Pear Pizzazz, Red Glimmer paper.  Stamps--Lots of Cheer (wreath/ sentiment).  Dies--Labels Collection.  Linen Thread. Mini Jingle Bells (2019 Holiday).  Other:  Patterned paper--Candy Candy/ Holly Stripe/ unknown.  Zutter corner punch.  Copic markers--Wreath Bells--G40, G21, YG68, G07; Ribbon--R01, R32, R37, R39 (lots of blending).  Wink of Stella Glitter Pen--Clear.  Chatterbox verse.  Size: 4-1/2 x 6-1/4.

Saturday, November 16, 2019

Hugs for a Friend!

One of my good friends is always so good about making sure she touches base, lends an ear, and brings cheer when I need a little "pick-me up."  She did just that when my brother had his heart attach while I was away visiting my Mom.  I wanted her to know how much I appreciated her and her thoughtful ways, so I made her a little friendship hugs card.

The original design for this card was from Darla Watson's October Stampin' Up card kit.  I loved the basic color design, the country-style flowers in a can stamp, and the puff paint, but I wanted larger, with more layers and colors, plus some personal touches to make the card fit my occasion and reflect more of my style and design.  I added an Early Espresso cardbase with a Crushed Curry mat layers beneath the original Granny Apple Green cardbase/ front, creating a three layer base rather than one and add more bright colors as well.  I corner punched the curry and green with two different styles of corner punch designs.  I cut down the size of the flower can white background to eliminate some white space and allow for a sentiment to be added, and  I rounded and design punched the corners to add interest.  I incorporated the puff paint idea from the original card, and I colored my flowers and the can to incorporate the bright colors of the added cardstock layers, plus shadow-colored the blooms with a  pale yellow-green. 


The original card did not have a sentiment, but I added an Early Espresso, rectangle mat-layer beneath my water can with my "hugs & kisses" sentiment...just the right message for my friend.


Prior to starting my card and design changes, I have reviewed some Splitcoaststamper challenges to see where this card might fit.  I will be posting later to my Splitcoaststamper gallery and to challenges.  Take a peek below at my finished inside and outside design.


Ingredients:  Stampin' Up products:  Cardstocks--Early Espresso, Crushed Curry, Granny Apple Green, Whisper White.  Stamps--Country Home, Good Greetings (sentiment- Oct. 2014).  Ink--Soft Suede.  Punch--Curvy Corners (retired).  Snowfall Accents Puff Paint (2019 Holiday).   Other:  WRMK--Deco Corner punch.  Zutter Corner Rounder punch.  Copic Markers.  Colorbox Ink--Chestnut Roan Edge Distressing.  Inside--Douglas Pagels verse.  Size--4-3/4 x 6 inches.

Wednesday, November 13, 2019

Remembering a Warm and Wonderful Lady!

My daughter-in-law lost her grandmother several months ago and her memorial service was held later in September, all when I was unable to make sympathy cards while recovering from hand surgeries.  Her grandma was a warm and delightful lady, who always had a big smile and never failed to stop and chat after church each Sunday.  She was always willing to lift and hand and do anything and everything to help.  She was part of the women's ministry who made and served our church's monthly breakfast, and she was an avid cake maker, as well...such beautiful creations!

I really wanted to acknowledge her memory and loss with a handmade sympathy card for my daughter-in -law and her mother.  Also, to let them know how thankful I was to have been able to get to know her even better after her granddaughter was engaged and married to my son!  Using the basic design from my October 28th post, I modified it once again with a change-up of colors, embossing folders, and the window creation using white heat embossing with the Flowering Flourish stamp, and for a more subtle effect, I used the reverse side.  I made the purple for my daughter-in-law and the pink for her mother.  Take a peek below at the finished cards inside and out!


Ingredients:  Stampin' Up products:  Cardstocks--Whisper White, Highland Heather, Pretty in Pink, Vellum-Translucent.  Stamps--Serene Garden (dove), Flourishing Phrases (oval window white embossed design).  Dies--Crosses of Hope (cross), Layering Ovals.  Ink--Sahara Sand (dove), Highland Heather & Pretty in Pink (oval window brayered coloring).  Embossing Powder--White.  Embossing Folder--Tufted Dynamic.  Other:  Colorbox--Snow Frost Glitter paper.  Dies--Spellbinders Grommet Tags w/modified ends using Spellbinders Classic Triple Scallop Edges. Ribbon--Offray 5/8" Sheer Stripe, 5/8" Sheer Ruffle.  Punch: EK Victorian Corners.  Copic coloring--doves.  Chatterbox sentiment/ verse.  Size:  4-3/4 x 6 inches.  (My card design was inspire by an Easter card by Dar Peterson.)

I've been on a mission to catch-up on back challenges that I was not able to enter for one reason or another; therefore, I checked my Splitcoaststamper Challenge List before beginning, I had lots of inspirations to be able to enter my finished cards into several challenges. 

Sunday, November 3, 2019

Happy Wishes for a Dear Friend!

While visiting my mother in Redding, I was lucky to be able to attend a belated birthday luncheon for one of her favorite friends that I have claimed as a dear friend as well.  She is a delightful lady, and I so enjoyed being able to celebrate her special day with Mom and her.  Of course, I could not go empty handed, and fortunately, I had taken a few cards that I finished just before traveling that only needed an inside verse to fit the occasion to make it complete.  This, of course, received a Chatterbox birthday verse to finish it off.


Ingredients:  Stampin' Up Products:  Cardstocks--Basic Black, So Saffron, Whisper White. Stamp: Birthday Blooms (flower/ sentiment). Inks--Blushing Bride (ink distressing). Punch: Curvy Corners.  Rhinestones.  Other:  Coloring: Flower--Copic Markers/ Y04, YR21, Y00, RV34, R37, SU Cherry Cobbler Medium.  Flower Shadow--Copic/ Y00.  Leaves--Copics/ G40, G12, G21, YG63, G46.  Wink of Stella-Clear (flower stamens).  Size: 6" x 4-3/4".

Monday, October 28, 2019

Sympathy for the Loss of a Son!

A kind and thoughtful lady that I met, probably, ten years ago, who is my Mom's Stampin' Up demonstrator, lost her 16-year old son due to a car accident a few months ago.  I was unable to make a sympathy card for her son due to recovering from hand surgeries.  So, I had to be satisfied with sending thoughts and prayers to her and her family, as well as joining a Facebook condolence post on her behalf, but I made a note that I really wanted to make her a card in the future as soon as I was able.


Meanwhile, I had a card idea started "brewing" in my head based an Easter card made by my Stampin' Up demonstrator, Dar Peterson, several years ago.  I loved her idea of the pretty oval floral-printed vellum oval, which reminded me of a church stained glass window, that she used as the backdrop for the cross on her card.  I thought it would make a lovely feature for a sympathy card.  At the same time, I was reading up a little on the Splitcoaststamper challenges available at the time, especially the Inspiration Challenge, which I always like to enter.  I found a metal scroll, rustic cross and a light blue cross ornament, which reminded me of a scrolled lattice background stamp that in blue might make a lovely oval vellum "window" for my masculine sympathy card.  I searched through my background stamps and found the lattice-style stamp that I was thinking of and place it on my craft table as a reminder for the future when my hands were better.


My hand recovery came about just before my four-week visit to my Mom in California in October and November.  Before I left, I tried out my vellum oval "window" idea and made several ovals to take with me.  Space was limited as I was flying.  While there, Mom and I got busy making cards to try and catch-up on missed occasions and also to build our Christmas card stashes.  I specifically worked on my three needed sympathy cards...the first being the one for this lovely Stampin' Up friend's sorrowful loss.   


Using Dar's original design as an idea base, I made several modifications to her card to make it fit for a sympathy card, plus make it a "more me" card.  I enlarged my card by adding more color layers with a different embossing folder pattern, plus a different color treatment, ribbon style, and sentiment layering dies.  I also added Copic color to my dove, stamped my lattice-patterned oval vellum "window" using a background stamp in Baja Breeze ink, added a scallop mat layer, and composed my own sentiment and interior verse.  Take a peek below at the finished card inside and out!


Ingredients:  Stampin' Up products:  Cardstocks--Whisper White, Dapper Denim, Vellum-Translucent.  Stamps--Serene Garden (dove).  Dies--Crosses of Hope (cross), Layering Ovals.  Ink--Baja Breeze (oval window), Sahara Sand (dove)  Embossing Folder--Stripes.  Other:  Stamps--Just Rite Modern Lattice Background stamp (oval window).  Dies--Spellbinders Grommet Tags w/modified ends using Spellbinders Classic Triple Scallop Edges. Ribbon--Offray 5/8" Stitched.  Punch: EK Victorian Corners.  Copic coloring--dove.  Wink of Stella-Clear (dove wings).  Chatterbox sentiment/ verse.  Size:  4-3/4 x 6 inches.  (Thank you Dar Peterson for the wonderful card design from which my card evolved).

Monday, May 6, 2019

Reaching Classic "Old" Age!

My brother's birthday is in early May and yet another card was needed, especially as this is a milestone birthday well into retirement!  I'm so far behind in cardmaking with the hand recovery that I'll never catch up, it seems! 


I had an unfinished card hidden away in my To Do Stash that I came across when looking for a previous unfinished card.  The initial basic design layout was by Liz Thayer on this one as well.  All the pieces were there to finish, except just a notation of the stamp set used.  I particularly liked the Acetate Foil gold patterned paper and gold foil included in the kit with the navy blue.  I used all the paper pieces provided, but I also decided to add a black cardstock layer as the cardbase and as another image mat layer. 


To start, I masked the image paper with the car outline, and watercolored the background around it with the idea of sky and landscape color tones and dried it with my heat tool.  I then stamped the image and sentiment from the Stampin' Up Guy Greetings stamp set with Memento Tuxedo Black ink, using my MISTI to line up the stamp images on my small piece of watercoloring.  Next, I colored the vintage car with my Copic markers.  Finally, I assembled all the paper layers and popped the acetate pattern off the gold foil.  I added some Glitter Enamel Dots, and voila, I was finished! 


As my brother has restored vintage and classic vehicles for many years, I am pretty sure he will like this card...even more so if it were a Chevy.  Take a peek below inside and out.


Ingredients:  Stampin' Up products:  Cardstock--Basic Black, Night of Navy, Gold Foil, Shimmer White.  Patterned Paper--Fabulous Foil Designer Acetate (retired 2018).  Stamps:  Guy Greetings (retired 2018).  Glitter Enamel Dots (retired 2018).  Other:  Memento Tuxedo Black Ink.  Copic Markers.  Artist Loft Watercolor Pan Set (Michaels).  Size: 4-3/4" x 6".

Friday, April 26, 2019

A Birthday Marquee Message!

One of my cardmaking besties has a Spring birthday.  I am determined to make her a card totally from scratch using nothing that is semi-prepared as a test to see how well my left hand will do post-surgery.  I did stamping, die-cutting, dry embossing, fussy-cutting, Copic coloring, and a shaker card.  A pretty great test, and I'd say I'm pretty pleased with the results.  The hand is a little tired, a little achy, and a bit swollen, but fabulous compared to pre-surgery swelling and pain!


I was also determined to get back into the Splitcoaststamper (SCS) challenges, and I have accomplished that with a vengeance!  I found eleven challenges that I can enter by tweaking my design idea here and there.  That is a new RECORD!  I can usually get in seven to nine, but have never even done ten before!  It all started with a card by cdimick (aka Catherine).   Catherine is an SCS Alpha sister, who is the current Featured Stamper at Splitcoaststampers.  I browsed her gallery and chose a card to "case" as the challenge requires, which featured a stamp set that caught my eye.  I browsed the inspiration challenge photos for some ideas, which led to the color challenge with the exact blues and greens I wanted to use, and on and on it went!


Meanwhile, I was keeping in mind that this card is for a very special friend, and I wanted it to be special for her with a huge focus on her birthday.  The Stampin' Up Marquee Messages stamp set was perfect!  I made it into a shaker to fit the Fan Club April Monthly challenge, and it really set off the marquee stamp perfectly.  First, I dry embossed a confetti pattern onto my Coastal Cabana cardstock and added sparkles by "painting" on glitter glaze with a foam brush. Love that sheen!  My finishing touches to dress up the shaker marque frame was to pop on some flowers, leaves, and oodles of pearls.  I must say I was pretty please with the results, and I am pretty sure my friend will like it as well!  Take a peek below.


Ingredients:  Stampin Up products:  Cardstock--Whisper White, Tranquil Tide, Coastal Cabana, Balmy Blue.  Stamps--Marquee Messages (shaker frame/ sentiments), Vibrant Vases (flowers), Happy Birthday Gorgeous (leaf). Embossing Folder--Confetti.  Pearls.  Metallic Sequins Asst.  Other:  Sargernt Art Acrylic Glitter Glaze.  Copic markers.  Ink--Memento Tuxedo Black.  Buttons Galore--Aquamarine Party Mix.  Wink of Stella/ Clear.  Chatterbox verse.  Size: 4-3/4" x 6".

Wednesday, March 6, 2019

Let's Celebrate in Epic Style!

My oldest son is having a birthday this week, and I needed to get a birthday card completed.  This will be my third card in a month because of my left hand surgery, and it is a slow and methodical process!  I am still in a cast that covers my left thumb and extends 3/4 of the way to my elbow.  This Friday is removal day, and I can't even express how glad I am!  I digress...back to my son's birthday card.

As is my usual process, I checked Splitcoaststamper challenges to get some inspiration on where to start.  None of the current challenges spurred any masculine card thoughts, so I branched out to play challenge catch-up, and I found some ideas that sparked my creative mojo!  An old December  inspiration challenge that I was not able to play in when introduced had me deciding on using a guitar for my card.  I did some collage grunge stamping to replicate the look of the guitar poster as seen on this website:  Watercolor Guitar Abstract.  I am pretty happy with my results and I think David will be as well!  Take a peek below at the finished card inside and out:


Ingredients:  Stampin' Up products:  Papers~ Cardstock--Basic Black, Whisper White.  Pattern:  Pick A Pattern dsp (stripe); Wood Textures Paper Stack.  Stamp--Epic Celebrations (2018 SAB); Timeless Textures (2019).  Ink--Crushed Curry; Smoky Slate.  Washi Tape--Myths & Magic/ silver glittery (Copics Gold colored)(2018 Occ).  Embellishments--Hearts & Stars Wood Elements (star-Copic colored center); Metallic Enamel Shapes (stars-silver/ Copic Goldcolored)(2018 ret). Other:  Paper--Recollections Gold Frosted Shimmer.  Memento Tuxedo Black Ink.  Dies--CraftsSuppliesForU/ Vertical Happy Birthday.  Punch--WRMK Stub Corners.  Wink of Stella/ Clear (black circle mat, HB sentiment die-cut, edge of Gold Shimmer paper to add more sheen.).  Copic Markers--Guitar coloring. Stars and glimmer star washi (silver to gold) + Wood star center to dark brown.  Chatterbox verse.  Size: 4-3/4" X 6".

Friday, February 1, 2019

A Birthday Journey!

It's my husband's birthday this coming week-end, and I needed to get his card made this past week.  I was anxious to begin, because I had a new Tim Holtz die...the Globe, and ideas were beginning to come fast and furious, especially after I reviewed possible Splitcoaststamper challenges to catch up on.  This will be my last card for a while, as my hand surgery is scheduled for Monday, and it will be about a six-week recovery.

One challenge needed some shine, another die-cut word(s)
, another some spritzing and/or splattering, another to use up something set aside to maybe use later, another to be inspired by color, and then there was the one that needed something natural and not man-made...what could be more natural than Mother Earth...a planet!  


I had printed a vintage map, which didn't print quite right and ended up with some purple splotches, but I loved the vintage look of it and decided to keep it to see if it would fit somewhere...somehow.  I decided to re-color the map with my Copics to enrich its color and cover up the wonky purple areas.  Then, I added some metallic antique copper spritzing and splattering for even more eye-appeal and/or cover-up!  Since my Globe die has longitude and latitude lines, it will work for the Alphabet challenge, letter L.  To add depth, I die-cut four globes and four Happy Birthday die-cut sentiments so they would pop up off the card front.  I also spritzed the top gold matte foil layers of both with antique copper spritzing and splattering to add even more interest.  I had some little tiny metallic gold stars in a cup on my craft tape since early December and decided to scatter those randomly on the card front as well.  I was really please with how they looked, so I painstakingly glued each down.


My last step was to decorate the card inside to coordinate with the front design and to compose a birthday verse.  I am really pleased with how my husband's birthday card turned out.  I love the vintage flair, and 
I think he will be please.  He decided he only wanted one card for his birthday and that was mine, because the store-bought cards are a waste of money he says.  He added that he would rather have a candy bar for a card, and it would be okay if the children need to add a happy birthday paper taped to the bar.  I told him perhaps a handwritten tag tied with a string would work!  I promised I would pass the word to the klds!  I also let them know he was doing his "baa-hum-bug" birthday dance, which he does each year!  

Here is his one and only birthday card below with the inside design pictured as well!


Ingredients:  Papers:  Cardstocks--SU Early Espresso, Darice Timeless Pack (tan), Vintage North America Map (printed from Pinterest); DCWV Solid Golds Stack/ Matte Foil.  Dies: Sizzix Tim Holtz Alterations: Globe; Dee's Distinctively Dies: Happy Birthday, Small.  Punch: EK-Victorian Corner.  Homemade Sprtizer: Folk Art Metallic Antique Copper diluted w/ water.  Copic Markers (map coloring).  Recollection: Large Copper Rhinestones.  Stash: bitty gold metallic stars.  Chatterbox verse.  Size: 4-3/4" x 6".