Showing posts with label Silhouettes. Show all posts

Monday, October 15, 2018

A Roller Coaster Birthday!

My son-in-law has a mid-October birthday.  Since my daughter and her husband will be taking a mini-vacation to southern California to visit the theme parks in all their Halloween glory as his birthday gift, I wanted to use a Halloween theme park with scary rides as the subject of his card.  I found the perfect roller coaster die made by Simon Says.

With the help of peeking at some Splitcoasterstamper challenges, I decided on a late evening sunset sky with the roller coaster and other card elements in a subtle black glimmer paper in silhouette fashion.  I watercolored my sunset sky with Stampin' Up inks starting at the bottom in this order:  Daffodil Yellow, Tangerine Tango, Rose Red, Wisteria Wonder, Marina Mist, and Night of Navy, and then reapplied different colors where I thought certain colors were needed.  I applied the inks with water-wetted brush and misted over with water spritzing.  I moved the colors around with a paint brush until I was happy with the color combination.  I blew it dry with my heat tool (back and front).  I lightly spritzed my homemade White Pearlized Mist (made from water and Folk Art Metallic White Pearl acrylic paint) to give it a sheen and starry look.  I sponged a separate small piece of watercolor paper with yellow, orange and a bit of rose-red and finished by pearl spritzing to make my 3/4" punched circle for my moon.  I ink distressed its edges lightly with Crumb Cake ink.

I am super pleased with my results!  I think it is the perfect card for Josh. . .the family, theme park enthusiast!  Take a peek below at my finished outside and inside coordinating designs with my Chatterbox verse.


Ingredients:  Watercolor paper.  Stampin' Up cardstock:  Basic Black, Hello Honey.  Gold Glimmer?, Black Glimmer?  Stampin' Up Inks:  Daffodil Yellow, Tangerine Tango, Rose Red, Wisteria Wonder, Marine Mist, Night of Navy.  Homemade White Pearlized Spritz (water/ Folk Art Metallic White Pearl Acrylic paint).  Dies:  Simon Says--Rockin' Roller Coaster; Impression Obsession--DIE096-D/ Grass; Memory Box--Stitched Halloween Circle Frame (just bats).  EK Punches:  Hole punch (people heads); 3/4" Circle; Victorian Corners (inside).  Background: Watercolor Sky.  Chatterbox verse.  Size:  4-3/4" x 6".

Friday, June 29, 2018

A Birthday with Lots of Technique!

My oldest daughter is celebrating her birthday today!  I've been working on her card for a couple of days trying to work out its design.  I knew only one thing for sure when I started, my daughter's favorite color is turquoise, so it would have turquoise in it somehow, somewhere.  A couple of other things I knew were that I wanted to enter the finished card into some Splitcoaststamper challenges, and if it could somehow fit one of my remaining three Round 8, Letters, I'd be pleased!


My usual plan, as most of you who read my blog might know by now, is that I check out all SCS challenges for inspiration and ideas before I begin, which I did with this card.  I am happy to say that with my mojo, which started with the SCS Inspiration Challenge, which led to my being able to enter into Alphabet Challenge, Round 8, and others!  


See "The Story" below my card for more details.  Meanwhile, take a peek at my daughter, Michele's, card below (plus the inside design and verse).  I am truly excited about her card, how it evolved, and how it turned out, and I think she will be thrilled!


Ingredients:  Stampin Up products:  Cardstock--Night of Navy, Tempting Turquoise, Basic Gray.  Patterned Paper: 2012-2013 DSP Stack--Brights/ Pacific Point (umbrella).  Stamp--Marbling (background).  Inks--So Saffron, Pear Pizzaz, Tempting Turquoise.  Stencil--Pattern Party Decorative Masks (clouds).  SU White Embossing Paste.  Glitter--Dazzling Diamonds.  Other products:  Cardstock--Recollections Pack/ Punchy Florals.  Colourcraft Brushos--Turquoise, Grey.  MFT Stencil--Raindrops.  Stamps/Dies--Crazy Birds; Crazy Things (bird/hat).  Savvy Dies--Cityscape; Small Space Needle.  Elizabeth Dies:  Rainy Day (umbrella).  EK Punch: Med. Victorian Corner.  Techniques: Coloring Texture Paste; Copic Coloring; Marbling; Glitter Texture.  Chatterbox sentiment/ verse (computer/ Xiomara font).  Size: 4-3/4" x 6".

THE STORY:

EVOLVING A CARD TO FIT NUMEROUS CHALLENGES


By now, a lot of you who are also on the Splitcoaststamper (SCS) site know that I love to find inspiration from several SCS challenges. You might wonder how I do this.  So here goes an explanation:


I keep a running computer document with all SCS challenges listed chronologically by weekdays and dates within each challenge, then the monthly, annual, etc. challenges follow.  I check each week and add the challenge updates as the week progresses.  If I actually enter a challenge, I place a red check mark in front of the challenge number.  It makes it pretty easy to spot what I've entered and what I haven't, plus checking to see what inspiration I can get to decide what I might want to do to my card to fit the challenges I decide to enter.  It is often a work in progress as I create, and I may add or subtract a challenge as I work and possibly make changes to my original plan.


Almost everything on this Crazy Bird card started first by browsing the June 23, 2018 Inspiration Challenge/ Hayneedle online site for art work with blues and greens as I knew for sure I wanted to use turquoise.  This Inspiration Challenge led to seven other challenges.


#1.  Inspiration Challenge - IC655 - 6/23/18.  In my browsing through Hayneedle, several blue and green three wall art items led me to my card design:  a marbled background, though eliminating the browns shown and adding pear pizzaz and soft yellow to the turquoise; 2) a silhouetted Seattle skyline; and an aqua raindrops canvas led me to add rain and clouds. . .after all, it will be a Seattle scene!


#2. Free for All - F4A432: Baby It's Cold Outside - 6/1/18.  Since I was going to use rain and it was to be Seattle, I decided to use embossing paste and add color and glitter to my rain and clouds to evoke a cool feel to the card.


#3. Ways to Use It - WT680: World Water Day - 3/22/18. . .with all this talk about rain in Seattle, I remember a older WT challenge that talked about rain and umbrellas that I missed because it was issued just a few days before being AWOL with my knee surgery.  I re-checked and sure enough the rain and an umbrella worked for this challenge.


#4. Alphabet Challenge, Round 8 - DD8ABC21U - 1/3/18.  Letter U = UMBRELLA. . .one of my final three missing letters for Round 8!!! The BONUS challenge for using a faux finish fit my plan for a marbled background mentioned above. I was stoked!! 


#5. Mix-Ability - MIX280: Losing My Marbles - 6/8/18.  Marbling led me to think of the mix-ability challenges.  I was sure there was bound to be something about marbling.  In my searched through this challenge and found this one, which gave suggestions on making a marbled background, but it also mentioned that a marbling stamp could be used.  I decided to possibly invent my own marbling by using my SU Marbling BG stamp.  To get three colors in my marbling, I used my MISTI and shifted my paper about 1/8" with each of three colors: So Saffron, Pear Pizzaz, and Tempting Turquoise and blew it dry to set the ink.  I watercolor brushed more turquoise ink as the final coat to add more turquoise and to fill in any white areas, and blew it dry.  Next, I "painted" the entire marbled surface with glitter glue and sprinkled Dazzling Diamonds all over, lightly brushed off excess glitter, and blew it dry.  It looked like a HOT MESS during the process, but I was pretty pleased with the final result.


#6. Colored Texture Paste Technique. I colored my White Embossing Paste and stirred in a bit of Dazzling Diamonds glitter and Brushos Turquoise to stencil on my raindrops and blew them dry.  I also mixed a batch of light grey with a few sprinkles of Brushos Grey and glitter to stencil on my clouds.


#7. Teapot Challenge - MMTPT515: TPT Tic Tac Toe - 6/5/18.  I'd been watching out for using this one, because I love Tic Tac Toe challenges.  My diagonal Tic Tac Toe is: Stitching, Die-Cuts, and Patterned Paper.  I also added Watercoloring and Embossing (if the Embossing applies to Embossing Paste rather than just dry embossing).  My umbrella is a die-cut, and it became covered in patterned paper with hand-stitching. My bg uses watercoloring and Embossing Paste in the raindrops and clouds.


8. USEIT2018 - ongoing :  My new but dusty and never stuff:  the Crazy Birds stamps and dies and my Small Space Needle die.  I bought both at least two years ago and had not used them yet!  Also both stencils are new and have been languishing in their packages.  My used oldie is my CityScape die, which I have not used for 2-1/2 years! 


So, there's the explanation of my development of a card utilizing numerous challenges. I find this great fun, and a challenge in and of itself for me! Usually I start with a bit of an idea from a challenge then embellish upon the idea to fit other challenges, but as I mentioned before its a work in progress and challenges to be entered can change as the card evolves.

Friday, January 12, 2018

Best of 2017 Favorites @ Splitcoaststampers!

I'm in 7th Heaven!!!!  I've had nine of my 2017 cards chosen in the Splitcoaststampers' Favorites - Best of 2017 recently, and three of these were chosen twice!   I also had one card chosen in the CAS Favorites - Best of 2017.  Now that was really a surprise, because rarely do I make a clean and simple card!  I'm speechless and so grateful to the wonderful and crafty multitudes at Splitcoaststampers for giving me so many honors.  


As I have had my cardmaking curtailed in mid-December due some severe hand problems, especially the left, and a right knee flair up, I've been kind of down a bit without my hobby to entertain me.  I've also been absentee blog posting as some may have noticed.  With that said, I thought I would post those cards BESTed again for your browsing!  


Favorites - Best of 2017 Cards


Let It All Hang Out Birthday - posted 8/28/17
 Blog link: https://chatterboxcreations-1.blogspot.com/2017/08/let-it-all-hang-out-birthday.html

 First Christmas for a Little Husky Named Zhanna! - posted 9/4/17 (chose 2 times)
Blog Link: https://chatterboxcreations-1.blogspot.com/2017/09/first-christmas-for-little-husky-named.html

Christmas Card from an Oldie But Goodie! - posted 9/8/17 (chosen 2 times)
Blog Link: https://chatterboxcreations-1.blogspot.com/2017/09/christmas-card-from-oldie-but-goodie.html

Improving on the Christmas Oldie But Goodie! - posted 9/12/17 (chosen 2 times)
Blog Link: https://chatterboxcreations-1.blogspot.com/2017/09/improving-on-christmas-oldie-but-goodie.html

A Dedicated 12th Woman Seahawks Fan Birthday! - posted 11/5/17.
Blog Link: https://chatterboxcreations-1.blogspot.com/2017/11/a-dedicated-12th-woman-seahawks-fan.html

My Son's First Father's Day! - posted 6/18/17.  (inspiration from Dar Peterson).
Blog Link: https://chatterboxcreations-1.blogspot.com/2017/06/my-sons-first-fathers-day.html 

Anniversary Twosome Sail with the Breeze! - posted 7/31/18
Blog Link: https://chatterboxcreations-1.blogspot.com/2017/07/an-anniversary-twosome-sail-with-breeze.html

Birthday Jazz for Youngest Son! - posted 9/15/17
Blog Link: https://chatterboxcreations-1.blogspot.com/2017/09/birthday-jazz-for-youngest-son.html

A Peek at Fall! - posted 9/20/17
Blog Link:  https://chatterboxcreations-1.blogspot.com/2017/09/a-peek-at-fall.html

CAS Favorites - Best of 2017 Cards

New Hat for Spooky Kitty! - posted 10/27/17
Blog Link: https://chatterboxcreations-1.blogspot.com/2015/10/new-kitty-face-card.html

Monday, December 18, 2017

A Christmas Nativity Bauble!

WHAT A WAY TO END THE YEAR!

THIS CARD IS NAMED A 

SPLITCOASTSTAMPERS' FAVORITE 

OF THE WEEK ENDING - DECEMBER 30, 2017


Sorry, I've been missing in action most of December!  Usually, my blog is loaded with all kinds of Christmas cards...not so this year!  I have been unable to do much crafting with some hand issues that may require surgery, especially my left hand.  The right one is working on it, but not quite there for surgery yet.  I have some "lovely" thumb guards (sarcasm dripping) that I am to wear pretty much 24-7, with a short timeouts if absolutely necessary.  So...that's the story...not able to do much crafting, as that really sets off the pain and swelling in the entire hand!

I did manage to get to my craft table and work up this little Christmas Nativity bauble.  I worked with several dies and modified my Cottage Cutz Nativity to fit inside the bauble.  I now have a baggie full of date trees, little sheep, and the Star of Behtlehem.  I used some more of the gold glimmer wrapping paper that I stabilized with a cardstock backing and lots of tape runner, row after row, especially with the paper used to die-cut the pine boughs.  


I tried a new stamp set to get gold embossed stars on the night sky.  I was really unhappy with how it turned out.  The stamp was not a background size, but an odd shape, like an amoeba, with totally uneven curves and bulges, so it was difficult to even get it stamped evenly over the paper.  I also sprinkled Gold  glitter embossing powder, and wasn't too happy with that either...it left smudges.  


I planned to make several of this design, so I will definitely be trying something different to my starry sky.  I seem to be liking the black and gold glimmer look this year, and I was pleased with my overall design, but not the sky, so take a peek below at what not to do on your starry background sky!


I will also be entering this into several Splitcoaststampers Challenges:  

  • December 2017 Dirty Dozen Christmas Challenge:  Nativity scene.
  • Alphabet Challenge (Letter O=Ornament/ Double Challenge = Letter L for lightfastness; Encore Metallic Gold a pigment, oil-base ink with slow drying time.
  • Free for All - Merry December.  Christmas my favorite December holiday.
  • 2017 Christmas Card Challenge - June = Religious card.
  • Dirty Dozen November Word Theme:  JOYS.  J=Jesus; O=Ornament; Y=Yule card (archaic for Christmas); S=Shiny, sparkle.
  • Inspiration Challenge IC628 - Dept. 56 as the inspiration website.

Ingredients:  Paper:  Stampin' Up--Basic Black cs; Recycled Gold Dot gift wrap.  Stamps: Christmas Pines (sky stars).  Dies:  Cottage Cutz--Nativity Silhouette; Stampin' Up Thinlits--Delicate Ornaments, Pretty Pines.  Ink:  Encore Gold Metallic (coloring edges of gold paper, ornament and pine needles).  Offray 1/4" ribbon, Black Fun Foam, Computer verse (inside).

Monday, November 20, 2017

The Birth of Christ!

JOYFUL NEWS!

THIS CARD IS NAMED A 

SPLITCOASTSTAMPERS' FAVORITE 

OF THE WEEK ENDING - NOVEMBER 25, 2017


Well, I'm still on a roll for using my re-cycled gift wrap stash.  The next paper I want to use is super great...it's a matte foil with shinier polka dots.  I'm excited to see how it looks as foil cardstock is so expensive and re-cycled gift wrap isn't!

I also want to enter some challenges on Splitcoasterstampers, so I decided to check out several before I got started and get some design mojo going on how best to use my gold foil.  This resulted in being able to enter five challenges.  Check out the story below on how the design and construction evolved with my card, which you can just see below.

Ingredients:  Papers: Stampin' Up cardstock--Basic Black; Gold foil dot re-cycled gift wrap.  Die: Lifestyles--Labels 9 (discontinued); Cottage Cutz--Nativity Silhouette, Birthday (modified to Birth), Christening (modified to Christ), Thinking of You (used only "of").  Ink--Stampin' Up Craft White.  Wink of Stella--Black.  Technique: Yarn Block (for snowy night sky).  Stash: rhinestones.  Size:  4-3/4" x 6".  

The Story
For the Splitcoaststampers challenges, I definitely wanted to try to catch up on the Alphabet Challenge, specifically for Letter B with the double challenge, Letter Y: use a Yarn Block, which means to wrap yarn around a block or chipboard, then dip in paint or ink to make a pattern on your card.

After looking at the Featured Stamper challenge and visiting byHelenG.'s gallery, I chose this card from her gallery as my inspiration:


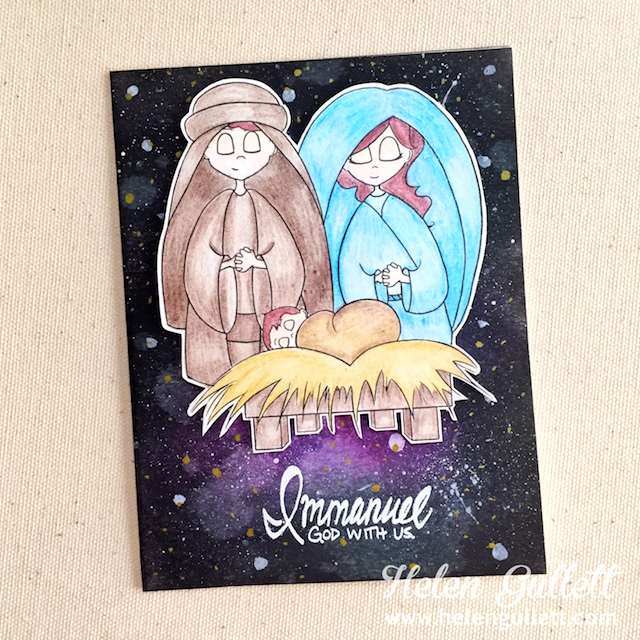
I knew then, that ny card's Alphabet Challenge Letter B would be all about the Birth of Christ.  To meet the Yarn Block requirement for the Alphabet Double Challenge, I decided to make a snowy black sky as my background.  I cut two piece of chipboard 1-1/2" x 5" and adhered them together.  I wrapped a single layer of fine yarn with a metallic thread running through it around my chipboard "block."  I used the narrow edge of the chipboard with yarn and my Stampin' Up Craft White ink.  Holding both ends of the chipboard piece at each end, I inked up the yarn on the edge and gently stamped a diagonal pattern on my black cardstock from diagonal corner to diagonal corner.  I made sure to ink up my yarn each time before touching it to my cardstock.  I turned the cardstock around 90-degrees and applied the inked yarn again diagonally across the paper from diagonal corner to diagonal corner in an opposite angle as the first application.  The finished product was a lot of  snowy white speckles all over my cardstock.  I was please...it was exactly what I was looking for.

With Virtual Stamp Night coming up in early December, our hostesses are featuring some pre-VSN challenges.  The first challenge is to make a monochromatic card; therefore with my gold foil re-cycle gift wrap in mind, I decided to use gold as my color with black as my neutral instead of white.  Therefore, to keep my nativity monochromatic, I deviated from the Featured Stamper's colorful card.  I decided to use a black silhouetted nativity scene with an underlying shaped, gold foil mat. 

I will also enter in the Free-4-All Challenge - Birthdays are Best.  My card celebrates the birth of Christ.  Finally, the fifth challenge will be the Use It Challenge requiring us to use old, forgotten or never used items from our stash.  Three of the four dies I used have been in my cardmaking stash for over a year and have never been unwrapped.

Friday, September 15, 2017

Birthday Jazz for Youngest Son!

SMILES ABOUND!  

THIS CARD IS NAMED A

SPLITCOASTSTAMPERS FAVORITE OF THE

WEEK ENDING - SEPTEMBER 16, 2017!!


When making birthday cards for people I know well, I try to choose a theme for the card that relates to that person in some way.  For my youngest son, and the youngest of my four children, I thought I would make a card focusing on his talent as a musician.

During his youth, in elementary school and as a teenager, he was very much into music.  He first learned how to play the clarinet and was promoted the next year to a saxophone.  He was really very good and became a member of the jazz band and concert orchestra starting in his junior high years.  With the jazz band, his focus was on his alto sax, but for concert orchestra, you could see him on his sax, playing the oboe, or any of a variety of other reed instruments in which the orchestra might be short of instruments for a particular piece of music.  Mark was a quick study and able to pick up many other reed instruments very rapidly.

I wanted to enter Mark's card into several challenges at Splitcoaststampers, so I did a little research before beginning.  The result was a Nu-Jazz style focus, using black, white, cream, tans, and reds.  "The Story" follows below if you are interested in more tidbits about the whys and wherefores of this birthday card.  Meanwhile, take a peek just below at the musical, jazz card that I ended up making for Mark's birthday...I think he will really like it!

Ingredients:  Papers: Stampin' Up--Basic Black, Cherry Cobbler cardstocks; Recollections--Antique Parchment stack.  Patterned paper: Graphic 45--Fashionista Collection/ Debutante (stripe); A Proper Gentleman (paisley).  Googled digital images.  Ink: Colorbox Chestnut Roam (age distressing).  Dies: Reverse Confetti--Edge Essential (black square edges); My Favorite Things--First Place Ribbon (fishtail).  Darice Foam Sheets.  Pink Posh: sequins.  Stash: black/ gold metallic baker's twine.  Knit fabric covered button.  Computer-made sentiment (Font: Budmo Jiggler/ 32).  Stampin'Up Marker: Cherry Cobbler (sentiment circles colored...very difficult to see).  Size:  5" x 6-1/4".

"The Story"

Because I wanted this to be a birthday card for son, Mark, about his musical talent, but I also wanted to enter it into SCS challenges, I did a little research on the challenges available before beginning my card.  For the Alphabet Challenge - Round 7, I needed a card using some element that starts with the Letter N, with the double challenge that it be "not feminine."  Well, that one was easy...a card for Mark would not be feminine and because his jazz band played a great variety of types of jazz, including the Nu-Jazz style, my card would focus on that style of jazz.

The second challenge I wanted to enter is the Inspiration Challenge, using inspiration from the website Design Seeds and their color palettes.  From their coffee hues, I decided to make my card, black, white, creams, tans, and reds.

The third challenge that would work well is the Mix-Ability Challenge, which requires the card to focus on Black, White, and "Read" All Over...a challenge all about colors as well.

The fourth and final challenge is the Featured Stamper, who is Rachel (stampinrachel).  The goal is to visit the Featured Stamper's gallery and find a card for inspiration in making your own card.  I chose a card from Rachel's gallery that used the inchie-style for the layout.  It was the inspiration to use that style in my card as well...check out Rachel's card with this link: Winter Thank You by stampinrachel.

Tuesday, August 2, 2016

Two Celebrate Their 10th Anniversary!

My youngest son and his wife celebrated their tenth anniversary in late July. . .it's difficult to believe ten whole years have gone by.  It was time to make them a special card to note their special day.  This year I decided on what I call a slightly vintage card style.  I love the vintagey look as long as it isn't way over the top, so my vintage-like cards tend to be low key.  Take a look at what I came up with below:


Ingredients:  Stampin' Up cardstock: Pool Party, Basic Black.  Pattern paper: stash.  Cottage Cutz Expressions word dies.  Bird Silhouette: Silhouette Graphics (PaintShop Pro modified).  Wilton 4-inch Doily.  Prima flower.  Hug Snug: seam binding ribbon (hand bleach/ crumpled).  Computer-made verse.  Size: 4-3/4" x 6".

The Story & Other Tidbits

Following is an explanation on the making of this card as I do not think the picture makes it totally clear.  Just a note to start: each of the layers are approximately 3/8" smaller than the layer below it both in width and height, and I sized and cut all layers prior to assembly.


To start, I cut my aqua cardbase to 4-3/4" x 6" and adhered the smaller black mat layer to it.  Next, I cut the chevron block patterned paper along its zigzag pattern so that it would be shorter than the aqua damask patterned paper that I planned to use as a layer below it.  I adhered these two patterns together so that 1/3 of the damask was exposed above the chevron blocks and 2/3 of the damask would show below.  I then positioned my half doily on the left of this patterned set, folding over a bit of the raw edge to the underside of the papers, and adhered the doily to the patterned set.  I was now ready to pop-up this set of patterned papers onto the black mat layer.  Once all four layers are adhered and popped-up adding the final touches to finish the card can begin! 


I positioned and adhered my black cardstock, happy anniversary die-cut toward the bottom right as shown.  I tied two pieces of the pink crinkled seam binding ribbon into a bow and adhered with a bit of hot glue.  Next, I attached my leaves with mini glue dots, and affixed my rose with a bit of hot glue.  

The final piece for my card front was to make my black silhouette bird family.  I cropped my family from a Googled jpeg-image filled with numerous silhouetted bird types, choosing exactly which birds I wanted to use.  I dropped my cropped image into PaintShop Pro and modified my bird family a bit.  There were two babies in the nest, and I decided I only wanted one, so using the software's tools, I erased one baby and made the nest smaller.  Next, I moved the Mama and Daddy birds closer to the baby's nest and shorten the branches on both side, eliminating a few leaves.  My last step was to save my new jpeg-image and then copy/paste it into a Word document to re-size for my card.  I printed it on white cardstock and fussy-cut it out to adhere to my card front.  

My last step as is traditional in my cardmaking was to finish the inside so that it complimented my card front.  I found the John Keats quote on line, which I love.  I also decided to incorporate my bird family to the inside as well.  I copy/pasted the verse into a Word document, sizing it to fit, and I found the perfect fonts to add the closing happy anniversary sentiment along with my son and daughter-in-law's names.  My bird family was also copy/pasted several inches below the verse.   Once I printed my Word document, I cut it to fit inside the card, distressed the edges, and adhered it inside the card.  I fussy-cut more of the chevron block patterned paper to decorate my verse at the top and bottom.  I think Mark and Ginger will really like their handmade card from Mom along with a dinner certificate for a night out.

Thursday, December 24, 2015

Christmas Greetings of Peace - Christmas X10 - Card #8!

In the post, I will be presenting card #8 from the Christmas X10 cardmaking event, which is a card made by one of our hostesses, Dara Peterson.  I love Christmas cards made with blacks, navys, grays, and silvers, and this one meets all of the qualifications to love it!  The only change I made from the original design was to add a silver mat layer between the navy cardbase and the gray card front base.


Just a note: in stamping your black silhouette scene, when your stamp is photopolymer, as this stamp set is, do NOT use StazOn black ink, which is a petroleum based product, and it is not compatible with polymer.  It is best to use Memento Tuxedo Black ink.  


The night sky is achieved by sponging lightly in a vertical downward stroke from the top of your scene's sky down to the tree line, lighting the pressure on your stroke as you move toward the horizon.  It also helps to place a piece of scrap paper under your white scene cardstock and starting your stroke on that scrap paper and then lightly moving onto your scene's cardstock.  This helps to alleviate sponging stroke marks.  Repeat your strokes until you achieve the depth of coloring you desire.


I love the end result of this card, and I think my addition of the silver glimmer layer absolutely adds to this cards already beautiful look.  And now, it is time for the reveal. . .see below.


Recipe:  Stampin" Up products:  Cardstock--Night of Navy, Smokey Slate, Basic Gray, Basic Black, Whisper White, Dazzling Diamonds Glimmer.  Stamps: To You & Yours (scene); Holly Jolly Greetings (on earth).  Ink:  Memento Black, Night of Navy (sponged).  Dies:  Hearth & Home Thinlits (window).  Christmas Greetings Thinklits (peacy).  (Thanks Dara Peterson for this wonderful card design.)

Friday, December 13, 2013

Serene Silhouettes Inspiration!

I made a little card designed by my friend, Liz Thayer, at her Totally Loving Christmas event back in August.  I had this stamp set in my stash, but had never used it or thought about it in terms of a Christmas stamp.  It was such a wonderful, serene Christmas scene that it inspired me to make another, using her fog technique and torn snow mounds.  As I like layering in my cards, I added a few more layers and patterned paper to the look, as well as enlarging my card.  I really liked how the pattern paper picked up and enhanced the bird coloring to make them pop.  Thanks Liz for the wonderfully pleasing effect of this card.  It makes you feel like you are looking out the window at a pristine snow-covered world that no one has dared to walk upon to mare its excellence!

Recipe:  SU stamps: Serene Silhouettes, Gorgeous Grunge (background illuminate), Petite Pars (sentiment). SU cardstock: Basic Black (base), Whisper White, Rich Razzleberry. Sycamore Street dsp. SU ink: Smoky Slate (stamping, sponging, distressing), Illuminate Glimmer. SU markers: Basic Black, Rich Razzleberry. SU Dazzling Details-silver.