Showing posts with label SU dsp. Show all posts

Monday, September 19, 2022

Glowing Lights At Christmas!

I recently went on a five-day crafting retreat with my group of 10 to 12 crafty lady friends. There were only nine of us attending this time, which is the smallest number we've ever been in the last seven years we've been going and sometimes twice a year, due to different health issues from colds to surgery recovery for two of our friends. We really missed the four ladies who planned to attend, but were unable to as time drew closer to departure.  The bulk of us are cardmakers, but we have one lady who was making fabric bags, zippered pouches, and starting a quilt and another was making a paper-crafting Halloween mini album for a niece.


I was making a Christmas card for Splitcoaststamper (SCS) challenges, plus four alternative Christmas kit cards.  SCS challenges can be the current week's challenge and/or a make-up challenge from several months old to several years old as challenges can be entered at any time you want. I started a personal goal for challenge completions of all the different challenge categories available since 2017 by making a WORD table list of all these different SCS challenges. Eventually, I am trying to catch up by participating in all them up to the most current week of challenges. Most challenges on Splitcoaststampers have a new challenge each week. There is no limit to the number of different challenges that a person can enter with one card, though you may not enter the same challenge category with the same card more than once.  For instance, if I enter the Color Challenge, I can enter only one week's Color challenge, but I may enter the Ways to Use It Challenges, the Sketch Challenges, the Teapot Challenge, etc. as long as I only enter one week's challenge date for each.  


Each week, I check out all challenges left that I have not yet entered from my list and try to adjust my card design so as many will fit as is allowed. I am usually able to enter 10 to 15 challenges each week. It will be the higher number if it is a Christmas card as that opens up at least two additional challenge categories involving the Christmas theme. Check out my Christmas card finished this week below. I was able to fit 15 challenges, because of the two Christmas card challenges available.


Ingredients: Stampin' Up products: Cardstock--Evening Evergreen, Cherry Cobbler, Whisper White. Papers--Distressed Gold, Glow Lights dsp (strip). Stamps--Brightest Glow (sentiment). Dies--Twinkling Lights (tree), Decorated Pine (stars). Basic Rhinestones. Other: MFT--Photo Corner Die-namics. Copic Marker (gem coloring). Chatterbox verse (inside). Size--4-3/4" x 6".

Tuesday, August 30, 2022

Candy Cane Wishes for Christmas!

 I still have very few Christmas cards ready for Christmas giving this year. It is starting to weigh heavily on me that I'm so far behind; therefore, my next card must be a Christmas card for my stash! I just received my Sweet Candy Cane stamps/dies and the Christmas Banner stamps/ dies that I ordered from the current Stampin' Up mini catalog so I'm eager to try them out. 


The Sweetest Christmas dsp in that same catalog has a lot of wonderful patterns and strips. I decided on a criss-cross background effect by using a striped diagonal paper pattern overlaid with the diagonal panel die-cut. I used all three colors in the striped paper on my card front stamping and die-cuts: Real Red, Garden Green, and Pool Party, plus I added a bit of aqua glitter paper to add some sparkle and bling! 


As most candy canes come in individually wrapped, clear cellophane wrappers, I decided to cover my Real Red, ink-stamped canes with Scotch clear packing tape to resemble these cellophane wrappers. This is an idea we used in a class card designed by Dar Peterson that I borrowed. I am pretty happy with the way my card looked upon completion...take a peak below at the finished card:

Ingredients: Stampin' Up-- Cardstock: Basic White, Garden Green, Pool Party. DSP: Sweetest Christmas. Stamps/Dies (J-D 2022 Mini): Sweet Candy Canes/ Candy Cane dies; Christmas Banner dies (pine boughs). Ink: Real Red. Punch: 1-1/4" Circle. Ribbon: 3/8" Pool Party Sheer. Gems: Elegant Faceted Gems. Other-- Paper: DCWV 6"x6" Glitter Pastels Mat Stack. Spellbinders Dies: Splendid Circles. Scotch 2" Clear Packing Tape.

Sunday, July 31, 2022

Mitering with a Twisted Oval Christmas!

I seem to be on a short hiatus from cardmaking of late! I've been really busy with other activities at home, away from home, and with family.  As usual, I have lots of cardmaking events that have pasted me by!


One thing that has been passing me by quite regularly is getting started on my Christmas stash this year.  I have been worrying about it, and since we've seen "Christmas in July" come and go, I actually got the yen to make a card very late in July!   I had a lot of incentive from Splitcoaststampers' challenges as well, and I will be posting it there as well.


I received some new free paper through the Stampin' Up Sale-A-Bration event going on in July and August, called Silver and Gold Specialty dsp (white glossy with gold or silver foiling), and somehow it got me interested in getting at least one Christmas card in July finished.  Take a peak below at my finished card, though I have not completed the inside verse or design, which I usually post.  I'm actually realizing that Christmas cards do not usually get a peak at the inside verse, because I'm not usually mailing them at the time that I make them!


Ingredients: Papers--White Metallic Shimmer cs (Amazon), Recollections-Gold Foil, SU-Silver & Gold Specialty dsp (Jul-Aug 2022 SAB). Dies--Spellbinders-Elegant Twist Etched Ovals, Ovals-Large; SU-Into the Woods (tree/ 2018 Holiday--2019-20 AC); Reverse Confetti Cuts-Winter Words (Oct.2015). Studio 112-Metallic Gems. Wink of Stella-Gold (3 of 4 peace layers colorized). Chatterbox verse-inside. 4-3/4 x 6 inches.

Tuesday, June 21, 2022

A Bohemian Chic Paper Weave!

 About four times a year, Splitcoaststampers hosts a Virtual Stamp Night challenge, which starts a month earlier than the official challenge date with three mini challenges.  When the official event happens, it starts on a Friday evening with four challenges, each on the hour, starting at 5:00 p.m. to 9:00 p.m. The second day starts at 1:00 p.m. and goes under 11:00 p.m., also with a challenge each hour.  My first goal was to at least get the mini challenge completed and at least six the next two days.  I was being realistic that I'd probably not get all challenges done in the time limit allotted for uploading the the gallery.  My fondest wish is that someday, maybe I'll actually complete all challenge and get them uploaded on time!


Well, this year, so far, I'm really random.  I may finish the minis, but I'm diving right into one of the later challenges, which I didn't really see myself completing, because I thought the challenge would be difficult to design a card for. But while browsing a few of the possible inspiration photos, I ran across one that really sparked my interest and reminded me of a collection of papers I recently bought, which motivated me to get started.  I also check for other challenges that might help me in my design, but I will have to add them later because of the short timeline to make and upload cards!


Take a peak at my completed card, which uses the bedroom color scheme and floral idea found in the paper:


Ingredients: Stampin' Up: Cardstocks--Crumb Cake, Calypso Coral, Basic White, Gold Foil. Patterned Paper--Symbols of Fortune DSP. Stamps-- Here's A Card (sentiment). Ink--Soft Succulent. Embellishments--Brushed Butterflies. Technique--Layered Strip Weaving. Other: Copics--Butterfly colors...R09 (orange), G29 (green), Y38 (Golden Yellow). Chatterbox inside verse. Size--4-3/4" x 6."

Saturday, April 30, 2022

My Mother is Celebrated & Loved!

It is already May, and I really need to get my Mom's Mothers' Day card made, compose my inside verse, finish the inside card design, and get it into the mail ASAP in order for it to arrive on time.  After reviewing various Splitcoaststamper challenge possibilities, I decided to finish one of my card class designs (original by Luci Kirschbaum) that I remembered was lurking in my “To Do Stash,” but there were some changes I wanted to make that occurred to me while in class. I wanted to jazz it up a bit and make it more me by adding layers, making it larger, and change the sentiment and its presentation.


I added layers below the card front with a Poppy Parade cardbase and a White Iridescent Glimmer layer.  I changed the label shape and sentiment theme from a simple fishtail flag to the Lovely Labels punch design, and I made my new sentiment Mothers' Day wording using two computer fonts I really liked. I have to say, I really like all my changes. 


I composed an inside verse using the computer and added a two-layer corner punch design to the four corners of the verse cardstock. I coordinated these punch corners with the card front's beautiful tulip dsp and the iridescent glitter paper. I'm just sure Mom will love her card......take a peek below:


Ingredients: Stampin' Up: Paper--Poppy Parade cs, Petal Pink cs, Flowering Fields dsp (2 patterns); Punch: Lovely Labels; Ribbon--3/8" White Taffeta; Gems--Opal Rounds. Other: Recollections White Iridescent Glitter paper; EK Punch--Victorian Corner; Chatterbox Creations sentiment/ verse. Size: 4-3/4 x 6 inches.

Monday, April 11, 2022

Little Lamb is Coming for Easter!

Easter is coming, and its time to get busy to allow for mailing.  I checked my "Need to Finish...TO DO Stash" to see if any Easter cards lurked that needed finishing.  I found a lamb image already colored and some paper pieces for possible finishing, but I wanted my card a bit bigger than the original card, so I decided to remodel the original design by Liz Thayer.


I kept the cardbase and first layer the same colors but changed the card face from a vanilla to a very soft yellow that I found in my 12x12-inch paper stash.  It was probably one I picked up from either Joanns or Michaels years ago.  There was a little Mint Macaron banner pre-cut, but I decided I wanted it longer.  I wanted to add some ribbon, and found a pretty Offray pink with white dots sheer ribbon that I thought would go nicely.


Take a look below at the finished card inside and out.  That little lamb is just darn cute!


Ingredients:  Stampin' Up:  Cardstock--Blushing Bride, Mint Macaron, Crumb Cake. Stamp--Easter Lamb for Baby (2016 Occasions).  Dies--Layering Ovals. Ink--Early Espresso, Cajun Craze, Memento Tuxedo Black. Banner Triple punch. Enamel Dot--It's My Party. Other--Soft Yellow Cardstock (stash, Dot paper (stash), Copic markers, Sergeant Colored Pencils, Offray pink-dot sheer ribbon, Uniball Signo White gel pen.

Tuesday, January 25, 2022

Happiest of Birthdays for an SCS Friend!

One of the ladies on Splitcoaststampers has a birthday in January, and she has kindly sent me a few cards over the years.  I seems to always be behind the eight ball and never have enough cards finished to send timely.  Even though that was still the case, I made up my mind that I would send her a card in January this year even if it was late.  It is on the way!


Take a peek at the cheerful little card sprinkled with lots of color and sequins that I made for her.  I'm hoping the Post Office is speedy in their delivery since she lives out of state from me and it's already late.  


Ingredients: Stampin' Up products:  Cardstock--Basic White, Lemon Lime Twist, Bermuda Bay, Daffodil Delight.  Pattern Paper--Bubbles & Fizz (2018 SAB).  Ink--Bermuda Bay, Lemon Lime Twist, Daffodil Yellow.  Stamps--Picture Perfect Birthday sentiment + confetti).   Dies--2-3/8" Stitched Circles.  Ribbon--1/8" Satin Bermuda Bay (2018 SAB Shimmer ribbon pack).  Other products:  Dies--Lifestyles Eyelet Circles.  Pretty Pink Posh--sequins.  EK Victorian Corner punch. Chatterbox computer verse.  Size:  4-3/4" x 6".

Wednesday, January 5, 2022

So Sweet Thank You!

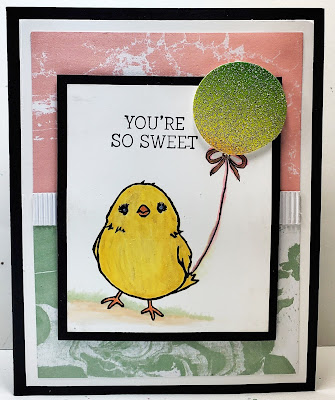
 My Mom has been my go-to-person for getting my stamps, dies, and "must have" Stampin' Up items since I resigned as a Stampin' Up demonstrator back in August.  If they would just stop inventing new stuff that I just can't live without, it would help.  I wanted to send her a little thank you card just to let her know how much I appreciate all her work...I do know what a big job it is to get things entered and on order in a timely manner in order to take advantage of sales that pop up every now and then!


I decided to check out my “To Dos” stash and finish a card I started back in early 2016.  This little chick was an SAB freebie, and I started coloring her when I was away from home, and didn't have my Copic markers with me.  I was not super happy with how she turned out.  I don't find I'm very skillful using water-base markers in getting any blending or shading.  I did try to go back and "fix her up" with my Copic markers later, but I'm not sure I improved upon her at all!  I did add a little ground shading so she was not floating in the air!

  
Originally, I was trying out a honeycomb paper balloon embellishment, but I found they don't store well and are flimsy and pull apart easily, so I tore off the honeycomb and added a glitter balloon made from a Duck Tape Rainbow Glitter roll that I bought about three years ago, but never opened the package to try it out.  It really is quite pretty and I think it works quite well with my color scheme.


I shipped off a check to pay Mom for my order along with this little So Sweet thank you card.  I think Mom will enjoy the thoughtfulness even if it was just a quick and speedy card!  Take a peek below at my inside and outside finished card for Mom!


Ingredients:  Ingredients: SU Products: Cardstock--Basic Black, Basic White. DSP: Perfectly Artistic (2016 SAB) Stamps: Honeycomb Happiness (2016 SAB). Ink: Memento Tuxedo Black. Punch: 1-1/2" Circle. Stamp-Write Markers: Daffodil Delight, Pumpkin Pie. Copic Markers. Ribbon: stash. Inside: Mint Macaron, Blushing Bride. Scalloped Scallops punch.  Other: Savvy Dies: Thank You Cursive. Duck Tape: Rainbow Glitter. Size-4-3/4" x 6".

Saturday, September 25, 2021

An Abstract Whimsy Christmas!

Here is a Christmas card for those who like a bold, abstract geometric flair with lots of bright and vibrant colors!  I like the design style, but usually not for Christmas cards, especially in such a non-traditional color combination!  (But, it actually grew on me as I worked with it!)

Ingredients:  All Stampin' Up products:  Cardstock--Night of Navy, Polished Pink, Mossy Meadow. DSP--Whimsy Wonder Specialty. Vellum--2021-23 In-Color Shimmer Vellum.  Dies--Layering Circles, Whimsical Trees, Christmas Trees. Ink--Polished Pink.  Wink of Stella-Clear.  Chatterbox computer verse (inside).  Size 4-3/4 x 6-inches.


 CONSTRUCTION NOTES WITH A STORY!


This is the first of four cards to be completed from a Christmas card class I attended this month.  Its original design was by one of our hostesses, Luci Kirschbaum.   Abstract Christmas cards are really out of my comfort zone, so it took time working with it before I began to appreciate its bold, totally non-traditional colors and abstract geometric design!  I loved the elements and dies Luci used in her composition, and I really like the changes that I made.


I started by switching the striped paper from a left vertical strip to an angled quasi-banner and built my card from there.  It was handy that I brought my mini-paper cutter with me to class!  The positioning of other elements are somewhat the same as Luci's, though I moved my tree a bit to the left and threw on a few more stars.  In addition, I added a new and larger framing card base in Blueberry Bushel.  I really liked this color addition as I was able to achieve my love of a larger card, plus the blue softened the bold colors and brought out the blue in the dsp stripes, which I liked.

Sunday, May 9, 2021

Let His Light Bring You Joy!

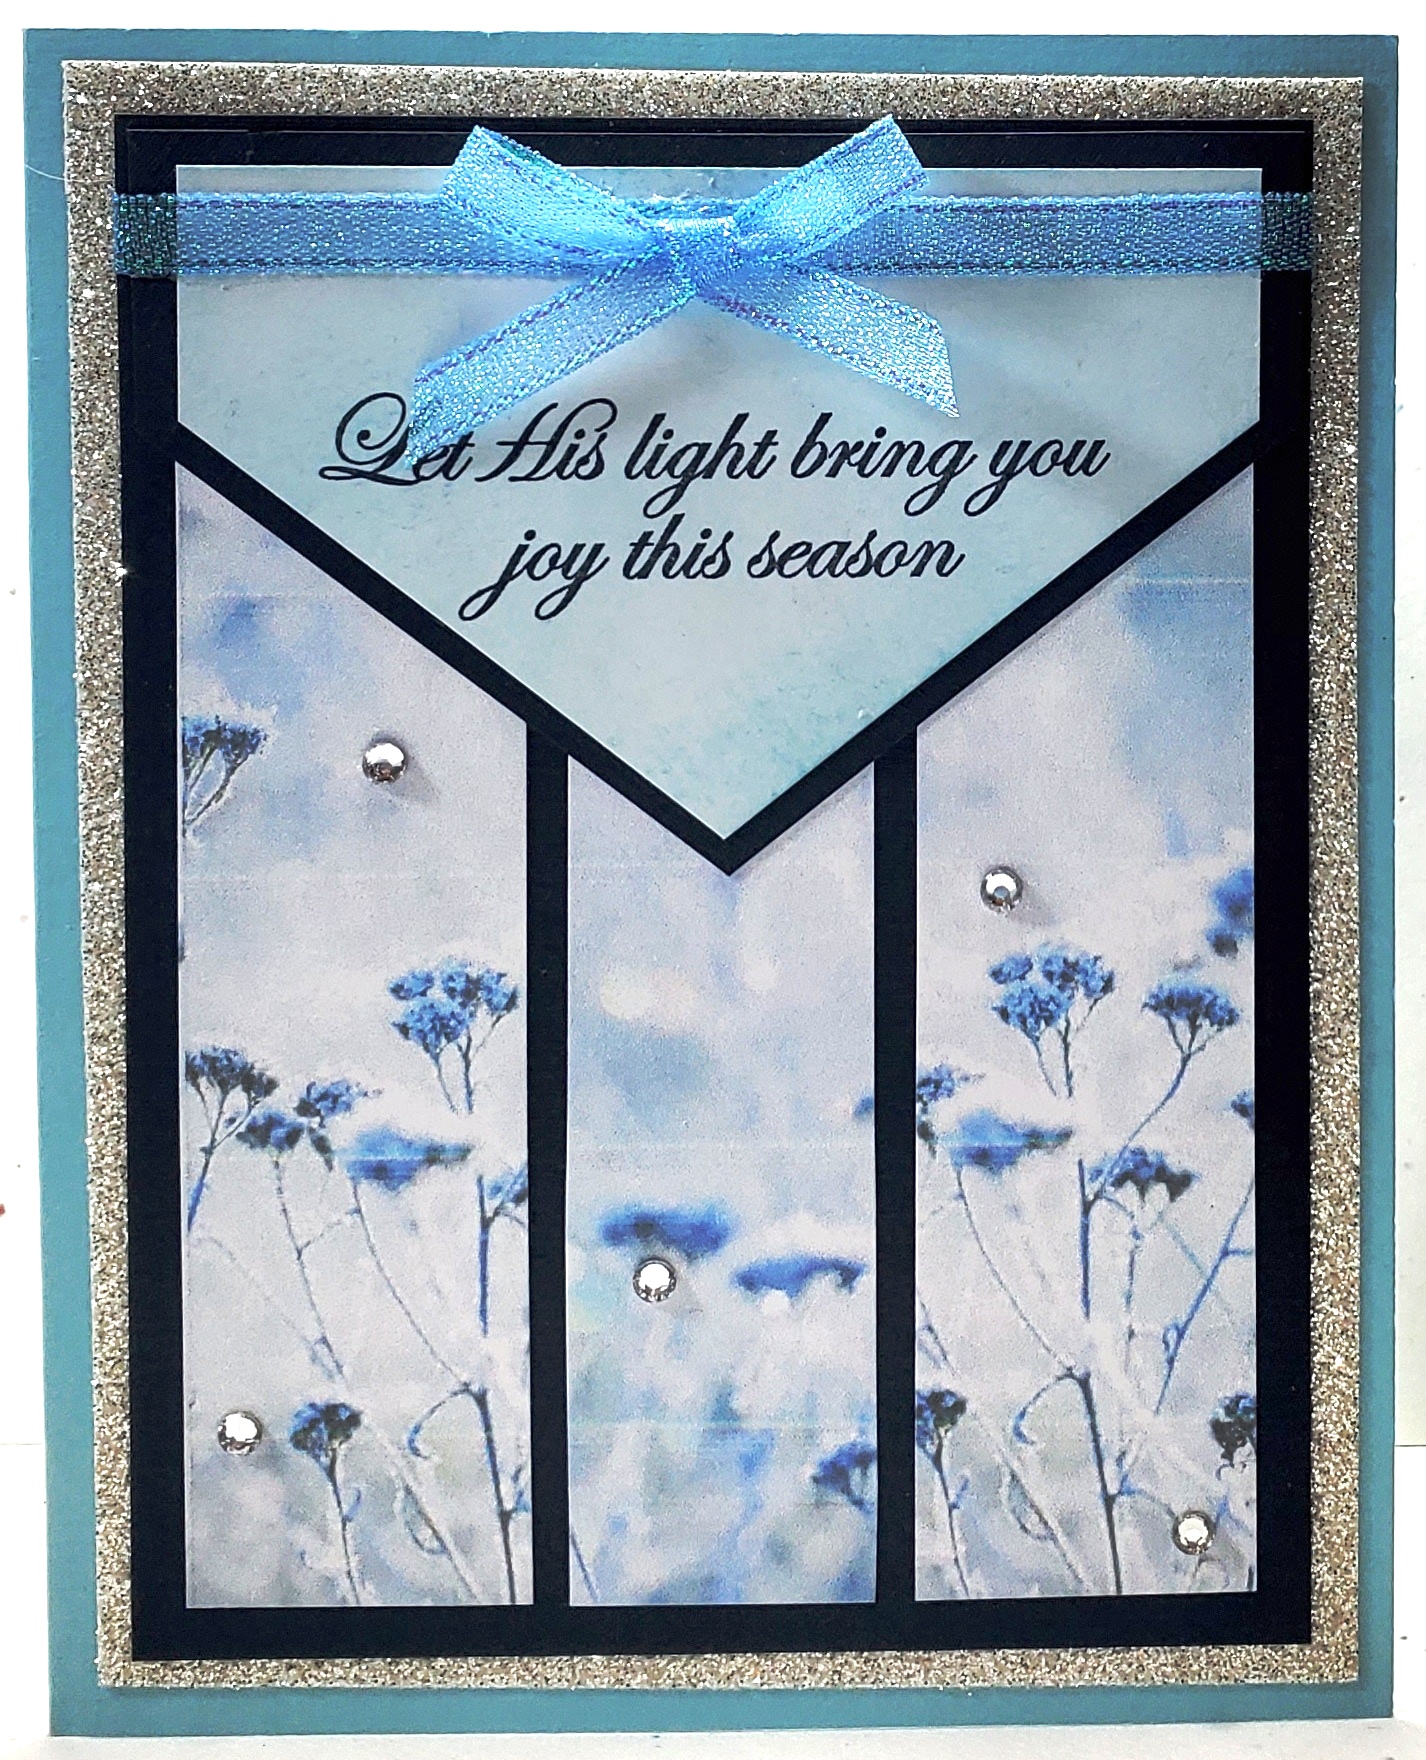
I'm trying to catch up on my blog posting, and I found this Christmas card that I made earlier this year that hadn't been posted.  I used this same card design for two sympathy cards back in January, but planned to remake it into several Christmas cards as well.   My card design was based on a My Favorite Things sketch from April 2018 - MFTWSC383, plus some Splitcoaststamper Challenge ideas as well.  


I liked the Feels Like Frost paper that I used on the sympathy cards, and I planned to use it on the Christmas cards as well.  I did not make the same mistake in measuring the flap this time, so it was plenty long enough to be positioned at the top of the layering scheme so the ribbon strip and bow would rested directly on the flap.  Take a peek at my finished  card:


My design rotated the sketch design to a portrait style and shortened the flap so it did not drop as low onto the body of the card.  I decided to place my sentiment on the flap similar to where MFT shows the white rectangle but lower in the angled area, and I layered the flap with navy.  In addition, I added vertical paper strips from top to bottom with the envelope flap overlaying the top portion of the strips.  Take a look at the My Favorite Things sketch that I based my card design from:


Ingredients:  Stampin' Up products:  Cardstock--Balmy Blue, Night of Navy, Silver Glimmer; Patterned paper--Feels Like Frost 6x6 dsp; Stamps--His Light (2018 Holiday); Ink--Night of Navy, Balmy Blue (sponging); Ribbon--1/4" Snowflake Splendor; Basic Rhinestones.  Other: Copic Markers (ribbon coloring); Chatterbox computer sentiment/ verse; Size--4-3/4 x 6-inches.

Monday, March 1, 2021

No Cake for David?

My oldest of four will be celebrating his birthday in the first week of March.  He is on the KETO diet, so he wants to say, "NO," to cake...can you imagine?!  I found it is now possible to purchase KETO ice cream, so we will be making an ice cream cake for his birthday.  He won't have to say NO to cake and he can have candles!  Now, I just had to get busy on a birthday card.


When I was last visiting my Mom, pre-COVID, I saw a card she made at her Stampin' Up demonstrator workshop.  I remember its sentiment from the stamp set, Amazing Life, and thought it would be perfect for my dieting son's card.  It also used the very masculine papers, In Good Taste, which I have, and thought one of the patterns might work nicely as well.  I decided to add a little black and a some recycle coppery foil (saved from an envelope insert...just too pretty to throw away!), plus a cupcake all work together.  Take a peek below at how my project evolved into David's finished card inside and out:


Ingredients:  Stampin' Up products:  Papers--Basic Black cs, Very Vanilla cs, In Good Taste dsp.  Copper Foil (saved from an envelope insert).  Stamps--Amazing Life (sentiment); Dies--Call Me Cupcake (framelits), Stitched Rectangles; Inks (sponging)--Bermuda Bay, Call Me Clover, Cherry Cobbler, Melon Mango; Clear Embossing Powder; 3/8" Black Shimmer ribbon; Metallic Brads.  Other:  Copic Markers.  Inside--Chatterbox verse.  EK Victorian Corner punch.  Size: 4-3/4" x 6."

Sunday, January 24, 2021

A Doily Gatefold Garden

I finally had the nudge to visit my craft room...yay!  I really wanted to put some cards together to send to some friends who have received no cards from me to celebrate their special times, even birthdays or Christmas while my mojo and cardmaking deserted me and ran amok for over a year!  My first thought was to motivate myself by trying to finish some cards already started that were gathering dust in the unfinished stash!


My first card is one I start back in the spring of 2019 when I traveled to visit my Mom in Redding, California before the COVID pandemic took over our lives.  While there, I attended a Stampin' Up card party given by Mom's Stampin' Up demonstrator, Darla Watson.   Darla is quite talented, and I always enjoy going to her parties when visiting Mom!  I am so glad my 95-year old "young" Mom still enjoys getting out and doing cardmaking with family and friends!


There were 5 card kits to make, all fun designs.  Some I completed at the party and others I took home half completed because ideas popped in my head while making them to add other layers or embellishments to the design.  This "popping into my head of ideas" is quite common when I'm making cards, my own or someone else's designs.  Most times, I feel pressured to pursue the ideas, or I will look at the finished card and say to myself, "what if" and drive myself crazy because I didn't at least see what I thought by using the "what if" ideas.  So, this card is one of those "what if" designs from Darla's long-ago designs that I found still unfinished and remembered my "pop in my head, what if" ideas.


As most of you know, who have read my blog for any length of time, I prefer cards larger than the standard A2 size.  The original card design had a white gatefold card base and a floral dsp layer added to the gatefold .  To me, it just needed more color, which meant layers, which automatically means...larger card.  I added a Blueberry Bushel (blue) bottom layer and a Call Me Clover (green) layer and then the white gatefold with flower dsp panels. 

 
It had a yellow belly-band as most gatefold cards do, but I decided to try a permanently attached horizontal band with Rose Red or Strawberry Slush scalloped edges.  The band starts on the center left side of the gatefold, under the doily, at the edge of the flower dsp and is adhered all the way around the back to the center right-edge of the gatefold.  The doily is only attached to the left side of the gatefold and becomes an overlay over to the right side.  Because of my modifications, I added a 1-3/4" white punched circle to the centerback of the doily underside to pretty it up now that its back shows when the card is opened.  


Thank you Darla for allowing me to modify your design many months later.  I always enjoy my visits and the fun times at your parties.  Here is my finished version of Darla's original card:


I'm send this card to a cardmaking buddy who did not receive cards from Chatterbox (me) while I hibernated in isolation.  Here is the added interior that she will received when she gets it in the mail!


Ingredients:  Stampin' Up products:  Cardstock--Blueberry Bushel, Call Me Clover, So Saffron, Melon Mambo, Whisper White;  Patterned Paper--Garden Impressions dsp 6x6;  Stamps--Eastern Beauty (sentiment);  Ink--Blueberry Bushel;  Punches--Bitty Blooms, 1-3/4" and 1-1/2" Circles, Leaf;  2-7/8" White Pearlized Doily; Bitty Basic Pearl Jewels.  Other products:  EK Punch--Victorian Corners. 

Wednesday, May 30, 2018

Thinking of You, Friend!

I have several Thinking of You cards that I need to make and get in the mail, yesterday!  One is for a friend who always have me over for tea when visiting in her seaside town.  I saw a challenge where we were to make a card around a song, and as soon as this, I thought about her and the song, I'm a Little Teapot, came to mind, and I couldn't get it out of my head.  With tea in mind, a search through my To Do box and brought forth pieces of an unfinished card that I started in a class about 4-1/2 years ago.  


Yes, I love to go to classes and socialize, and I usually don't get all the design samples completed.  To give me some credit (rolling my eyes), sometimes that is deliberate, because an idea comes to mind where I want to change something little or big about the card.  I don't complete the card at class in order to make the changes at home with my own supplies.  This one, I have kept near the original design, but made the original Melon Mambo card base into a layer.  I re-sized most pieces smaller, plus I added two more layers. . .a white cardbase and a die-cut decorative Old Olive layer.  I also popped up all the layers above the Old Olive layer from those first two added layers.  As a finishing touch, I ink distressed all my edges for a bit of a vintage flair, but I see this does show up well in my picture.


I think my friend will like her card, with its little teacup and happy colors, and be pleased to know I've been thinking about her.  Take a peek below at my finished card inside and out.


Recipe:  Stampin' Up products:  Cardstock--Old Olive, Melon Mambo, Whisper White.  Patterned dsp:  Gingham Garden (2013 AC).  Stamps: Kind & Cozy (2013-14 AC).  Ink: Old Olive, Melon Mambo; Ink Distressed: Soft Suede.  Punches: 2-1/4" Scallop, 2-3/8" Circle. Scallop Trim Border (ret.).  Embossing Folder: Stripes (ret.).  Ribbon: 3/8" Old Olive Striped Organdy. Rhinestones.  EK Punch: Scallop Photo Corners.  Die:  Reverse Confetti Die: Lacy Scallop Frame.  Fussy-cut teacup.  Chatterbox verse.  Size:  4-1/2" x 5-3/4".

Friday, December 25, 2015

Peaceful Pines @ Christmas (Totally Lovin' Christmas #7)!

Totally Lovin' Christmas card #7. . .OMGosh, I'm within three of finishing!  Have I said this before, but I'm saying it again. . .I love this card.  It has that homespun Christmas feel to it with the rustic Hardwood background in a weathered cedar look, and the cutest little Christmas tree ever!  It so reminds me of Christmas along the coast of the Pacific Northwest while growing up with the fog rolling in on Christmas Eve and hanging around until late morning, except I would have been looking at Redwood trees, not cedars, pines, or firs!


I only made two very little changes to the original design, and one was to add another layer, making a new cardbase in Cherry Cobbler cardstock.  The second was to just add a gold cording thread to my button rather than leave the holes empty of thread; just gave it a more finished look I think.  Just got to say again that I love, love that rustic weathered wood for the background.  I also have to say that seeing the Peaceful Pines stamp set actually used and in color makes it even more appealing than I thought just looking at it on the catalog page or the stamp case.  Take a look below at this little gem of a card.


Recipe:  Stampin' Up products:  Cardstock--Cherry Cobbler, Basic Gray, Old Olive, Very Vanilla; Farmer's Market dsp; Gold Glimmer.  Stamps--Peaceful Pines (2015 Holiday); Hardwood background.  Ink--Cherry Cobbler, Old Olive, Basic Gray.  Punches--1-1/4" Scallop Circle; Itty Bitty Accents-Star.  Regals Designer Buttons.  1/8" Gold Metallic ribbon.  Gold Metallic Cording.  (Thank you Liz Thayer for the marvelous original design).
  

Tuesday, December 22, 2015

Jolly Stars (Totally Lovin' Christmas #6)!

I'm rolling along finishing another card that I started at Liz Thayer's Totally Lovin' Christmas cardmaking event!  This one if full of jolly stars, and indeed, we did have a jolly time making cards, seeing old friends, and socializing as we made Liz's superbly designed cards.

I have to confess that I can seldom make a card exactly as it is designed and presented at an event such as this.  For some reason, when I see an already designed and finished card, my creative mojo starts zinging into my mind, and I have all sorts of ideas of how to tweak or change a card just a bit to make it more me.  Everyone has their own style and ideas in cardmaking, and I hope my hostesses do not take offense if I don't end up with the exact same card as designed.  One thing I know for sure, I love larger than A2 sized cards and I also like more layers of color than many other do.  My changes usually incorporate adding layers, which ultimately makes the card a bit larger.


On this Jolly Stars #5 card, I was not fond of the Iridescent embossed smaller stars, it changed the color too much, and made it so they didn't quite match the shades intended.  I thought I'd try clear embossing, which turned out so well that I decided to clear emboss the larger stars as well.  While I was at it, I embossed the Jolly greeting with Cherry Cobbler embossing powder rather than just stamping it in Cherry Cobbler ink.  Next, I decided the layers needed to have a bit more of an edge between layers, and also I felt it needed a white layer to set off the Mossy Meadow and the Red Glimmer papers.  Thus, I added white as a bottom layer making it my new cardbase.  My final addition was to add Clear Wink of Stella all over each of the stars and to the Crumb Cake band to add a bit of shimmer.

For those of you who are not familiar with the "Winks," they are a liquid brush pen that adds a coat of thin shimmer gloss to any surface by painting it on with its brush tip.  It comes in many colors, clear, black, gold, and silver to name a few.  Spoiler Alert:  the new Occasion mini catalog, which will be introduced on January 5, 2016 and run through May 31st, introduces the Wink of Stella Clear and Gold pens for purchase.  I know you'll like them.  Unfortunately, it doesn't really show up all that much in my card photo, but you certainly can see it when you view the actual card!


Recipe:  Stampin' Up products:  Cardstock--Whisper White, Mossy Meadow, Crumb Cake, Cherry Cobbler, Red Glimmer.  Merry Moments dsp.  Stamps--Oh, What Fun.  Star Framelit dies (size #1/ #2; #1 = smallest).  Decorative Label punch.  Clear Embossing Powder.  1/4" Real Red Cotton ribbon.  Other:  Clear Wink of Stella.  (Thanks Liz Thayer for the original card design).

Monday, December 21, 2015

Delicate Ornaments on Your Tree - Christmas X10 - Card #6!

Card #6 from the Christmas X10 card event is a non-traditional color combination for Christmas, but oh my, it is a beauty. . .black with gold and silver shiny foil!  It utilizes one of my favorite of all time designer paper collections, WinterWonderland dsp, all in black and gold coloring with the foil element incorporated right into the papers.


I did tweak this card's design just a bit, because I wanted my card to be larger to give more room for the ornament design elements, which are good size.  Also, I wanted to pop up the sentiment instead of affixing it directly onto the card front. Therefore, I made my card a 5-1/2 inch square rather sticking with the traditional A2 card size of 4-1/4" x 5-1/2."  I also add a third layer, in-between the two layers on the original card, in the gold foil. . .I truly think this really enhanced an already beautiful card design. Again, thank you Dara Peterson & Luci Kirschbaum for this wonderful card event, but most of all, for the magnificent card designs.  You two out did yourselves for sure!


Recipe:  Stampin' Up products:  Cardstocks--Basic Black, Gold Foil, Silver, Winter Wonderland dsp.  Stamps:  Embellished Ornaments - sentiment.  Delicate Ornaments Thinlit dies.  Gold Embossing powder.  1/8" Gold Metallic ribbon.

Friday, December 18, 2015

Candles Flickering - Christmas X10 - Card #4

We are on to card #4 from the Christmas X10 card event, which features a lovely trio of candles.  This one could be classified as punch art, much like the first angel card, as the composition of the card is composed by using a variety punches.  The candles themselves are cut in varying lengths of 3-1/2 inches, 3 inches, and 2-3/4 inches and all one inch wide, the wing of the Bird Builder punches out the glimmery candle flames, and a shallow punch with the 1-1/4 inch circle defines the wick's "well."   The background is textured with the Brick embossing folder, which reminds me of candles displayed on your fireplace mantel with a bower of pine branches to create that wonderful piney smell of Christmas!   


Again, I loved this card just the way it was created by Dara & Luci, and I find when this happens, no creative editing juice flow to make me want to tweak it in any way.  Christmas X10 card #4 can be seen below.

Recipe:  Stampin' Up products:  Cardstock--Whisper White, Old Olive, Cherry Cobbler, Gold Glimmer;  Merry Moments dsp (Holiday 2015).  Stamps--Festive Fireplace (Holiday 2015), Teeny Tiny Wishes (sentiment).  Ink--Old Olive.  Brick Embossing Folder.  Punches--1-1/4" Circle, Bird Builder-wing (flames), Itty Bitty Accents-flowers. Pearls.  


Thursday, December 17, 2015

Holly Jolly Christmas!

I am, once again, on my let's use some of that old stuff that been hanging around for several years, some of which has never even had the box cracked!  About time wouldn't you say!


Trying to decide what old stuff I should use, I started thumbing through my Stampin' Up Christmas stamp collection.  I came across a cute little set, Tags 4 You, that addressed a little bit of this holiday and a little of that one, from Halloween, to Thanksgiving, to Christmas, to Valentine's Day!  Though this particular stamp set has retired, its coordinating punch, Label Bracket, has not.  Wow! at least maybe I'll use the punch before it retires!  In this card, I even incorporated an old embossing folder, Stripes, that was introduced in the 2011-2012 catalog year, but retired two years ago. 


Next, I needed to decided on what papers and what colors to use.  There is something about the words "holly jolly" that makes me think of Santa, and immediately, that means red and white to me.  After playing with those two colors, I knew that I had to add a pattern to the card's design and maybe some glitz!  I ended up with festive red and white dots from the Polka Dot Parade designer paper, which retired after several years running in 2014.  I paired it up with a current paper, the glitzy Gold Foil, which I intended to emboss to add some depth and dimension.  After all my playing and trying this and that, I think I'm pretty happy with the end results.  Don't you just love that shimmery stripe organdy ribbon that I found in my stash and added at the last minute?


Recipe:  Stampin' Up products:  Cardstock--Real Red, Whisper White; Polka Dot Parade dsp (retired); Gold Foil sheets.  Stamps:  Tags 4 You (retired).  Embossing folder:  Stripe (retired).  Other:  Pink Posh sequins.  Stash: Red Shimmery Organdy ribbon.

Sunday, December 13, 2015

Punch Art Angel - Christmas X10 - Card #1!

October was a busy month.  I went to another Christmas cardmaking event, Christmas X10, which was hosted by two great ladies and Stampin' Up demonstrators, Dara Peterson and Luci Kirchenbaum.  This is the first time I have been invited to one of their annual events, and I was thrilled with the ten card designs presented by these two wonderful ladies.  What a great and fun way to teach and demonstrator Stampin' Up products. . .a partnership where everything is shared.  I am sure these two have a great time together.  I met several new cardmaking ladies who love to craft as much as I do.  It surely was a fun-filled and enjoyable event.


Our first card was made from products featured in the annual catalog rather than the new 2015 Holiday mini catalog.  I so loved this card's design that in making my own card, I stuck to an exact replica of the class sample.  The cute little punch art angel and the tree were formed by using the Tree punch, and the angel's wings were formed by using the smaller round-winged butterfly from the Bold Butterfly framelit die set.  This was such a lovely card, presented in a beautifully simplistic style.  Please take a peek. . .you'll like what you see!


Recipe:  Stampin' Up products:  Cardstock--Whisper White, Shimmery White, Dazzling Diamonds & Silver Glimmer paper.  Merry Moments dsp,  Stamps: Merry Everything.  Ink: Cherry Cobbler.  Punches:  2-1/2" Circle, 3/4" Circle, Tree, Itty Bitty Accent-Star.  Framelit dies: Bold Butterflies.  (Thank you Dara & Luci for the wonderful card design).

Tuesday, December 8, 2015

Home for Christmas (Totally Lovin' Christmas #3)!

Here is another bedazzling card design by Liz Thayer from her Totally Lovin' Christmas card event, which was held in October of this year.  All parts of the card are from products in the Stampin' Up 2015 Holiday mini catalog, if you are interested in trying to order them.


I made this card exactly as Liz designed it, except I added another layer, creating a new Real Red cardbase.  The card just seemed to call out for a little more of the red featured in the Home for Christmas designer papers and the little red ribbon.  I also added a red rhinestone on one of the little deer that was more centered on my card...just a bit more of my own flair.  Feast your eyes on this cuteness!


Recipe:  Stampin' Up:  cardstock--Real Red, Crumb Cake, Pool Party, Very Vanilla, Gold Glimmer.  Home for Christmas dsp (deer, music & red stripe).  Stamps: Endless Birthday Wishes.  SU Ink: Soft Suede.  Punch: Washi Label.  7/8" Sahara Sand lace, 1/4" Real Red Cotton ribbon.  Wood Snowflake Elements (2015 Holiday - colored with marker).  Rhinestones.  (Thank you Liz Thayer for the very cute card design).