Showing posts with label Ribbon. Show all posts

Tuesday, April 19, 2022

Easter's Symbol of Salvation!

Moving on to my second Easter card that I found in my "TO DO" box: a previously finished card from a 2018 class card. When I got home from class, I separated the layers with my trusty spatula (OLD Cricut spatula), because I knew I wanted to elaborate on the card when I had time and I didn't want the glue tape to set. The pieces ended up stashed in my "Need to Finish...TO DO Stash" box and promptly forgotten! The original card's design credit goes to Dar Peterson, one of my two SU demonstrator duos.


I got out all the pieces and my photo of the original to see if I could remember what I wanted to do different. My changes do not really change the original design look too much, but adds a bit more sparkle and elegance, I think, with more Gold Foil added. I enlarged the card to a 4-3/4" x 6" card from an A2 by making a larger new white card base, adjusting the Blackberry Bliss larger (I used the original for an inside card layer), and cut and inserted a Gold Foil layer before adding the top white embossed card front layer. I also added a Gold Foil scalloped oval below the multi-color stitched dsp layer.


I was really please with the foil additions as it dressed up this lovely card even a bit more by adding more eye-catching metallic sparkle that coordinates with the gold filigree cross.  Now, here's the rub!  I forgot to take a photo of my remodel before popping it in the post for mailing! 


All I got to say is...woe is me, sigh! I bid you to use your imagination to envision how those changes looked as this is a photo of the original design! Take a peek below at it and my inside design and stamped verse:


Ingredients:  Stampin' Up: Cardstock--Blackberry Bliss, Basic White, Gold Foil. Pattern--Painted with Love Specialty dsp (2018 Occasions).  Stamps--You're Inspiring (sentiment); Easter Promise (inside verse). Dies--Cross of Hope Framelits (2018 Occasions/ 2018-19 AC); Stitched Shapes Dies (oval). Petal Burst EF (2018 AC). Other: Brilliance Chalk ink--Gingerbread. Ribbon scrap.

Monday, April 11, 2022

Little Lamb is Coming for Easter!

Easter is coming, and its time to get busy to allow for mailing.  I checked my "Need to Finish...TO DO Stash" to see if any Easter cards lurked that needed finishing.  I found a lamb image already colored and some paper pieces for possible finishing, but I wanted my card a bit bigger than the original card, so I decided to remodel the original design by Liz Thayer.


I kept the cardbase and first layer the same colors but changed the card face from a vanilla to a very soft yellow that I found in my 12x12-inch paper stash.  It was probably one I picked up from either Joanns or Michaels years ago.  There was a little Mint Macaron banner pre-cut, but I decided I wanted it longer.  I wanted to add some ribbon, and found a pretty Offray pink with white dots sheer ribbon that I thought would go nicely.


Take a look below at the finished card inside and out.  That little lamb is just darn cute!


Ingredients:  Stampin' Up:  Cardstock--Blushing Bride, Mint Macaron, Crumb Cake. Stamp--Easter Lamb for Baby (2016 Occasions).  Dies--Layering Ovals. Ink--Early Espresso, Cajun Craze, Memento Tuxedo Black. Banner Triple punch. Enamel Dot--It's My Party. Other--Soft Yellow Cardstock (stash, Dot paper (stash), Copic markers, Sergeant Colored Pencils, Offray pink-dot sheer ribbon, Uniball Signo White gel pen.

Thursday, January 13, 2022

An Anniversary for January!

This card is for my youngest daughter and her husband in celebration their fifth anniversary.  I wanted to send them a card to mark this half-decade event, and I decided on a little bit of fall to mark the season in the year that we all spent so much time together getting the wedding and reception all arranged.  They married in a large barn, and my son-in-law was instrumental in using CAD software to arrange the layout for the wedding area and the reception.  One-third of the barn was used for the wedding "stage" with garden arbor and seating, and the other two-thirds was set up for the reception.  I distinctly remember one blustery fall evening when we drove to the barn for measurements to see if his drawings worked...being an engineer, I never doubted him!


Take a look at their finished anniversary card.  I may have to explain the fall design to them, but I'm sure they will enjoy their card made by one of their Moms
!


Ingredients:  BoBunny Double Dot--Rust; Echo Park patterned dsp; Papertrey Ink: Autumn Acorns stamps/ dies. Spellbinders: Labels 16 Nested dies (sentiment frame); 3/8" stash ribbon; Computer-made sentiment.

Wednesday, January 5, 2022

So Sweet Thank You!

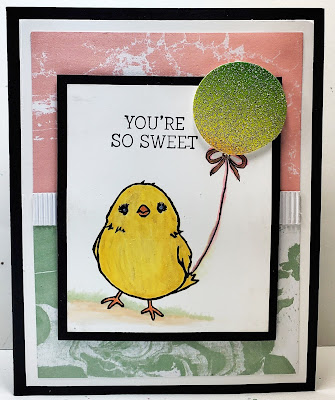
 My Mom has been my go-to-person for getting my stamps, dies, and "must have" Stampin' Up items since I resigned as a Stampin' Up demonstrator back in August.  If they would just stop inventing new stuff that I just can't live without, it would help.  I wanted to send her a little thank you card just to let her know how much I appreciate all her work...I do know what a big job it is to get things entered and on order in a timely manner in order to take advantage of sales that pop up every now and then!


I decided to check out my “To Dos” stash and finish a card I started back in early 2016.  This little chick was an SAB freebie, and I started coloring her when I was away from home, and didn't have my Copic markers with me.  I was not super happy with how she turned out.  I don't find I'm very skillful using water-base markers in getting any blending or shading.  I did try to go back and "fix her up" with my Copic markers later, but I'm not sure I improved upon her at all!  I did add a little ground shading so she was not floating in the air!

  
Originally, I was trying out a honeycomb paper balloon embellishment, but I found they don't store well and are flimsy and pull apart easily, so I tore off the honeycomb and added a glitter balloon made from a Duck Tape Rainbow Glitter roll that I bought about three years ago, but never opened the package to try it out.  It really is quite pretty and I think it works quite well with my color scheme.


I shipped off a check to pay Mom for my order along with this little So Sweet thank you card.  I think Mom will enjoy the thoughtfulness even if it was just a quick and speedy card!  Take a peek below at my inside and outside finished card for Mom!


Ingredients:  Ingredients: SU Products: Cardstock--Basic Black, Basic White. DSP: Perfectly Artistic (2016 SAB) Stamps: Honeycomb Happiness (2016 SAB). Ink: Memento Tuxedo Black. Punch: 1-1/2" Circle. Stamp-Write Markers: Daffodil Delight, Pumpkin Pie. Copic Markers. Ribbon: stash. Inside: Mint Macaron, Blushing Bride. Scalloped Scallops punch.  Other: Savvy Dies: Thank You Cursive. Duck Tape: Rainbow Glitter. Size-4-3/4" x 6".

Friday, June 4, 2021

A Ballerina for Amara's Birthday, Too!

My oldest son's fiance has two adult children. Her daughter has a daughter who was born between my granddaughter #2 and granddaughter #3.  She is a wee little thing, and my granddaughter #3, who is five months younger, is at least three inches taller!  We consider Amara our adopted granddaughter #4, and she needed a birthday card for her second birthday in early June.  Needless to say, she needed a ballerina birthday card as well!


To decide what colors her ballerina would feature, I asked what colors of clothing Amara looked the very best in...the answer was turquoise (aqua) and yellow.  So, a two-tone card Amara would get.  I used an SU retired Tempting Turquoise cs and Crushed Curry.  patterned paper I chose was a little pale, so I sponged Daffodil Delight ink over the surface.  Since I made the last ballerina card for Evie, I purchased the body parts that I spoke of in the first ballerina card made (see it here: A Ballerina Birthday for Callie!); therefore, this little girl has real arms and a real torso, and legs, which are hidden below her clothing!  Other than these added body-shaped parts, there is very little difference in construction.  Take a peek below at Ballerina card #4 in light turquoise and yellow:


Ingredients:  Stampin' Up products:  Cardstock--Crushed Curry, Tempting Turquoise (ret.), Whisper White.  Patterned Paper--All Abloom dsp stack (2014-15).  Ink: Daffodil Delight (sponging).  Pearls-mini--Copic colored.  Other:  DCWV Glitter stack--Turquoise-oval frame/ Yellow-skirt.  American Crafts POW--Marine Glitter paper (bodice/ balloon).  Dies--Alina Crafts--Ballerina, Doll Body Set; Spellbinders--Floral Ovals, Petite Ovals Large; Lawn Fawn--Party Balloons; MemoryBox--Varsity Numbers; Autone dies (Amazon): Balloon Message Strings (happy birthday sentiment). EK punch--Victorian Corners (inside).  Ribbon--Offray 1/2" Turquoise Organza (lengthwise 1/2 cut).  Copic Markers.  Wink of Stella: Black   Stash--Balloon strings--Lyon Sparkly Mini Yarn; Glitter Tulle--turquoise/ yellow.  Chatterbox Verse.  Size: 4-3/4" x 6-1/4".

Saturday, March 27, 2021

But, Of Course, Evie Gets a Ballerina too!

Evie celebrated her first birthday in November, 2020.  Not to be outdone by her cousins, Evie did not receive a birthday card in 2020 for her first birthday from Grandma either.  Mama and Evie were busy moving into their new home, and Grandma was busy helping Mama move storage unit boxes, babysit, and unpack many boxes as well.  Grandma also masked up, brought hand sanitizer, clorox wipes, etc. and timidly ventured out with Mama and Evie, while eyeballing my six-foot minimum distancing as we bought furniture, carpeting, closet doors, window coverings, paint, lumber, and hardware for all of Mama's myriad of projects she wanted to complete before officially moving in.  With everything freshly painted, renewed or replaced, Mama and Evie moved into their new home with three weeks to spare!  Grandma's house became very quiet...we surely missed Mama and Evie, but not to fret...it was only a 12-minute drive to their new doorstep!


Evie's Zoom Unicorn Birthday Party day arrived after many hours spent decorating with streamers, a birthday banner, balloons, and unicorn tidbits everywhere.  Unicorn cupcakes were made and party favors delivered to each party participant's porch the night before, and Mama made and decorating a beautiful unicorn cake with whip cream frosting and a beautiful pink, turquoise, and purple mane.  Grandma had her gift all wrap with a note that said, "Evie's birthday card is 'under creative construction.'  Hopefully, it will arrived completed soon!"


I am happy to say Evie's birthday card and my third ballerina card is complete!  I have to say, I thoroughly enjoy making these gems for my lovely girls!  Evie gets a turquoise ballerina with a dab of pink.  She has light brown hair to match Evie's very short locks, but the little ballerina doesn't show off the reddish glints in the sunlight that we see sparkling off little Miss Evie's head!  Take a peek at Evie's card below:


If you are interested in the Ballerina construction check out this link: A Ballerina Birthday for Callie!

Ingredients:   SU cardstock: Bermuda Bay, Blushing Bride, Whisper White.  ColorBok Glitter Paper: Glacier Springs/ White.  Patterned Paper: Raspberry Road Design by Susan Darter--Mini Roses/ Stripes.  Recollections: Turquoise Foil.  Cote'dinations Sparkle cardstock: Fashionista.  Bubbley White Shimmer Paper.  Spellbinders dies: Floral Ovals, Petite Ovals Large.  Lawn Fawn die: Party Balloons.  MemoryBox die: Varsity Numbers.  Autone dies (Amazon): Balloon Message Strings (happy birthday cutout/ sentiment).  Turquoise Glitter tulle (stash).  Wink of Stella/ Clear.  Offray ribbon: Turquoise Organdy.  SU: Pearl minis.  Size: 4-3/4" x 6-1/4".

Friday, March 12, 2021

A Little Pink Ballerina for Sienna!

 I've now finished my second ballerina card, and this one is for my second granddaughter.  They get to be granddaughter #1, #2, and #3, by their age.  Callie, who was just 4, is granddaughter #1.  Sienna, who was just 2, is granddaughter #2, and Evie, who is 16 mos., is granddaughter #3.  I love them all dearly, and I'm sure you know, their number has nothing to do with how much I dearly love them!  All clever, cute, and darling girls for sure!


So, I missed making Sienna's first birthday card, as I was just returning from several trips to California, just in time to attend her birthday party, but not get a card done!  Within 5 days of her birthday party,  Covid arrived in Washington...the first state with a Covid case, then schools closed, gatherings closed, restaurants closed, and life became anything but normal!   It seems everything stopped, even my creative mojo and ability to get myself to my crafting table stopped!  I think we were all in shock, and my husband and I were certainly in the age range where every precaution was needed!  I am happy to say...a year later, both my husband and I have received the vaccine, and we are looking forward to an end of the pandemic!  At least we can now socialize with our family members who are vaccinated...we are almost to 75% of our immediate family at this point.


I am also happy to say that I have finally made little Sienna her card for Birthday #1 to save in her memory box...a homemade card from Grandma in honor of her first birthday!  Sienna dressed in a darling little frilly pink birthday dress, so it was only right that her card should be pink...and with her very blonde hair, her ballerina surely must have yellow hair.  I followed the construction instructions provided on Callie's purple ballerina card, and here is that link:  A Ballerina for Callie! if you are interested in the ballerina's construction.  Take a peak below at Sienna's sweet little pink ballerina:


Ingredients:   SU cardstock: Melon Mambo, Whisper White.  ColorBok Glitter Paper: Glacier Springs/ White.  Little Yellow Bicycle Patterned Paper: Baby Safari Girl--Pink Floral/ Girl Small Squares.  Bazzill: Hot Pink Foil.  Gemstone Shimmer Cardstock: Rose Quartz. Alina dies--Ballerina. Spellbinders dies: Floral Ovals, Petite Ovals Large.  Lawn Fawn die: Party Balloons.  MemoryBox die: Varsity Numbers.  Savvy die:  Happy Birthday cursive.  Rose Glitter tulle (stash).  Offray ribbon: Hot Pink Organdy.  SU: Pearl minis.  Wink of Stella: Clear (hair sheen).  Size: 4-3/4" x 6-1/4".

Sunday, March 7, 2021

A Ballerina Birthday for Callie!

March is a time to celebrate two granddaughter's birthdays as their actual birth dates are only two days apart.  Callie is my oldest granddaughter, and it will be her fourth birthday.  I have been so out of mojo for over a year that she did not get a Grandma birthday card for year three! Since a bit of my creative mojo has returned, I wanted to make a very special card for her for birthday #4.  


A friend made me a "Thinking of You" step card during my hand surgery recoveries, and I loved the card so much, I borrowed the die, thinking Callie would love it.  What little girl wouldn't...its a ballerina!  I've since decided I need to make one for each of my other two granddaughter's in different colors and different patterned papers.


The die is from Alina Crafts, and I found some YouTube videos on construction using the die.  It turns out that it's meant to be used with a companion body-parts die, which can be used with a variety of other theme and wardrobe  "people" dies.  The die comes as one main die including the head, hair, neck, upper body, and flowery vine tutu skirt.  It also has dies that cut out the dress bodice, ballerina slippers, and the eyes and cheeks.  I didn't like the way the video put the face and hair parts together...let's just say, to me, it was weird.  So, of course, I had to do my own thing, which I've tried to explain below the card picture.  And,  voilà, here is my finished card!  I think Callie will love it! 


Note:  Inside & outside are identical shades...somehow camera lighting didn't take it that way!

Ingredients:  Stampin' Up products:  Cardstock--Gorgeous Grape, Purple Posie; Punch--Detailed Trio; Pearls-mini; Rhinestones--Copic colored.  Other:  Papers--K&Co. mini floral (from Stash); Paper Adventures--Dazzle Purple-Pink Stripes; Colorbox--White Glitter paper.  Dies:  Alina Crafts--Ballerina; Spellbinders--Floral Ovals, Petite Ovals Large; Lawn Fawn--Party Balloons; MemoryBox--Varsity Numbers.  Balloon strings--Lyon Sparkly Mini Yarn.  Stash--Flower Gems.  Chatterbox Verse.  Size: 4-3/4" x 6-1/4"


Ballerina Construction:

Die-Cutting/ Punching/ Fussy-Cutting:
1) Die-cut the chest/ skirt die (and the ballerina slipper dies) from purple foil, leaving off the head and neck.  2) Using this same die, out of flesh-colored cardstock, die-cut two sets of heads with chest down to the waist...do NOT include the "skirt."  3) Die-cut a third flesh-colored cardstock head/ hair rounding the lower edge of the face without a neck.  This piece will be the "final" face for the ballerina.  4) Die-cut the head/hair only from black cardstock for the hair.  5) Using the eye/cheek die, out of black cardstock, die-cut the "eyes."  6) Using the bodice die, die-cut the dress top out of a sparkly lavender cardstock.  You could use glimmer paper, but I wanted a little less sparkle than that.  7) Again, using the eye/cheek die, you could die-cut the cheeks using pink cardstock, which is what Alina intended to be done.  I decided to use Copic marker coloring/ shading on all flesh colored areas that would show when the ballerina is complete: the face, neck, upper torso, and arms flesh.  I also Copic-coloring rosy cheeks and added a white gel pen dot rather than using pink half-circle die-cuts.  I also added Copic-colored blue eye shadow.


There were no dies for the lower body, legs, arms, or a leotard, so I fashioned my own.   1) Using a retired SU Small Oval punch (3/4" x 15/16") for the arms (with an arms behind the back look), punch one oval from flesh-colored cardstock.  2) Using the same oval punch, punch out the leotard from same sparkly cardstock used for dress bodice.  3) Using a retired SU Large Oval punch (1-3/4" x 7/8"), punch one large oval  from the flesh-colored cardstock for the lower body (hips) and legs.  4) Turn this large punched oval vertically.  Leave one end of the oval as is for the hips.  5) Fussy-cut and shape legs with pointed toes from the other end of the oval.  Now, it was time to put my body parts together!  


Head/ Hair/ Face/ Upper Body & Arms:

1) I adhered the two head/ upper body flesh pieces together to form a stronger upper body unit.  2) I trimmed 1/16" around the head/hair down just to the neck.  3) I trimmed 1/16" along the chest/ upper body along the sides from shoulders to waist.  The head/hair was done so when the third "head/ face" flesh piece was added this double thickness would not show...only the top third layer would show and its round without a neck would form the chin.  The sides of the chest/ upper body edges were trimmed to allow the flesh cardstock Small Oval to form the shoulders and arms, looking like she was putting her arms behind her back.  4) I  Copic-colored/ shaded the face at this step and I did the same to the neck and chest of the two-layer piece.   5) I adhered this third Copic-colored face (hair, which did not need to be Copic colored or shaded) to the double-thick body making sure the head fit nicely on top and formed a "chin".  Now, my head is 3-layers thick!  6) I trimmed off just a bit of the flesh cardstock around the edges of the hair area so that none of the flesh color would show around the edges of the black hair color.  7) I fussy-cut the black hair from the head black cardstock so it would fits nicely over the flesh-colored hair area and adhered it to the flesh-colored hair.  When it was dried, I applied Clear Wink of Stella for a bit of shine to her hair.  8) I applied a tiny bit of glue to the back of her black eye/ lashes and used tweezers for correct placement.  (Be sure you have them turned over for the correct sides of the face when applying the glue).  9) I Copic-colored her rosy cheeks and added a white gel pen dot to their centers.  10) When eye glue dried, I Copic-colored her blue eye shadow.  11) Now, I was ready to add her arms.  I Copic colored/ shaded the flesh-colored Small Oval, but didn't bother to color the center of the oval where the chest/ upper body would be glued.  I positioned the oval horizontally, fitting it behind the back so the shoulders flared out at the base of the neck and adhered it to the back of the torso with glue. 


Lower Body/ Leotard/ Legs/ Ballerina Slippers: 

My ballerine needed a lower body, leotard and legs!  1) Take the leotard...the Small Oval cut from the sparkly bodice cardstock; turn the oval vertically, and trim 1/16" off the end of the oval curve using a straight cut.  2) Fit this straight edge up to the flesh waist bottom and glued it to the lower edge of the arm oval (which you will see extending below the waist) and snug it up to the waist flesh.  3)  Turn over the ballerina and glue her "hip/legs fashioned larger oval" behind the sparkly leotard so her hips are behind the leotard and legs extend below.  4)  Adhere the ballerina slippers over her pointy toes with the wider part of the slipper down covering the "pointy toes."  Set aside your girl to thoroughly dry while you form her skirt/ dress.


Skirt/ Bodice Top/ Hair Bow: 
1) With the purple foil skirt/ chest die-cut, narrow the chest area, all around three sides, down to approximately 1/4" wide and 1/8" high just to waist where skirt flares out; set aside.  2
) Cut 5 or 6 pieces of tulle (sparkly best) 2" long by 3" wide.  Overlay the pieces one layer over the other.  2) Using the metal die as a guide only, fussy-cut the tulle to the same shape as the die skirt and upper body.  3) Adhere the layers together with bitty glue does and larger if needed, keep the edge-shaping even along the skirt sides and upper body to form a unit.  4) Take the purple foil skirt/ chest and attached to the tulle unit to the backside of the chest (make sure no tulle shows along the "chest" part of the skirt).  5) Lift the skirt vines and streak with glue, pressing them on the tulle to attach and dry.  6)  When skirt/ tulle is dry, attach the lavender leotard and legs behind the tulle at the torso back with glue/ glue dots as needed.  7) Glue sparkly lavender bodice onto ballerina chest top and foil skirting.  8) Add 4 string pearls along waist.  9) Take a 4" to 5" piece of 1/4" sparkly ribbon and tie a bitty bow, cutting and angling its tails.  (Tip: my sheer ribbon was too wide, so I trimmed it to 1/4" width.)  10) If desired, you can add 2 bitty pearls to the bow knot area as well.

Wednesday, January 6, 2021

Christmas Flowers Bring Joy (Paper Pumpkin October 2020 - Joy to the World Alternative)

I think I mentioned several months ago that I finally signed up for Stampin' Up's Paper Pumpkin subscription hoping that would motivate my lost cardmaking mojo.  It helped a little, but not as much as I'd hoped.  I still didn't get started on Christmas cards until just a few days before Christmas...YIKES!  I did fall in love with the October 2020 "Joy to the World" Paper Pumpkin kit, and it did finally spark me to try some alternative designs of my own rather than just make the couple of designs provided in the kit. 
 
I received a cute little penguin card from Ann Otto, the hostess of the Splitcoaststampers' Christmas Card Challenge...one I have participated in many times in past years.  I loved Ann's simple layout design with its left side triangle so much that it immediately gave me the idea to use the bones of her layout and incorporate it into the Stampin' Up October 2020 "Joy to the World" Paper Pumpkin kit elements to create my own card.


My deviations to Ann's layout were to add several layers to the card background, enlarge the left-side triangle and add layers and embossing to it as well.  Instead of a cute little alcohol inked penguin, I positioned two layers of kit's Christmas rose flowers on the triangle to which I did a bit of fussy-cutting and coloring.  I also added gold sequins to the flower centers and added green to the leaves.  I wanted the leaves to show off more and wanted to add depth and texture with the layers, sequins and dry embossing.


The kit came with gold metallic "Joy" die-cuts, but I decided to use my own "Joy" die, cutting it in two colors and setting them in an off-set,  layered placement.  The kit provided two vertical Crumb Cake card bases with a gold-etched vertical patterned, but I wanted to make multiple numbers of my card design to build up my Christmas stash, so I found a background stamp that I thought would work really well.  I stamped and heat embossed the pattern in gold onto plain Crumb Cake cardstock to create eight more card fronts.  I also added ribbon and more sequins that were also not part of the kit.  (Unfortunately, the other seven pre-cut and prepared card pieces are still waiting for me to finish putting them together!)  

Take a peak below at my first alternative card design using the Paper Pumpkin kit supplies, plus some added items and supplies not provided by the kit.  I have included the card ingredients below for your information:


Ingredients:  Stampin' Up products:  Paper Pumpkin October 2020 "Joy to the World" kit elements.  Cardstock--Cherry Cobbler, Whisper White, Call Me Clover.  Gold Embossing Powder; Versamark Watermark Ink.  Polka Dot Tulle Ribbon.  Other:  My Favorite Things background stamp: Balloon Strings.  Alina Craft die: "joy."  Hot Off the Press:  Diamond Dots EF.  Pretty Pink Posh sequins.  Colorbox Ink: Chestnut Roan (edge distressing).  Size: 4-3/4" x 6".

Wednesday, November 13, 2019

Remembering a Warm and Wonderful Lady!

My daughter-in-law lost her grandmother several months ago and her memorial service was held later in September, all when I was unable to make sympathy cards while recovering from hand surgeries.  Her grandma was a warm and delightful lady, who always had a big smile and never failed to stop and chat after church each Sunday.  She was always willing to lift and hand and do anything and everything to help.  She was part of the women's ministry who made and served our church's monthly breakfast, and she was an avid cake maker, as well...such beautiful creations!

I really wanted to acknowledge her memory and loss with a handmade sympathy card for my daughter-in -law and her mother.  Also, to let them know how thankful I was to have been able to get to know her even better after her granddaughter was engaged and married to my son!  Using the basic design from my October 28th post, I modified it once again with a change-up of colors, embossing folders, and the window creation using white heat embossing with the Flowering Flourish stamp, and for a more subtle effect, I used the reverse side.  I made the purple for my daughter-in-law and the pink for her mother.  Take a peek below at the finished cards inside and out!


Ingredients:  Stampin' Up products:  Cardstocks--Whisper White, Highland Heather, Pretty in Pink, Vellum-Translucent.  Stamps--Serene Garden (dove), Flourishing Phrases (oval window white embossed design).  Dies--Crosses of Hope (cross), Layering Ovals.  Ink--Sahara Sand (dove), Highland Heather & Pretty in Pink (oval window brayered coloring).  Embossing Powder--White.  Embossing Folder--Tufted Dynamic.  Other:  Colorbox--Snow Frost Glitter paper.  Dies--Spellbinders Grommet Tags w/modified ends using Spellbinders Classic Triple Scallop Edges. Ribbon--Offray 5/8" Sheer Stripe, 5/8" Sheer Ruffle.  Punch: EK Victorian Corners.  Copic coloring--doves.  Chatterbox sentiment/ verse.  Size:  4-3/4 x 6 inches.  (My card design was inspire by an Easter card by Dar Peterson.)

I've been on a mission to catch-up on back challenges that I was not able to enter for one reason or another; therefore, I checked my Splitcoaststamper Challenge List before beginning, I had lots of inspirations to be able to enter my finished cards into several challenges. 

Monday, May 14, 2018

Sorrow for Our Alpha Sister!

It is with sadness that I must make another sympathy card for a dear friend that I've gotten to know through Splitcoaststampers.  She is a fellow Alpha Challenge sister, Art Deco Diva, and after a long struggle, she has lost her mother to the battle.  We are all so saddened to hear this, but want our friend to know how much we are thinking of her and praying for her and her family.

The Splitcoaststampers Traveling Teapot Challenge, which chooses someone each week that we want to honor in some manner and for different reasons.  Unfortunately, some of those reasons involving losing someone near and dear to us.  Art Deco Diva's SCS galley is filled with lovely cards that can only be described as eclectic.  We are choosing to honor Art Deco Diva with cards that feature the shabby chic style and are challenge hostess wants us to include lots of detail.

I love shabby chic, one of my favorite styles, but I prefer it not to be too over the top, but for sure it must include ribbon, lace, flowers, and definitely be feminine.  I am using all of those things, plus some layering and dry embossing to add texture.  Of course, it has to have some sparkle, so I added a flower rhinestone medallion for the center of my flowers.  Take a peek below at my finished card inside and out.  I'm hoping it will bring solace to ADD's sorrowful heart and let her know that we are thinking of her and keeping her and her family in our prayers during this trying time.


Ingredients:  Stampin' Up products:  Cardstocks--Sahara Sand, Lost Lagoon, Very Vanilla.  Stamp--Petal Potpourri (2015 Occ).  Markers--Lost Lagoon, Sahara Sand.  Dies--Stitched Shape Framelits/ Ovals.  Punch--Flower Medallion (ret.).  Embellishment--Something Borrowed (Occ-2015).  Ribbon--3/8" Stitched Satin-Lost Lagoon (ret.).  Lace--7/8" Lace Trim-Sahara Sand (ret.).  Other:  Cuttlebug EF-Summer Set/ Floral.  Dies--Spellbinder Petite Scallop Oval SM.  Chatterbox sentiment/ verse (computer printed).  Size: 4-3/4" x 6".

Tuesday, January 30, 2018

Tool Time Waterfall Birthday!

It is my husband's birthday in a few days, and as he's quite the handyman; therefoe, I decided on a tool card for him.  I had been itching to do another waterfall card, and I thought this technique would work well with tools for each stage of the waterfall.  This will be my third waterfall card, but it's been almost two years since the last one, which was for Easter 2016.


I have three stamps sets that have carpentry tools on them.  Two of them are about four years old, and the other is just about a year old.  I have made cards with all three, but I wanted my tools to be a bit more realistic and not so cutesy or toy looking, so I surfed the web for Google blackline images and found several that I liked.  I did use the nuts, bolts, screws, and nails from one of my stamp sets.


I wanted to enter a few Splitcoaststampers' challenges, so I looked up what was available before getting started to see if I could fit parts of one thing or another into one or more challenges.  I ended up being able to enter these five challenges...Alphabet Challenge/ Letter W for waterfall/ Extra Double = use decorative scissors (I used old pinking shears); Ways to Use It - Give Me a Second Chance (use old stamps/ tools/ old pinking shears); Inspiration Challenge...something from Needlepoint website to inspire you (colors came from here...serendipity...the kitty even had tools); Use It 2018 (bring out unused or never used crafting items; and the Technique gallery for Waterfall card.  I entered one more...Free 4  All/ F4A415, but I might be fudging a bit......create a pop-up card or use things with a popping theme, i.e., popcorn.  In my Waterfall technique...the waterfall items "pop up" one by one when you pull the ribbon.  There is interaction, but not quite like a "pop up" card, but it still seems like it might fit!


I'm thinking my husband will be very please with his card.  Take a peek below to see what you think.  There will be four views as a waterfall card is interactive and you'll need to see it in each of its stages as it flips up through the layers.


Ingredients:  Solid Papers:  Stampin' Up cardstock - Basic Black, Real Red, Hello Honey, Silver Foil (embossed).  Patterned Papers:  Michaels Open Stock: Golden Grid; Joanns Open-Stock: Silver Check Designer.  Google Search Digital images: tools + 6" ruler (from stash).  Copic Marker colored.  Stampin' Up stamps: Nailed It (bolts, nuts, screws, nails, only).  Dies:  Spellbinders: Circles LG, Pinking Circles LG, Lifestyles Circles (retired).  Punches: 1/2" Circle; 1/8" Hole punch; Zutter Corner Rounder.    Decorative Scissors: Pinking shears.  SU Embossing Folder: Argyle (retired).  Recollections: Screw Brads.  Stampin' Up Ribbon: 1/8" Black w/silver grosgrain.  Fussy-cutting.  Waterfall Technique.  Computer verse/ sentiment.  Size: 4-3/4" x 6".

Sunday, November 12, 2017

Christmas Medallion has Pzazz!

LOVE THIS KIND OF NEWS!

THIS CARD IS NAMED A 

SPLITCOASTSTAMPERS' FAVORITE 

OF THE WEEK ENDING - NOVEMBER 18, 2017


I'm needing to catch up on more cards for this Christmas season as well as my Splitcoaststampers' Alphabet Challenge.  I'm way behind in both categories!  Letter "M" is the current alpha challenge and it just opened with a bonus challenge added to use Letter"N" in the form of material with a nap or the Nib of your marker.  


I wanted to work those requirements into a Christmas theme, and I already had something brewing in my head using more of my Christmas gift wrapping paper from my re-cycle stash.  By planning carefully, I was able to fit my card into three Splitcoaststampers' challenges.  


While making this card, I learned that with the MISTI stamp tool, I can actually stamp a sentiment on gold glittery paper as long as it is the type that is fairly smooth without much of a nap, BUT you have to stamp over and over at least 10 times to get more and more depth of color and be patient to let it dry well.  I was going to use a gold shimmer vellum, but I did not have Navy embossing powder and the Stampin' Up ink did not dry well on the gold shimmer vellum so that I could use clear embossing.  


TIP:  When working with wrapping paper, which tends to be thin, I cut a 6" by 6" square of gift wrap and adhered it with my Scotch 3M tape runner to cardstock scraps to give it thickness and body.  If I used more than one scrap, I used scotch tape on the back side over the seam to be sure it was stabilized.  I also made sure I ran a double row of tape on the sides to allow for trimming my 6" square to fit any card size I planned to make, plus I ran a few tape rows toward the center horizontally and vertically.


Even with all my adjustments and changes as I put this card together, I'm pretty happy with the finished look. . .take a peek below, and then see "The Story" of making the card below the card picture.


The inside design and verse are under construction...check back later for posting.


Ingredients:  Paper:  Stampin' Up Night of Navy cs; DCWV Glitzy Glitter Stack (gold); Christmas re-cycle gift wrap (navy/ gold embossed).  Stamps: Stampin' Up--Hang Your Stocking (sentiment).  Ink: Stampin' Up Night of Navy.  Dies:  Stampin' Up Layering Circles Framelits (scalloped).  Punches:  Stampin' Up--1-3/4" circle; Curvy Corners (retired).  Stampin' Up Foil Snowflakes (medallions).  Ribbon: 7/8" Offray Shimmery Sheer--yellow (color modified with Copics: Y28/ YR23).  Size: 4-3/4" x 6".


The Story

I started my card with the look of a present or gift in mind and used a sheer shimmer ribbon vertically and horizontally like gift wrap.  I didn't have the exact color I needed, but not to worry...I colored my pale yellow ribbon using the wide angle nib of my Copic marker pens YR23 and Y28 to colorize it to the perfect gold!  Now, my card fits the Alphabet Challenge Letter "M" for Medallion and bonus Letter "N" to use material with a nap or the Nib of your marker.


I saw that the July Dirty Dozen Christmas Challenge asked you to create card with presents in mind...bows, boxes, old wrapping paper, or great a gift.  Old wrapping paper works just great for me!

For the yearly 2017 Christmas Card Challenge, my card does not fit any of the specific categories for the months, except December, which is "Anything Goes!"  Fortunately, in this challenge, we are given the monthly themes for the entire year, and we can post to any of the months at any time!  So, hey, I'm early for something for a change!

Sunday, October 22, 2017

Halloween Glitz

Halloween is coming, and it is one of my favorite cardmaking holidays!  I've been eyeing the Splitcoaststampers Falliday Fall Challenges taking place during with the month of October.  In the back of my mind, I had been toying with the idea of making a card somehow with a big glitzy gold moon and a Halloween silhouette image.  When the Falliday challenge "From Trash to Treasure" came up several days ago to use something recycled on your card, I remembered this pretty black and gold shimmery striped gift paper that I had saved on one of my husband's Father's Day gifts.  I began to get excited and felt the itch to get to my craft table, because I was also remembering my Halloween card idea semi-formed in my mind.  Below is the Halloween card that evolved as I worked on it...


This is the inside design and verse that I created to coordinate with the outside.  I've decided this is the perfect card for my youngest daughter and husband.  I think they will be delighted. . .they are all about Halloween!


Ingredients:  Papers: SU Basic Black cs, Core'dinatins Black Tie Glitter, DCWV Glitzy Glitter Stack (gold), Recycled gold/black stripe gift paper (stablized w/cs).  Dies: My Favorite Things--Stitched Circle STAX, Savvy--Haunted House, Sizzix Tim Holtz Alterations--Halloween Shadows (bats).   Busy Kids Flip Flop Rhinestones.  Ribbon/ Twines: Offray--7/8" Black Satin Ribbon, BoBunny--Sheer Dot ribbon, MayArts--Metallic Gold/ Black Twine.  Wink of Stella-Black.  Computer-made verse (inside).  Size: 4-3/4" x 6".

Thursday, August 31, 2017

A Whirl of a Birthday!

MORE GOOD NEWS!  

THIS CARD IS NAMED A

SPLITCOASTSTAMPERS FAVORITE OF THE

WEEK ENDING - SEPTEMBER 2, 2017!!


One of my favorite sister-in-laws is having a birthday at the end of the week.  Our birthdays are just one day apart, and I really needed to get busy and get a card made and mailed to California!  


I found several card parts and paper pieces in my scrap box that I had made several years ago, but not used: two pinwheel heads and a glittery cloud.  I decided it was high time these cute little items move from the scrap bin to center stage on a card front!


I liked niece's card of several years ago so well that I decided to CASE my own creation.  
 I knew the theme of this card would remind June of fun times we had together with our brother spouses at the California State Fair.  Another bonus that it would save me time so I could get her card in the next day's mail.  All I would have to do was finish the pinwheels, cut some new cardstock layers, and create a new sentiment and inside verse with my sister-in-law in mind. 


While putting the card together, ideas were simmering about the birthday verse and a sentiment that would keep the verse's theme in focus.  Therefore, when I finished the card, I was ready to move to my computer.  Once I finished composing the verse and sentiment, chose the font, and printed both, I put together an inside design that complimented the card front.  


Voila...I was done and off to the mailbox it went.  I think it will put a smile of pleasure on June's face when she sees her perky little card made from some things old and some things new that will take her for a walk down memory lane.  Meanwhile, please take a peek below at her card inside and out:


Just a note that I plan to enter June's card into the Alphabet Challenge, Round 7 - DD7ABC23D for Letter D = Double Bow/ Double Pinwheels and DD7ABC24C  for Letter C = Cloud.


Ingredients:  Stampin' Up products:  Cardstock--Island Indigo.  Patterned paper: Sycamore Street dsp (2013 SAB). Clouds Embossing Folder.  Punches: Modern Label, Word Window.  Pool Party Baker’s Twine.  Dazzling Details (glitter glue).  Other products:  Recollections cs:  Cool Water pack.    Spellbinders Big Scallop Ovals SM.  Sizzilits Pinwheel die.  WRMK Corner Chomper: Deco.  Offray double-sided satin ribbon,.  Recollections mini gold brads.  Toothpicks.  Size: 5-1/4" square.

Monday, August 7, 2017

Feel Better Soon!

HAPPY MAIL RECEIVED!  

THIS CARD IS NAMED A

SPLITCOASTSTAMPERS FAVORITE OF THE

WEEK ENDING - AUGUST 13, 2017!!


There is a challenge on Splitcoaststamper's called the Traveling Teapot, and its goal is to make cards for someone who needs a bit of cheering up due to illness or other circumstances.  One of my Favorites Teammates has a sister who is in the hospital awaiting serious eye surgery to remove an abscess behind her eye.  The Teapot challenge team has decided to shower Angie's sister with get well cards from SCS members who wish to play in this challenge, and I, of course, wish to do that.


My card for Angie's sister is one I made from a design I received in a shoebox exchange held during our crafting Girls' Getaway.  The card design and techniques used were from a dear friend and crafting cohert, Sandy Stroble.  She showed us how to do the braided ribbon technique and also the tiled window.  I had a difficult time with the braided ribbon because of my arthritic fingers, so she made several for ribbon strands for me to take home to use in the future.  My card incorporates both of her design techniques, as well as a little butterfly stamped into the tiling technique.  Take a peek below. . .I think Angie's sister will enjoy her card!


Ingredients:
                  Paper: SU cardstock:  Whisper White, Chocolate Chip, Pretty in Pink
                  Patterned paper: Heidi Grace stripe (JoAnns)
                  Stamp:  SU-Butterfly Basics
                  Ink:  SU-Chocolate Chip, Pretty in Pink, Pink Pirouette, Versamark
                  Die: Spellbinders: Rectangles, Scalloped LG (inside)
                  Punches:  SU: Word Window, Modern Label (retired), Dotted Scallop Edger (retired)
                  Embossing Powder:  Clear
                  Sentiment and Verse: Computer generated
                  Font: Daddy-O.........Size:  4-3/4" x 6"

Monday, July 31, 2017

An Anniversary Twosome Sail With the Breeze!

I'M SMILING AGAIN!  

THIS CARD IS NAMED A

SPLITCOASTSTAMPERS FAVORITE OF THE

WEEK ENDING - AUGUST 6, 2017!!


We are celebrating our youngest's eleventh anniversary this year!  WOW! is it difficult to realize it has been that many years since this lovely couple married.  But, these two also celebrated the birth of their first child just a few months ago, so now it is easier to recognize that they've been married a few more years than five or so!  I wanted to make them a special card celebrating their first anniversary with Miss Callie Page in attendance as well.  Take a peek below at the finished card front and inside with my composed verse via the computer: 


THE BACK STORY!

I recently purchased this whimsical die-cut from Spellbinder, named Dandylion, which depicts the dandelion's seed head after flowering.  I thought I'd use it as an anniversary card with the two little seedlings sailing off in the breeze as a couple to begin their own family.  I dare say my imagination is a bit whimsical today!


My background is made with Stampin' Up re-inkers in Tempting Turquoise, Wild Wasabi, Daffodil Delights, and a touch of Lemon-Lime Twist, and the Danylion die-cut is made using black glitter paper.  I made the sentiment using my computer and printing directly onto my finished watercolor background.  I decided to add a perky little sheer ribbon and bow, and pop the watercolor front and its black mat up off the Tempting Turquoise cardbase.  I'm pretty happy with my watercolored background since I have not used this technique much, and I'm not totally comfortable with it yet.


Splitcoaststamper's is also hosting their annual Dare to Get Dirty Challenges for their members who are SCS Fan Clubbers.  Since we are not supposed to mentioned what the basis of the challenge is, I will just say this one is for the very first challenge initiated by *Understanding  Blue (*the hostess' SCS nickname).  There is a color challenge going on as well, which requires the use of the three colors I chose for my card, so it will be entered that challenge as well.


Ingredients:  Stampin' Up products: Cardstock--Tempting Turquoise, Basic Black, Watercolor paper; Inks--Tempting Turquoise, Wild Wasabi, Daffodil Delight, Lemon-Lime Twist.  Darice core'dinations Glitter Silk-black.  Die: Spellbinders Dandylion.  Ribbon: Stash-3/8" Offray.  Computer sentiment.  Size: 4-3/4" x 6".  Inside: EK Medium Scallop Photo Corner punch; SU: Daffodil Delight cs; Computer verse.  Technique: Watercolor...Let It Run.

Thursday, June 22, 2017

A Brainy Get Well!

A good friend and cardmaking buddy had brain surgery for repair of the trigeminal nerves in the brain, caused by a rare condition known as Trigeminal Neuraligia.  This condition caused her chronic pain in the area supplying feelings, by the trigeminal nerve, to the cheek, jaw, teeth, gums, lips, or less often the eye and forehead.  Bouts of pain can last from a few seconds, several minutes, days, weeks, months or longer (some people have periods when they have no pain at all for weeks or months).  Her surgery seems very successful, though she can not be sure of the exact results for up to several months.


I wanted to make Charlene a pretty get well card that was cute and cheerful, letting her know how much I can't wait until she can join us again at the crafting table!   After mulling around several ideas, I saw Sketch Challenge SC649 on Splitcoaststampers, issued June 14th.  I really thought I could do something with this sketch idea, using a colored image in a cute round frame.  
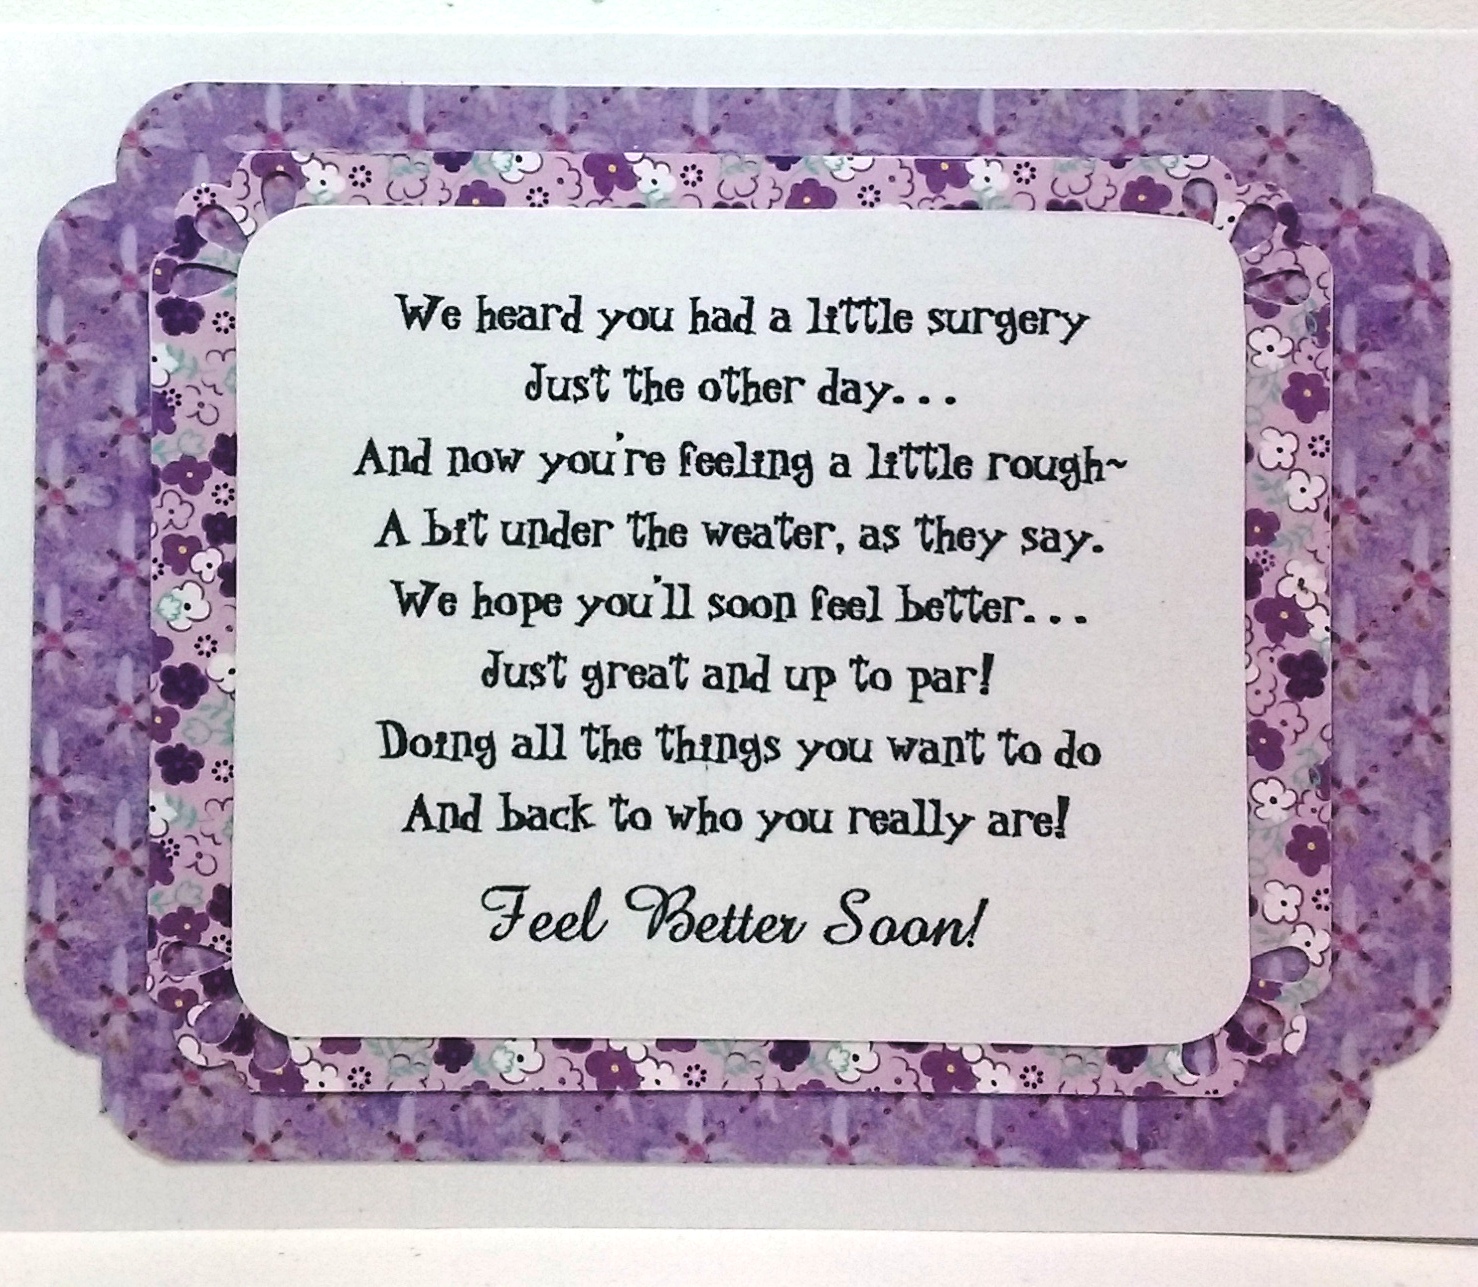
After completing my outside design, I created a little verse and designed the inside to coordinate with the front.  Take a look at her finished card below, both inside and out:  


As it turned out, I took some liberties with the sketch elements, which we are allowed to do.  Take a look at the original sketch that I worked with:


My little girl image shouted out for a square frame instead of a round one, and its angled band called for a straight and wider band to blend with my square frame.  I also decided to add a couple of corner curves and eyelets cut-outs to spruce up my layers and a sheer ribbon and bow.  I hope Charlene will enjoys her card as much as I had fun making it!


Ingredients are listed below:

Cardstocks:  Recollections Essentials (Violet); SU Whisper White. Patterns: Recollections: Purple Ditsy Floral; K&Co.-Watercolor Bouquet-Purple. Color Digital Image: Bandaging Kitty.  Die: Spellbinders: Classic Squares SM; Lacey Squares. SU Punch: Three Corner (retired).  EK Border Punch: Patterned Circles (cut in half).  Offray 5/8" Sheer Violet Ribbon.  Bath & Body Works-Magic in the Air/ Diamond Shimmer Mist. Frame (outside): 3-1/4". Frame (inside: 2-1/4".  Card Size:  4-3/4" x 6".

Tuesday, March 29, 2016

Easter Kangaroos in Australia???

As I've mentioned before, I joined the 2 Cute Ink Digital Stamps Club, which has a monthly fee of $5.00, though you can sign up and pay for more than one month if you choose.  For this fee, you receive five free 2 Cute Ink images, plus one exclusive to the club, for a total of six each month.  In addition, you receive a coupon to use in the 2 Cute Ink Etsy Shop.  The coupon varies monthly, but has been 75% off purchases from the shop of already published images.  There are also several challenges available through 2 Cut Ink, one of which is open to club members using the exclusive monthly stamp.

I've not made it a habit of entering challenges very often simply because I never seem to have enough time to make cards that fit a challenge requirement and my personal cardmaking obligations.  But, for some reason with these 2 Cute Ink digital images for Easter, I have entered two other cards into challenges so far!  Now that has to be an all-time record for me, and guess what, I'm about to submit my Easter Kangaroo card that I just finished to the club's exclusive challenge.  It seems I'm on a roll wanting to color, color, and more color my 2 Cute Ink Easter images.  I'll even be able to put this one away in my card stash to give out next Easter!


I found getting my coloring and shading for my kangaroo to where I would be satisfied was a difficult thing.  I finally called it good before I totally messed him up and had to start all over!  Ever been there. . .done that???  Though the picture does not show it well, I made a lightly colored blue mottled sky, which was really easy, as it turned out, and I added a bit of Wink of Stella--Clear on my eggs and chicks and also in my grass just under my kangaroo.  In real life, it looks pretty cool!  Love that Wink!!!


Recipe--  Papers: Stampin'Up Gumball Green cardstock; DCWV Dots & Stripes Stack; Recollections Mom's Diner/ Cone; AdornIt Vintage Groove Collection/ Vintage Polka Dot Green-side 2 (frame).  2 Cute Ink digital image: Easter Kanagroo.  Dies: Spellbinders--Big Scallop Ovals LG; My Favorite Things--Stitched Oval STAX.  Ribbon: Celebrate It 360--7/8" Metallic Gold Sheer; Waverly--5/8" Satin Metallic.  Lion Brand Bonbons Yarn: Celebrate (Copic colored).  Crafter's Square Sequins.  Wink of Stella/ Clear.  Colorbox: Chestnut Roan (distressing).  Copics:  Kangaroo Tummy: E50, E51, E53.  Kangaroo Body: E21, E53, E55, E23, E25.  Ears/ Nose: R02, RV11.  Chicks--Y00, Y08.  Eggshells--BG000, BG13, BG57; YG11, YG09; R00, YR04.  Sky: B0000. Grass: YG03, YG17.  Ground: YG03, YG11, G0000.  Size: 5-1/2" square.