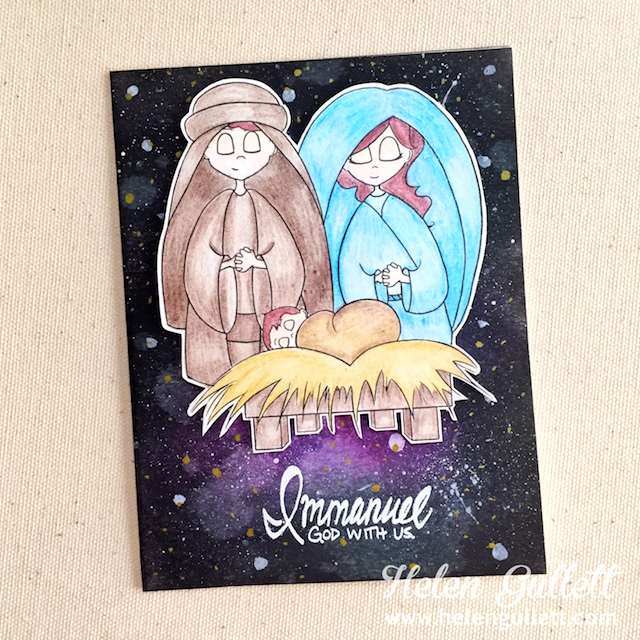
Monday, November 27, 2017

Christmas is Snow Much Fun!

NEWS THAT IS SNOW MUCH FUN!

THIS CARD IS NAMED A 

SPLITCOASTSTAMPERS' FAVORITE 

OF THE WEEK ENDING - DECEMBER 2, 2017


I seem to be challenging myself for the past couple of months to make a card that will fit as many Splitcoaststamper challenges as possible.  After looking over the challenge possibilities, I was actually able to meet seven challenges.  YES! I did say seven.  I am thrilled that I am getting Christmas cards done as well.

I did have in mind to use more of my leftover re-cycled gift wrap; therefore, my first thought was to check out the Inspiration Challenge to see if anything jumped out at me to give me ideas to start with.  I found a cute little wool Toolies' sheep (see picture in The Story below) that reminded me of a specific re-cycled paper waiting to be used.  His little orange nose gave me the idea to use a snowman with an orange carrot nose, incorporating the Toolies' colors in my snowman's top hat, scarf, and boots, along with the recycled gift paper, which were a perfect match!  I am really thrilled with the way this card turned out, and I plan to make several somewhat similar for other Christmas cards I need for family and friends.  Take a peek below at my finished card.


Ingredients:  Papers:  Stampin' Up cs--Pacific Point, Whisper White.  Express It Blending Cardstock (use with Copic Markers).  DCWV White and Silver Glitter paper.  Stash--Recycled Silver & Dot gift wrap.  Stamps--SU: Snow Much Fun (retired).  Ink: Memento--Tuxedo Black.  Dies: Memory Box: Snow Burst.  Punch: Recollections Mini Snowflake.  Embossing Powder: SU: Iridescent (retired). Stash ribbons:  1-1/2" White Mesh; 1/2" Satin Snowflake.  Copic Markers.  Computer sentiment. 

The Story 


(come back later...UNDER CONSTRUCTION)!

Monday, November 20, 2017

The Birth of Christ!

JOYFUL NEWS!

THIS CARD IS NAMED A 

SPLITCOASTSTAMPERS' FAVORITE 

OF THE WEEK ENDING - NOVEMBER 25, 2017


Well, I'm still on a roll for using my re-cycled gift wrap stash.  The next paper I want to use is super great...it's a matte foil with shinier polka dots.  I'm excited to see how it looks as foil cardstock is so expensive and re-cycled gift wrap isn't!

I also want to enter some challenges on Splitcoasterstampers, so I decided to check out several before I got started and get some design mojo going on how best to use my gold foil.  This resulted in being able to enter five challenges.  Check out the story below on how the design and construction evolved with my card, which you can just see below.

Ingredients:  Papers: Stampin' Up cardstock--Basic Black; Gold foil dot re-cycled gift wrap.  Die: Lifestyles--Labels 9 (discontinued); Cottage Cutz--Nativity Silhouette, Birthday (modified to Birth), Christening (modified to Christ), Thinking of You (used only "of").  Ink--Stampin' Up Craft White.  Wink of Stella--Black.  Technique: Yarn Block (for snowy night sky).  Stash: rhinestones.  Size:  4-3/4" x 6".  

The Story
For the Splitcoaststampers challenges, I definitely wanted to try to catch up on the Alphabet Challenge, specifically for Letter B with the double challenge, Letter Y: use a Yarn Block, which means to wrap yarn around a block or chipboard, then dip in paint or ink to make a pattern on your card.

After looking at the Featured Stamper challenge and visiting byHelenG.'s gallery, I chose this card from her gallery as my inspiration:


I knew then, that ny card's Alphabet Challenge Letter B would be all about the Birth of Christ.  To meet the Yarn Block requirement for the Alphabet Double Challenge, I decided to make a snowy black sky as my background.  I cut two piece of chipboard 1-1/2" x 5" and adhered them together.  I wrapped a single layer of fine yarn with a metallic thread running through it around my chipboard "block."  I used the narrow edge of the chipboard with yarn and my Stampin' Up Craft White ink.  Holding both ends of the chipboard piece at each end, I inked up the yarn on the edge and gently stamped a diagonal pattern on my black cardstock from diagonal corner to diagonal corner.  I made sure to ink up my yarn each time before touching it to my cardstock.  I turned the cardstock around 90-degrees and applied the inked yarn again diagonally across the paper from diagonal corner to diagonal corner in an opposite angle as the first application.  The finished product was a lot of  snowy white speckles all over my cardstock.  I was please...it was exactly what I was looking for.

With Virtual Stamp Night coming up in early December, our hostesses are featuring some pre-VSN challenges.  The first challenge is to make a monochromatic card; therefore with my gold foil re-cycle gift wrap in mind, I decided to use gold as my color with black as my neutral instead of white.  Therefore, to keep my nativity monochromatic, I deviated from the Featured Stamper's colorful card.  I decided to use a black silhouetted nativity scene with an underlying shaped, gold foil mat. 

I will also enter in the Free-4-All Challenge - Birthdays are Best.  My card celebrates the birth of Christ.  Finally, the fifth challenge will be the Use It Challenge requiring us to use old, forgotten or never used items from our stash.  Three of the four dies I used have been in my cardmaking stash for over a year and have never been unwrapped.

Sunday, November 12, 2017

Christmas Medallion has Pzazz!

LOVE THIS KIND OF NEWS!

THIS CARD IS NAMED A 

SPLITCOASTSTAMPERS' FAVORITE 

OF THE WEEK ENDING - NOVEMBER 18, 2017


I'm needing to catch up on more cards for this Christmas season as well as my Splitcoaststampers' Alphabet Challenge.  I'm way behind in both categories!  Letter "M" is the current alpha challenge and it just opened with a bonus challenge added to use Letter"N" in the form of material with a nap or the Nib of your marker.  


I wanted to work those requirements into a Christmas theme, and I already had something brewing in my head using more of my Christmas gift wrapping paper from my re-cycle stash.  By planning carefully, I was able to fit my card into three Splitcoaststampers' challenges.  


While making this card, I learned that with the MISTI stamp tool, I can actually stamp a sentiment on gold glittery paper as long as it is the type that is fairly smooth without much of a nap, BUT you have to stamp over and over at least 10 times to get more and more depth of color and be patient to let it dry well.  I was going to use a gold shimmer vellum, but I did not have Navy embossing powder and the Stampin' Up ink did not dry well on the gold shimmer vellum so that I could use clear embossing.  


TIP:  When working with wrapping paper, which tends to be thin, I cut a 6" by 6" square of gift wrap and adhered it with my Scotch 3M tape runner to cardstock scraps to give it thickness and body.  If I used more than one scrap, I used scotch tape on the back side over the seam to be sure it was stabilized.  I also made sure I ran a double row of tape on the sides to allow for trimming my 6" square to fit any card size I planned to make, plus I ran a few tape rows toward the center horizontally and vertically.


Even with all my adjustments and changes as I put this card together, I'm pretty happy with the finished look. . .take a peek below, and then see "The Story" of making the card below the card picture.


The inside design and verse are under construction...check back later for posting.


Ingredients:  Paper:  Stampin' Up Night of Navy cs; DCWV Glitzy Glitter Stack (gold); Christmas re-cycle gift wrap (navy/ gold embossed).  Stamps: Stampin' Up--Hang Your Stocking (sentiment).  Ink: Stampin' Up Night of Navy.  Dies:  Stampin' Up Layering Circles Framelits (scalloped).  Punches:  Stampin' Up--1-3/4" circle; Curvy Corners (retired).  Stampin' Up Foil Snowflakes (medallions).  Ribbon: 7/8" Offray Shimmery Sheer--yellow (color modified with Copics: Y28/ YR23).  Size: 4-3/4" x 6".


The Story

I started my card with the look of a present or gift in mind and used a sheer shimmer ribbon vertically and horizontally like gift wrap.  I didn't have the exact color I needed, but not to worry...I colored my pale yellow ribbon using the wide angle nib of my Copic marker pens YR23 and Y28 to colorize it to the perfect gold!  Now, my card fits the Alphabet Challenge Letter "M" for Medallion and bonus Letter "N" to use material with a nap or the Nib of your marker.


I saw that the July Dirty Dozen Christmas Challenge asked you to create card with presents in mind...bows, boxes, old wrapping paper, or great a gift.  Old wrapping paper works just great for me!

For the yearly 2017 Christmas Card Challenge, my card does not fit any of the specific categories for the months, except December, which is "Anything Goes!"  Fortunately, in this challenge, we are given the monthly themes for the entire year, and we can post to any of the months at any time!  So, hey, I'm early for something for a change!

Thursday, November 9, 2017

Christmas Gift Wrap Goes A Long Way!

HAPPY MAIL!

THIS CARD IS NAMED A 

SPLITCOASTSTAMPERS' FAVORITE 

OF THE WEEK ENDING - NOVEMBER 11, 2017


I have been saving gift wraps of all kinds to re-use on future gifts and even on my crafting.  I find they work well for cardmaking, but to take care of the too thin paper problem, I adhere it to a piece of scrap cardstock using my Scotch tape gun with several strips running vertically and horizontally so that it becomes one piece.  Problem solved!

I decided to drag out my gift wrap scraps and see what I had saved for Christmas, because I was in the Christmas mojo mood.  I found a lovely gold and maroon damask foil that my Mom used on my gift last year.  It's a beauty!  I wanted to use a Memory Box Christmas flower tree die that I've had for over a year, and I thought this recycled glitzy gift wrap and this die might really make a pretty card together.

In the process of deciding on what to do with my recycled gift wrap and my Christmas Flower Tree, I found I could fit five of Splitcoaststampers' challenges:  
  • 2017 Christmas Challenge for September:  make a card using a Christmas tree.
  • The May 2017 Dirty Dozen Christmas Challenge:  make a card with a Christmas tree or parts of a tree, i.e., wreath, pine garland, etc.
  • Alphabet Challenge:  Letter "E" for Elegant/ double challenge: Victorian.
  • Free for All..."Did You Say the Kitchen Sink?":  make a card with lots of "stuff"...layers, embellishments...extra challenge: add ribbon.
  • "Use It" challenge sponsored by Julie Gearinger: which reuqires you to use unused or forgotten stamps, dies, etc. to make a card.
I finished my recycled Christmas card, and I'm pretty please with the way it turned out.  Take a peek below:


Ingredients:  Paper: Stampin' Up Cherry Cobbler; Recycled Gold/ Maroon Glitzy Christmas wrap; Recollections: Gold Sheen cardstock.  Die: Memory Box--Flowering Christmas Tree.  Morex Ribbon: 5/8" Merry Christmas (sentiment).  Stash: 1-1/2" Sheer Wire ribbon.  Size:  4-3/4" x 6."

Sunday, November 5, 2017

A Dedicated 12th Woman Seahawks Fan Birthday!

OVER THE MOON!!!

THIS WAS ONE OF TEN
OF MY 2017 CARDS RECEIVING
A 2017 SCS BEST OF FAVORITES!!


I was checking on challenges opening at Splitcoasterstampers and found three that motivated me to get started on a card I will be needing in the month of November.  See more about these challenges in "The Story" below the finished card presentation. 


My oldest son's long-time girl friend has a birthday in November, and she is an avid Seahawks fan...a real 12th Man/ 12th Woman!  An explanation of what this means is in "The Story" below the finished card presentation.  As you can see, the perfect card for Katrina's birthday has to be a card with a Seahawks theme, using layers of Seahawks colors: navy, gray (silver), and lime green.  It should also have lots of icons that depict football and Seattle as well!  Take a peek below...I think Katrina will love her card!


I finally finished this card's inside decor just in time for delivery to the birthday person!  I created the inside to coordinate with card front, and its verse with a Seahawks fan theme!  Take a look below:


Ingredients:  Papers:  Stampin' Up--Night of Navy cs; The Paper Company--Textured Linen cs (Cool Mint pack); Scrapbook Customs--Poster Diagonal Mascot/ Grungy Dots.  Darice Glitter paper--Silver, Lime (color Copic modified).  Dies:  Savvy Dies--Space Needle (Lg); MemoryBox--Cityscape Nightline; QuickKutz--Washington.  The Paper Company: Stickabilities--Football.  Pretty Pink Posh: Sequins.  

THE STORY


The first Splitcoaststampers' challenge I spotted was the new Inspiration Challenge, which features a company called Frontgate.  Browsing around their website, I came upon a sports game, called Galaxy Football Toss Game.  The game is very colorful and reminds me, to some degree, of the Seattle Seahawks colors and that inspired me to get started on a card I knew I needed in November.  But, this wasn't the only challenge that inspired me to get start on this same card.  Another is the Traveling Teapot challenge, where we are to create a card depicting apples or a city, i.e., The Big Apple...mine, of course, will be Seattle, Washington, home of the Space Needle and the Seattle Seahawks.  After deciding that my card would be a Seattle sports card, I saw the Free for All challenge: "Did You Say the Kitchen Sink," which requires "lots of stuff or layers or both."  Now, for me this wouldn't be difficult as it's right up my alley for the type of cards I love to make!


For those of you who are not football fans or who do not know about the Seattle Seahawks, their fans are called the 12th Man.  Why are they called this, you might ask?  As there are 11 players for each team on the playing field for each play, the Seattle fans represent the Seahawks' 12th Man, though they are not actually on the field but rather in the seats.  We are such dedicated and savvy fans, we know when to make noise and when not to, which helps our Seahawks team and often unsettles their opponents when playing in our home field, Century Link, thus giving our Seahawks great home field advantage.  The Seahawks organization retired the number 12 jersey in honor of their fans in 1984, and  authentic jerseys are made and sold in the team store specifically for the Seahawks' fan base.  In 2016, Seahawk's fans took on the nickname, "The 12's, to denote fans specific to the Seahawks and no other organization.  A flagpole was also installed at the south end of Century Link, and the 12's Flag is raised by a celebrity in honor of the fans before each and every home game.  We LOVE being 12's!

Wednesday, November 1, 2017

Happy Day to A Card-Making Buddy!

JOYFUL NEWS!

THIS CARD IS NAMED A 

SPLITCOASTSTAMPERS' FAVORITE 

OF THE WEEK ENDING - NOVEMBER 4, 2017


A lovely lady, who is a Stampin' Up demonstrator and cardmaking buddy, has an early November birthday, and I wanted to make and send her a birthday card.  I also wanted to use her card to catch up on the newest rounds of the Alphabet Challenge.  Letters A through L have already opened.  I've submitted a few cards for letters that are out of sequence, but have not designed and submitted for Letter A yet. There is a bonus challenge attached to each letter as well, using the alphabet letters backwards; therefore, A = double challenge Z for zebras and we are required to use black and white stripes on our card to meet the double challenge.

With these requirements in mind, I decided to use a cute little punch-art Asian geisha girl that I ran across on Pinterest for Dar's card and use a black, red, and white color scheme with a background of black and white stripes.  The original punch art character was designed by LeeAnn Greff, and I thank her for the idea!


To determine what my layout might be, I decided to check out other challenges on the Splitcoasterstamper website to see if any would give me ideas.  As it turned out two challenges wanted you to get inspiration from specific galleries...My Favorites and a Featured Stamper's gallery.  They both worked perfectly to get my mojo going.  Both had similar layouts, but with different embellishments and/or enhancements, i.e., like matting, ribbon, shaped mat for your focal point, etc.  My layout ended a using ideas from each inspiration card's layouts.


I think my little geisha girl turned out really cute.  After finishing the basic punch art tutorial, I added Wink of Stella-Clear to her hair and shoes for a light sheen, plus rosy cheeks using a Copic Marker, and a mouth with a fine-tip red pen.  To dress her up, I added scallop cuffs to her sleeves, and bitty black pearls on her belt and her hair.  I finished the inside with a bit of coordinating patterned paper borders and composed a verse.  I think Dar will get a kick out of her birthday card...take a peek below!


Ingredients:  Paper:  Stampin'Up Cardstock--Basic Black, Real Red; My Mind's Eye--Everyday Basics Pad (blacks); Doodlebug--Petite Prints/ Ladybug Daisy; Little Yellow Bicycle--Once Upon A Christmas/ OC-102; Photoplay--Holiday Cheer/ Holly Jolly.  My Favorite Things Dies:  Stitched Oval Scallop Frame (used inside cut-out/ red); ZigZag Stitched Oval STAX #2.  Punches:  Stampin' Up--1-1/4" Circle (head/ hair), 1/2" circle (shoes/ trimmed...Heart to Heart punch better), Extra Large Oval (2"x1-3/8"--body/ dress), Dotted Swiss Double Border (retired--trimmed: belt/ cuffs).  Queen & Co.--Black pearls.  Ribbon: 7/8" BoBunny Double Dot Sheer.  Computer sentiment/ verse.  Size: 4-3/4" x 6".