Thursday, October 28, 2021

It's A Shaving Cream Birthday!

Another October birthday, and I'm running late (but what is new with me)!  This crafting friend's birthday happens to fall on my anniversary as well.  My hope is to finished and at least to take it with me to our early November crafting retreat, which I was able to do, but I was late posting it here (and even later posting it to my Splitcoaststampers gallery)!


I found a shaving cream technique YouTube by Darla Watson...Scrap Happens with Darla!  She is my Mom's Stampin' Up demonstrator and mentor and I've had the pleasure of crafting with her and her group when visiting Mom, though that has not happened now in several years because of Covid!   I love Darla's color combination and card design, so I thought I'd follow along with the video and make my own changes to make the final card more me.  


For my shaving cream BG, I chose to use watercolor paper (video showed regular cardstock).  I adjusted the layout and placement of the elements.  I raising my horizontal strip and lowered my circle of flowers so it sat more right centered than almost above the horizontal strip.  I added several more background layers...Gold Foil and an additional Lovely Lipstick.  


Additional additions are, ink-distressed edging, a Gold Foil Starburst BG layer beneath the Stitched Circle flowers, gold metallic Gilded Gems for flower centers, and a Gold Foil strip to the top edge of the horizontal decorative heart border.  I chose to use 4 strands of Linen Twine and center my 4-strand bow in the left negative space rather than right next to the flower circle.  I love my shaving cream background, and really like my changed layout, layering, and bling additions.  I think my crafting friend will like it as well...take a peak below at the finished results:


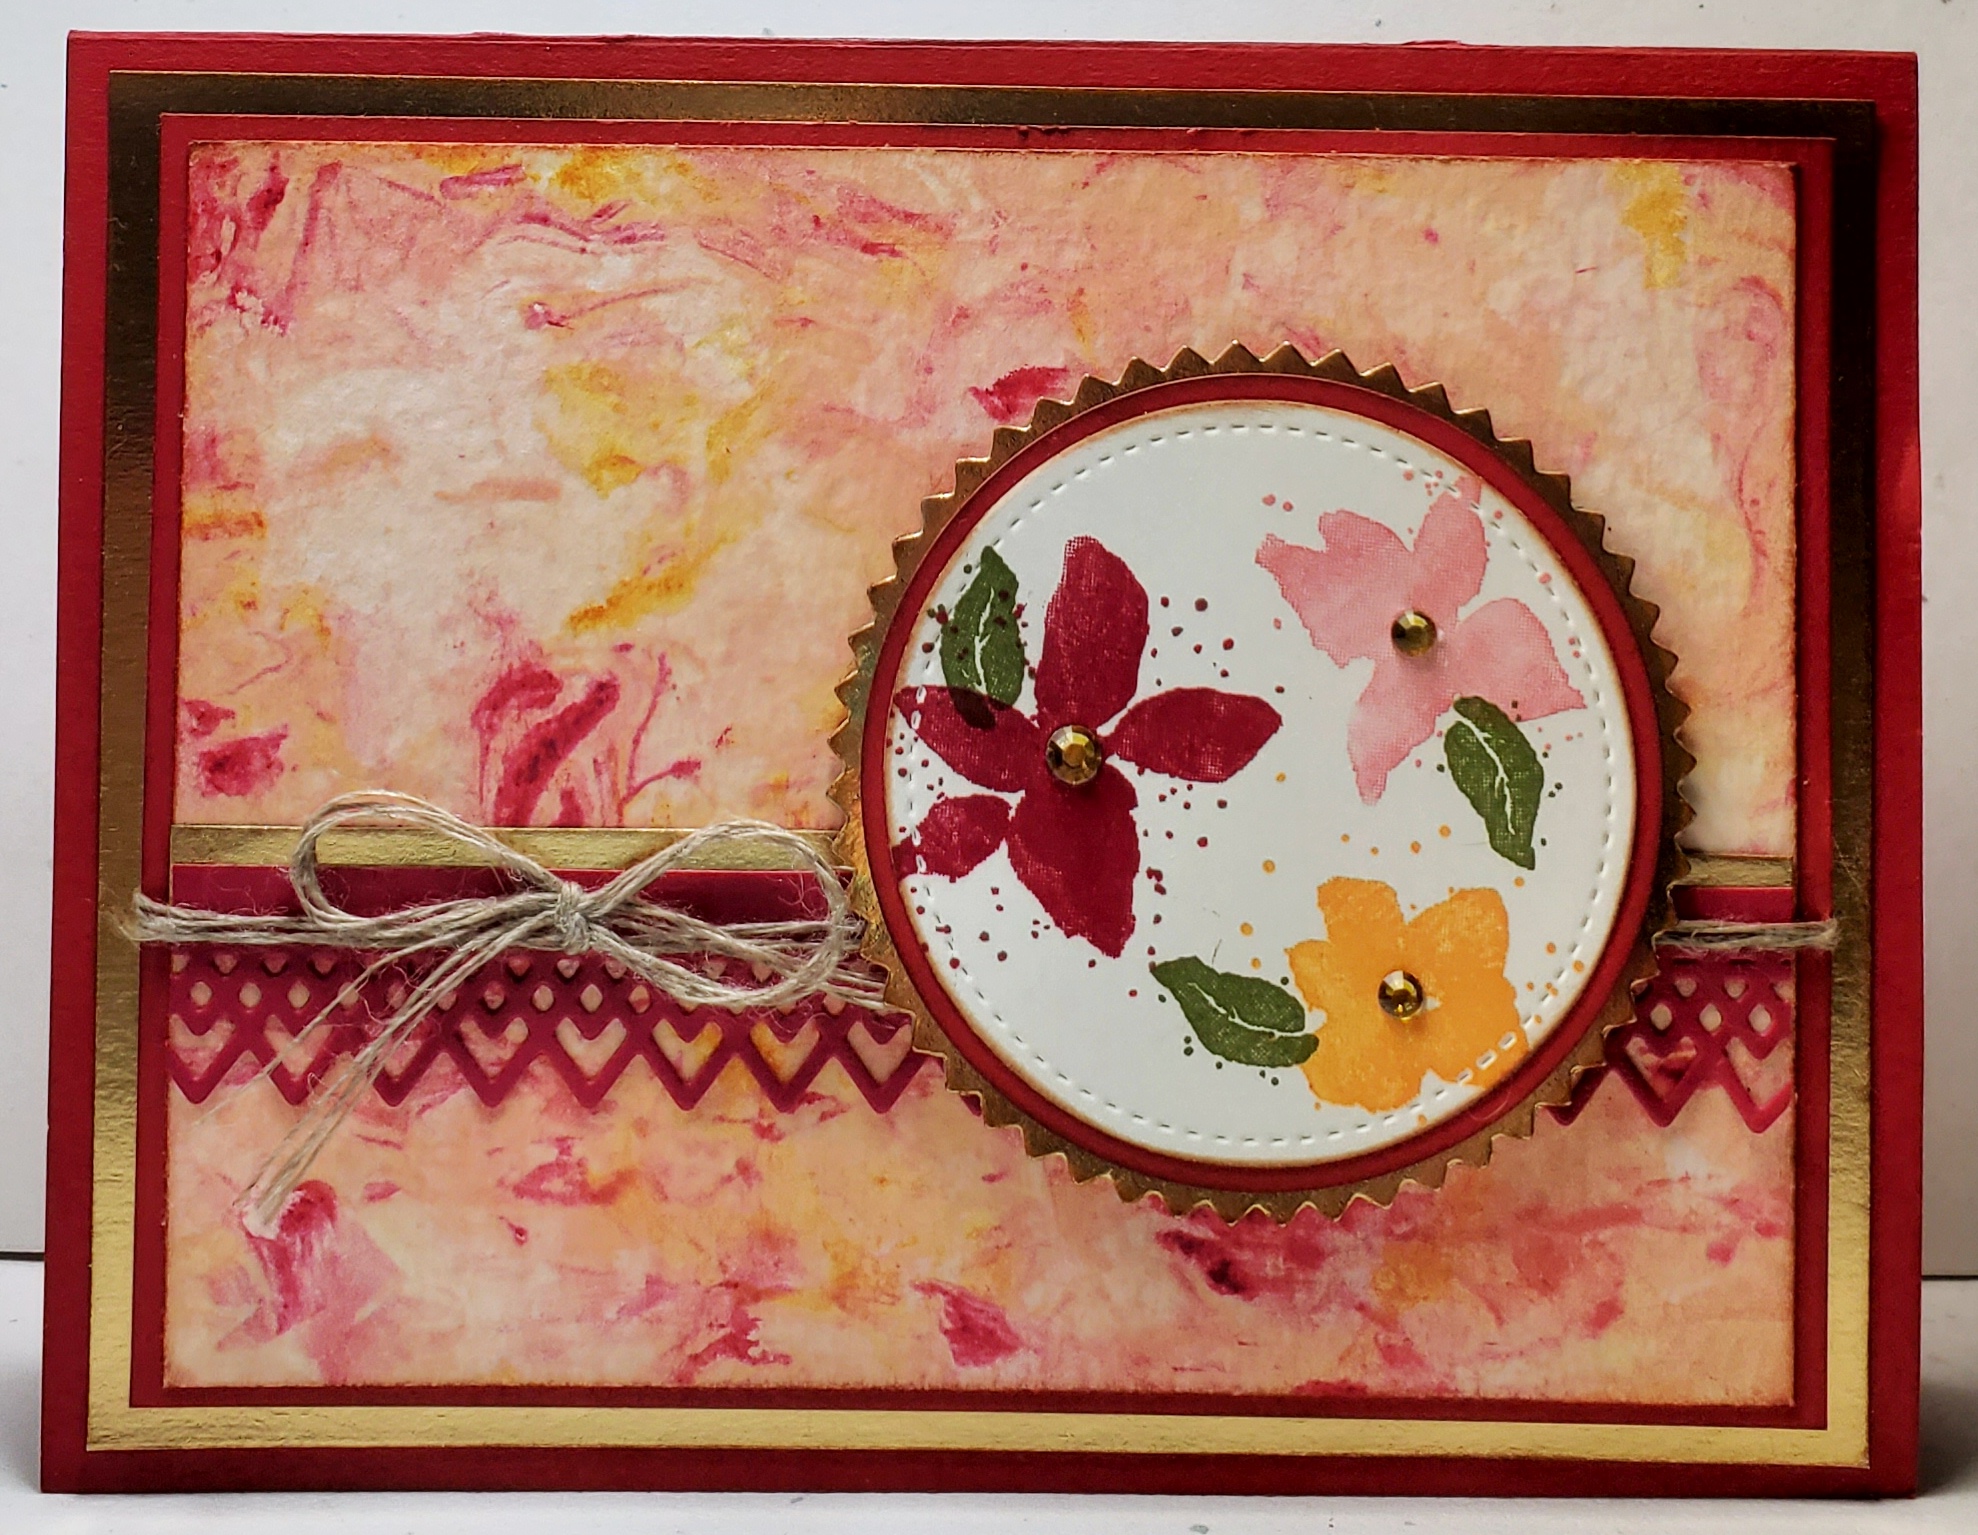
Ingredients:  Stampin' Up: Cardstock--Lovely Lipstick, Very Vanilla. Other Paper--Watercolor, Gold Foil. Stamps--Parcels & Petals. Dies--Delicate Lace; Stitched Shapes-circles; Starburst Framelits. Inks--Mango Melody, Flirty Flamingo, Lovely Lipstick, Mossy Meadow. Linen Thread. Gold Metallic Gems. Other: Colorbox Chestnut Roan (ink edge distressing). Technique: Shaving Cream BG--2 drops ea. ink (no Mossy Meadow). Chatterbox inside computer verse. Size: 4-3/4 x 6-inches.

Monday, October 18, 2021

October Birthday with Paper Pumpkin--March 2021--Here's to You Alternative #2!


Ingredients:  Stampin' Up Products-- Cardstock/ Papers: Old Olive, Pretty Peacock, Basic White, Paper Pumpkin March 2021 - Here's to You--envelope inserts used as dsp. Stamps: Itty Bitty Birthdays. Ink: Pretty Peacock, Early Espresso. Other-- Punch: EK Medium Victorian Corners. Chatterbox verse (computer). Technique: Front Flap Fold. Size: 4-3/4x6-1/4-inches.

THE CONSTRUCTION STORY

This will be my second alternative card for the Paper Pumpkin March 2021 kit, Here's To You.  You might remember that alternative cards are my goal and personal challenge when making up my Paper Pumpkin kits.


Once again, I fussy-cut, layered, and sponged to get more depth, color, shadowing, texture and definition from the flat scenic papers provided in the kit.  I used the sunset scene again and coordinating cardstock colors in greens, blues, and blue-green to give my card a more masculine look.  This card will be for my son-in-law's October birthday.  Instructions for building your card follow.


1. I planned a Front Side Overlay Flap Fold (aka Front Flap Fold) design with a square flap and three layers, using the mountain sunrise scene from the kit. (Note: Use the finished card picture as your guide throughout the construction process).


2. Here are the cutting dimensions for my card paper, which is for a 4-3/4 x 6-inches finished size:


--Cardbase = Old Olive = 9-1/2" x 4-3/4".  Score at 3-1/2" to form the Front Fold, which leaves a 6" Inside base.


--Inside Middle Layer/ Middle Fold Layer = Pretty Peacock:.  Inside Middle:  Cut to 5-3/4" x 4-1/2".  Front Middle Fold: Cut to 3-1/4" x 4-1/2".


--DSP Layers--Inside /  DSP Front Top Fold:  DSP Inside: Cut to 5-1/2" x 4-1/4".  DSP Front Top Fold: Cut to 3" x 4-14".


--Overlay Flap Square Layers:  Bottom Overlay Flap = Old Olive: Cut to 3-1/2" x 3-1/2".


--Middle Overlay Flap (layer) = Pretty Peacock: : 3-1/4" x 3-1/4" square. 


--Top Overlay Flap (mountain-sunrise scene in this card):  Cut two to a 3" x 3" square, removing all the the Petal Pink cardstock framing from arount the scene.


3.  From one mountain-sunrise scene, fussy-cut the sun and its background to remove the lower half of the scene at the mountains.  With Pretty Peakcock ink, ink-distress and sponge lightly along the top edges of the mountains.  This gives the mountains more color, shadowing, and depth.  Set aside.


4. From the second mountain-sunrise scene that is still untouched, carefully fussy-cut off the Old Olive trees from the bottom of the scene.  Working with the Old Olive fussy-cut treets, ink-distress the edges and sponge the surfaces with Old Olive ink.  Set the remaining scene, from which you removed these trees, and the fussy-cut trees.


5. Glue the fussy-cut mountains, created in #3 above, onto the mountain-sunrise scene, created in #4 above, so the top mountains are slightly lower than the bottom layer of mountains. This will give the mountains more texture and definition.  When the gluing is complete, you will have one mountain-sunrise scene unit.


6. Glue the Old Olive fussy-cut trees, created and sponged in #4 above, to the scene completed in #5 above.  (Note: This completed unit will be used for form the 3-1/2" square Front Overlay Flap.)


7. From the kit, sponged one set of die-cut evergreen trees and their land base with Pretty Peacock ink to add texture and depth.  Glue them, starting at the left side, across the bottom of the scene.  They will overlay part of the Olive Green trees (see card picture).  Finally, with Early Espresso ink, stamp a set birds flying near the mountains.


Just an FYI, here is the kit design version using this sunrise-mountain scene:


Saturday, October 9, 2021

A Lovable Birthday Zebra for Evie!


Ingredients:  Stampin'Up: Cardstock--Lucky Limeaide, Pacific Point Blue, So Saffron; Patterned Papers--2013-14 Subtles Dsp Stack-Pool Party, 2016-17 Subtles Dsp Stack-Wild Wasabi, 2012-13 Subtles Dsp Stack-Certainly Celery; Ribbon--Gold Metallic Cord; Gems--Gold Metallic.  Other--Dies:
Marianne Collectables--Zebra-Donkey; Cottage Cutz Sun & Clouds; My Favorite Things--Frightful Fence; Lawn Fawn Party Balloons; IO Dies--Small Grass die, Insect Set (butterflies); Lawn Fawn--Grassy Hillside; Memory Box--Varsity Numbers; Poppystamp--Happy Birthday Banner Flags (Letters); Glitter--Impress Sparkle;  Wink of Stella/ Clear. Chatterbox verse--computer. Size: 4-3/4 x 6-inches.


CARD STORY & CONSTRUCTION NOTES

My youngest granddaughter will be turning two in mid-November, and I wanted to get her card finished early so I would be absolutely sure to have it on time!  Her birthday party theme this year will be butterflies.  

I had been fiddling around with my Marianne cute little zebra die many months ago when I was making last year's granddaughter birthday cards.  At that time, I die-cut the parts for several  zebras and though this little zebra girl turned out just as cute as I thought she would, I decided to go for 3D ballerina girls instead!  I got side-tracked and never quite decided what I was going to do with the little zebra, so she's been lurking around my craft for all this long while!  

I recently came upon a challenge that basically said to use up those items in your stash (or laying around) that were finished or partially finished or just throw them out.  I spotted the little zebra, and I knew I did not want to throw her out; therefore I was motivated to find her a home! 
 
Though a zebra did not exactly fit the butterfly theme, I thought I'd be able to fix that if I incorporated some butterflies flitting around a zebra card scene.  I even recycled a rainbow foil birthday party hat that this same birthday granddaughter had previously worn at a party.  Though it was torn a little, I'd been saving it as the perfect recycle paper to somehow use on a card for her.  The balloons and flitting butterflies I planned were the perfect thing!  Take a look at Evie's finished card below.  I'm pretty pleased with the results and think she will LOVE it!