Showing posts with label Foil paper. Show all posts

Saturday, August 13, 2022

Happy Day!

 I have quite a number of birthdays in August between family and friends.  I'm feeling behind already, so I got my thinking cap on and decided to get serious!  With some help from Splitcoaststamper challenges, I came up with a vintage design that I'm really pleased with! It will be for one of my husband's sisters, who moved to Florida in this last year to be closer to her oldest daughter. I'd better get it finished and off in the mail as she lives about as far from Washington state as she could be...kitty-corner across the U.S.!


I found this wonderful vintage paper in my paper stash from Michael's Craft Stores, "Recollections Signature Vintage Country Paper Stack. It got my vintage mojo going full speed ahead, which made me really excited to get started!  Vintage is one of my favorite card styles, yet I haven't made many cards in this style during the past several years.


I used five patterns from the paper pack that I cut into varying widths and distressed inked the edges before horizontally layering them one after the other, on  a pre-sized cardstock guide.  I also used one of the patterned tags provided in the paper stack as my sentiment rectangle centerpiece. I stamped my birthday sentiment onto it using my Misti stamp positioner, and I adhered the finished tag onto a black lattice frame for added interest.  I fussy cut several identical flowers from several of the tags and layered and distressed their edges to provide additional depth, finishing off with a sparkly gem. My last addition was to add a black-striped sheer ribbon horizontally with a two-loop side bow.  Take a look at my finished card. I'm pretty pleased with its outcome.


Ingredients: SU Cardstocks--Basic Black, Gold Foil. Patterned paper--Recollections Signature Stack--Vintage Country (12x12). SU Stamps--Itty Bitty Birthdays. Spellbinders dies--Lattice Rectangles. Ink--Memento Tuxedo Black. Colorbox--Chestnut Roan ink distressing. Offray--3/8" sheer black stripe ribbon. Jolee's Boutique--Black Circle Bling Gems. Chatterbox verse. Size--4-3/4" x 6."

Monday, May 6, 2019

Reaching Classic "Old" Age!

My brother's birthday is in early May and yet another card was needed, especially as this is a milestone birthday well into retirement!  I'm so far behind in cardmaking with the hand recovery that I'll never catch up, it seems! 


I had an unfinished card hidden away in my To Do Stash that I came across when looking for a previous unfinished card.  The initial basic design layout was by Liz Thayer on this one as well.  All the pieces were there to finish, except just a notation of the stamp set used.  I particularly liked the Acetate Foil gold patterned paper and gold foil included in the kit with the navy blue.  I used all the paper pieces provided, but I also decided to add a black cardstock layer as the cardbase and as another image mat layer. 


To start, I masked the image paper with the car outline, and watercolored the background around it with the idea of sky and landscape color tones and dried it with my heat tool.  I then stamped the image and sentiment from the Stampin' Up Guy Greetings stamp set with Memento Tuxedo Black ink, using my MISTI to line up the stamp images on my small piece of watercoloring.  Next, I colored the vintage car with my Copic markers.  Finally, I assembled all the paper layers and popped the acetate pattern off the gold foil.  I added some Glitter Enamel Dots, and voila, I was finished! 


As my brother has restored vintage and classic vehicles for many years, I am pretty sure he will like this card...even more so if it were a Chevy.  Take a peek below inside and out.


Ingredients:  Stampin' Up products:  Cardstock--Basic Black, Night of Navy, Gold Foil, Shimmer White.  Patterned Paper--Fabulous Foil Designer Acetate (retired 2018).  Stamps:  Guy Greetings (retired 2018).  Glitter Enamel Dots (retired 2018).  Other:  Memento Tuxedo Black Ink.  Copic Markers.  Artist Loft Watercolor Pan Set (Michaels).  Size: 4-3/4" x 6".

Tuesday, November 13, 2018

Thank You for the Delightful Gift!

I received a fairly unique gift quite unexpectedly...a cedar, chainsaw-made Christmas tree.  We had a family gathering a few weeks ago to celebrate two birthdays, and my son-in-law's mother was in attendance.  She is a collector of chainsaw wood art, and she brought a gift for me and my two daughters plus my daughter-in-law.  They were "carved" Christmas trees using a chainsaw to cut and form them from cedar logs.  The tree's branches were painted green with a bit of white snow gracing their tips and the trunks were the natural bark from the small cedar logs from which they was cut.  She had decorated each with miniature Christmas lights that could be all white or multi-colored by changing the remote settings.  What delightful gifts!

I needed a thank you card desperately and immediately.  I scoured some of the Splitcoaststamper challenges to find some ideas.  I used the Inspiration Challenge for an autumn color inspiration and found a Featured Stamper Challenge with a pretty autumn leaf card.  My mind was made up to do an autumn leaf card of my own.  I found some other challenges that would fit as well, and if I added green, I could finish Color Letter Z in the Round 9 Alphabet challenge.  


At this point, I remember a card by Liz Thayer that also had a leaf design, so I "borrowed" elements from her card to add to my card as well.  This is my finished card, a bit of a modified Liz design than from the Featured Stamper with two more added layers.  I finished the card off with an interior design to fit the outside and added a Chatterbox verse printed by my computer.

Take a peek below at the finished card inside and out.  I think my friend will enjoy her thank you card and also know just how appreciative I am of her lovely gift!


Ingredients:  Stampin' Up Papers:  Cardstocks--Mossy Meadow, Blackberry Bliss, Gold Foil, Cajun Craze, Soft Suede, So Saffron;  Patterned--Color Me Autumn (2014 Holiday), Typeset (2014-5 Annual).  Stamps: Holiday Cheer, Project Life (sentiment/ 2014 Holiday).  Dies:  Autumn Accents BigZ.  SU Embossing Folder: Hardwood.  SU Other:  Gold Basic Metal buttons; Washi Tape (names unknown); Dazzling Diamonds Gold Glitz.  Ink: Soft Suede ink distressing.  Size: 4-3/4x6-inches.

Monday, November 20, 2017

The Birth of Christ!

JOYFUL NEWS!

THIS CARD IS NAMED A 

SPLITCOASTSTAMPERS' FAVORITE 

OF THE WEEK ENDING - NOVEMBER 25, 2017


Well, I'm still on a roll for using my re-cycled gift wrap stash.  The next paper I want to use is super great...it's a matte foil with shinier polka dots.  I'm excited to see how it looks as foil cardstock is so expensive and re-cycled gift wrap isn't!

I also want to enter some challenges on Splitcoasterstampers, so I decided to check out several before I got started and get some design mojo going on how best to use my gold foil.  This resulted in being able to enter five challenges.  Check out the story below on how the design and construction evolved with my card, which you can just see below.

Ingredients:  Papers: Stampin' Up cardstock--Basic Black; Gold foil dot re-cycled gift wrap.  Die: Lifestyles--Labels 9 (discontinued); Cottage Cutz--Nativity Silhouette, Birthday (modified to Birth), Christening (modified to Christ), Thinking of You (used only "of").  Ink--Stampin' Up Craft White.  Wink of Stella--Black.  Technique: Yarn Block (for snowy night sky).  Stash: rhinestones.  Size:  4-3/4" x 6".  

The Story
For the Splitcoaststampers challenges, I definitely wanted to try to catch up on the Alphabet Challenge, specifically for Letter B with the double challenge, Letter Y: use a Yarn Block, which means to wrap yarn around a block or chipboard, then dip in paint or ink to make a pattern on your card.

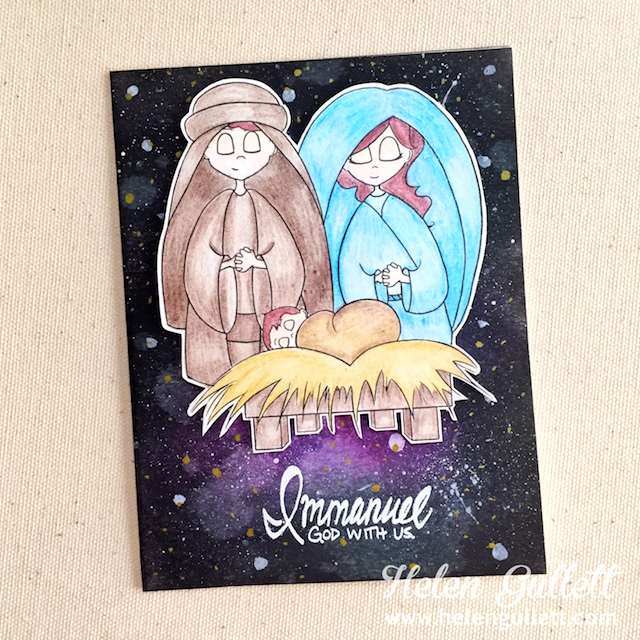
After looking at the Featured Stamper challenge and visiting byHelenG.'s gallery, I chose this card from her gallery as my inspiration:


I knew then, that ny card's Alphabet Challenge Letter B would be all about the Birth of Christ.  To meet the Yarn Block requirement for the Alphabet Double Challenge, I decided to make a snowy black sky as my background.  I cut two piece of chipboard 1-1/2" x 5" and adhered them together.  I wrapped a single layer of fine yarn with a metallic thread running through it around my chipboard "block."  I used the narrow edge of the chipboard with yarn and my Stampin' Up Craft White ink.  Holding both ends of the chipboard piece at each end, I inked up the yarn on the edge and gently stamped a diagonal pattern on my black cardstock from diagonal corner to diagonal corner.  I made sure to ink up my yarn each time before touching it to my cardstock.  I turned the cardstock around 90-degrees and applied the inked yarn again diagonally across the paper from diagonal corner to diagonal corner in an opposite angle as the first application.  The finished product was a lot of  snowy white speckles all over my cardstock.  I was please...it was exactly what I was looking for.

With Virtual Stamp Night coming up in early December, our hostesses are featuring some pre-VSN challenges.  The first challenge is to make a monochromatic card; therefore with my gold foil re-cycle gift wrap in mind, I decided to use gold as my color with black as my neutral instead of white.  Therefore, to keep my nativity monochromatic, I deviated from the Featured Stamper's colorful card.  I decided to use a black silhouetted nativity scene with an underlying shaped, gold foil mat. 

I will also enter in the Free-4-All Challenge - Birthdays are Best.  My card celebrates the birth of Christ.  Finally, the fifth challenge will be the Use It Challenge requiring us to use old, forgotten or never used items from our stash.  Three of the four dies I used have been in my cardmaking stash for over a year and have never been unwrapped.

Friday, April 14, 2017

Sweet Friend's Milestone Birthday!

A very dear friend is celebrating a milestone birthday this week.  Several really good gal friends are getting together to celebrate her and take her to lunch.  I wanted to make her a special card, and since I seem to be loving my new Stampin' Up Beautiful You stamp set, and also seem to have another card idea floating around in my gray matter, I thought I'd see what I came up with.

I found a lovely piece of patterned paper from the Watercolor DCWV Stack that looks like a watercolored paper with gold foil embossing.  I decided to make a salt watercolored background incorporating the colors from this paper to use as the layer upon which I would stamp my dancing lady image.  Though I had only done one other card with watercolors and never used the salt technique, I decided to be brave and give it a go.

I wanted my stamped dancing lady to have pink arms and legs, so I started my watercoloring with pink where I planned to stamp my image.  I used blues in the sky area along with a bit of pink and orange to give the allusion of the beginning of a sunset, and I used greens and yellow at the bottom to represent grass and a carpet of yellow flowers.  


After my watercolor application was complete and while the paper was still fairly wet, I sprinkled a good amount of regular table salt onto my paper and let it set for about 10 minutes.  I then helped the drying process along with my embossing heat tool.  I brushed and rubbed off all the dried salt so the paper was once again smooth and salt-free.  With salt, my understanding is that the larger the salt crystals and varied their sizes, you achieve a more dramatic effect.  Since table salt is much finer and more uniform, it creates a more subtle effect, but I was pleased with how it turned out and excited to try something new.


Since my patterned paper was gold foil embossed, I stamped my dancing lady onto my watercolor background with Encore Gold Metallic ink.  I stamped the patterned paper as well with the dancing lady stamp and the umbrella from another image in the stamp set.  I then fussy-cut them to adhere over the top of the image already stamped on the watercolor background to give her a patterned dress and matching umbrella.

For my layout, I found a Sketch Layout #SC639 on SplitcoastStampers' April 5th Sketch Challenge that I thought I would use.  See below:


For my #6 top left, I added an umbrella for my stamped lady, and for the #6 lower right, I added a butterfly to my double fishtail flag sentiment.   Below is my finished card, that I think Sandy will really like for her birthday!


Ingredients:  Stampin' Up products:  Cardstock--Island Indigo, Watercolor Paper; Stamps: Beautiful You; Inks: Pool Party, Soft Sky, Pink Pirouette, Sweet SugarPlum, Calypso Coral, Daffodil Delight, Mint Macaron, Pear Pizzazz.  Other:  DCWV Watercolor Stack (gold foil pattern).  DCWV Foil Stack (Aqua).  Recollections:  Cardstock--Cool Breeze 5-Color Pack; Gold Metallic pearls.  Encore: Gold Metallic Ink pad.  Wink of Stella: Gold.  Martha Stewart 3-in-1 Petite Butterflies punch.  Papertrey Ink stamp: Tea for Two Additions (sentiment). Technique: Salted Watercolor Wash.  Size: 4-3/4" x 6".

Monday, December 21, 2015

Delicate Ornaments on Your Tree - Christmas X10 - Card #6!

Card #6 from the Christmas X10 card event is a non-traditional color combination for Christmas, but oh my, it is a beauty. . .black with gold and silver shiny foil!  It utilizes one of my favorite of all time designer paper collections, WinterWonderland dsp, all in black and gold coloring with the foil element incorporated right into the papers.


I did tweak this card's design just a bit, because I wanted my card to be larger to give more room for the ornament design elements, which are good size.  Also, I wanted to pop up the sentiment instead of affixing it directly onto the card front. Therefore, I made my card a 5-1/2 inch square rather sticking with the traditional A2 card size of 4-1/4" x 5-1/2."  I also add a third layer, in-between the two layers on the original card, in the gold foil. . .I truly think this really enhanced an already beautiful card design. Again, thank you Dara Peterson & Luci Kirschbaum for this wonderful card event, but most of all, for the magnificent card designs.  You two out did yourselves for sure!


Recipe:  Stampin' Up products:  Cardstocks--Basic Black, Gold Foil, Silver, Winter Wonderland dsp.  Stamps:  Embellished Ornaments - sentiment.  Delicate Ornaments Thinlit dies.  Gold Embossing powder.  1/8" Gold Metallic ribbon.

Tuesday, December 1, 2015

Christmas - To You & Yours Re-design #2

I looked at the calendar and my heart took a big pitter patter...OMG..osh, it is only 21 days to Christmas and I am no where near even half way through making my Christmas cards!  I need to get BUSY, BUSY!!!


I brought out my Stampin' Up To You & Yours Card Kit again, and decided to fiddle with it just to see what creative mojo might seep into my being.  If you recall, I had cut all my cardbases in half, as one Pinterest video suggested, thus increasing my foil card fronts to 36 instead of the 18 if the kit was put together exactly as designed.  You know me, I can never follow directions exactly as it seems my creative mojo always tempts in lots of different directions other than what is right in front of me!  LOL


I love the paper with the diagonal red foil and white stripes, and decided to use it with one of the star window cutouts.  Next, I remembered the flat plastic glitter ornaments that I purchased at WalMart a month or more ago thinking they could be incorporated as an embellishment with Christmas cards.  I thought, "Gee, those white glittery snowflakes might be pretty peeking through my star window."


Then, I thought the star window needed to be framed as it is in the kit itself, but the kit provides a gold star frame, and I wanted red.  So, I pulled out by star dies, and found that if I used one of my Spellbinder Stars with one from the Stampin' Up Star framelits, I could replicate almost the exact cutout that the kit provided in any color I wanted.  Thumbs up...am I excited!  


I cut the height of the white star window layer smaller at both the top and the bottom, because I wanted to fit a separated Christmas sentiment underneath.  I added white glitter paper as a trim next to the foil stripe at the sides and adhered it all to a Real Red cardbase.   And thus, with NO shaker on this one, my very modified To You & Yours card was created!!


Recipe:  Stampin' Up cardstock: Real Red, Whisper White; Dazzling Diamonds Glimmer; Red Foil (2015 Holiday); To You & Yours kit: Red Foil stripe.  SU Stamps: Versatile Christmas (2015 Holiday).  SU Ink: Real Red.  Holiday Time: Glitter Ornaments (WalMart).  Craft Medley: red sequins.

Saturday, January 3, 2015

First Card - First Birthday Card for 2015!

My first two cards and first birthdays for the 2015 year will be masculine cards!  My husband's two brothers celebrate their birthday on the same day ~ January 5th ~ though one has been celebrating his birthday several years longer than the other.  No, they are not twins!


For the first card, I will be using a stamp set that is one of the first that I ever purchased from Stampin' Up and is four years old, is now retired, and I have never used it!  Wow. . .now that is terrible, because I actually really like this set called Totally Tools.  It, however, was only available in wood stamps, and I do not like to work with wood stamps, because I have a terrible time getting my image lined up exactly where I want it.  Do you suppose this is why I took so long to use it?


I was going to make a antique automobile card for Joe, because he builds antique cars, but I could not find the right image to fit his 1949 Chevy Business Coupe, so I just couldn't get my creative mojo going.  As you can tell, this gentleman is very handy with tools, so my mind went in that direction when I remembered the Totally Tools stamp set. 


I pulled out the set, and then I promptly looked for some Pinterest directions on how to unmount your wood block stamps to turn them into clear-mount stamps.  There are several different directions out there, but I went with the one that microwaves the stamp/block for about 10 seconds.  This loosens the glue on both the foam mounting and the acrylic images that are mounted on either side of your wooden block.  After peeling both off, gently, there is still enough sticky to adhere the acrylic to the stamp foam and trim off the excess acrylic that probably is hanging over the edges of the foam.  No need to separate the rubber from the foam and then have to remount the rubber onto new (and expensive) foam.  To get your now foam stamp to adhere to your acrylic block, the directions I found indicated to sparingly use Tombow glue on the acrylic, smoothing with a foam brush or your finger and let dry for one to two hours.  Then, tap it on your jean-covered leg to remove the excess stickiness, and you are now ready to use your new foam-mounted clear stamp.  I did not follow these glue instructions, as I usually place two-side, removable poster tape on my clear stamps to keep them from falling off the acrylic block when used.


My card uses mustache paper as Joe has that bit of facial hair.  I used a dotted embossing folder on the circle which holds the tools to represent pegboard, which is often used on a garage wall to hang tools from.  I thought that made it a bit more authentic.  I colored my tools with Copic markers to coordinate with the copper-colored foil paper used and fussy-cut them out when finished.  I'm pretty please with my results, and I hope Joe enjoys his card.


Recipe:  SU Basic Black cs (base), Kraft cs. Echo Park Times & Seasons/ Spiffy Mustache.  DCWV Cardstock Stack: Foiled/ Copper.  DCWV Everyday Essentials/ Gold Grid.  SU stamps: Totally Tools.  TPC Studio stamps: Greetings.  Memento Tuxedo Black Ink.  Dies: Spellbinders/ Circles LG; Lifestyles/ Nesting Circles. Sizzix Medium Dot Embossing Folder.  Copic markers.  Colorbox Chestnut Roam distressing/ sponging.  Size:  5-1/2" square.