Monday, June 29, 2015

A Lovely Daughter's Birthday!

We celebrated my daughter, Michele's, birthday yesterday so we could all gather as an entire family to mark her special day.  Michele's request for the day was that it be casual and relaxing.  A simple day of lounging on the deck, pizzas to munch, favorite beverages to quench our thirst, family games (both board and lawn games) to play, and banana split extravaganzas, including all the toppings imaginable as a finale.  With these notable facts in mind, I came up with just what I wanted to do for her birthday card.  A card depicting a banana split!


I found just the right digital image I wanted to use, and as I did earlier this month for my friend's card, I grouped all four images together into one, using PaintShop Pro.  I sized all my images to their appropriate sizes and then grouped them.  As before, it took a bit of work with the images as they were all different dpis and sizes and rotations.

My next step was to decide on the papers for the card.  I decided to use a technique called Angled Background, which I have not used in over a year and one-half (last on my husband's birthday card published Feb. 2, 2014).  I found a pretty little flowered paper by Echo Park in reds, pinks, greens and a tiny bit of yellow.  I decided that this would be the piece to build from and found four other papers to blend with it.  I chose two shades of cardstocks by Stampin' Up: Strawberry Slush for the cardbase and Gumball Green for the next layer.  For my third layer under my angled background papers, I used a red glitter paper.


Knowing the paper colors made it easy to then choose the Copic Markers to use on my banana split digital image.  I used a bit of Crystal Effects on the cherries and some puffy white Flower Soft on the whip cream.  I'm pretty happy with the way it all turned out, and I think Michele will be thrilled!


One of my signature cardmaking styles is to always create an inside decoration to coordinate with the outside design and complete a little verse that fits the occasion for the card being given.  Michele's card is, of course, no exception; therefore, my final step was to do just that.  It is finally completely done and ready for your inspection. . .see below:


Recipe:  Cardstocks: Stampin' Up - Strawberry Slush, Gumball Green (both retired), Red Glimmer.  Pattern papers: Echo Park - This & That/ Wooden Nickel Red Floral, Hello Spring Floral (back) ; My Minds Eye - Find Your Wings/ Up & Away (back), Nostalgia/ Scallop Paper.  Digital images (online freebies).  Spellbinders dies: Ovals, Lacey Ovals, Circles, Scallop Circles.  EK punch: Scallop Photo Corner.  Copics Markers.  Stampin' Up Pearls: copic colored.  Stash: Ribbon, Lace.  Homemade "flower soft" w/ styrofoam shavings. Computer-made sentiment and inside verse.  Font: Gisele Script/ Bold.  Technique: Angled Background strips.  Size: 5-1/2" x 6".

Thursday, June 25, 2015

Sister-in-Law Birthday in June!

My second sister-in-law birthday of 2015 is in late June.  I made several birthday cards while away in May at my Girls' Get-Away Cardmaking Retreat.  I immediately earmarked this one for my sister-in-law, Thelma.  After I made it, I reserved it and set it aside for safekeeping until it was time to mail Thelma her birthday card.  


This card was designed by my good friend and cardmaking buddy, Charlene Inks, who actually happens to be an around-the-corner neighbor as well.  This card was the design Charlene brought for our ShoeBox Swap cardmaking marathon.  Her original sample card was in oranges, but mine is in shades of aqua (or Pool Party as known by Stampin' Up users).  I really enjoyed learning how and making the little fold-back frame depicted on this card.  It was absolutely easy-peasy. . .much more so than it looks.  I have seen several cards made with this little fold-back frame idea over the past several years on Pinterest, and I really wanted to try my hand at it, but just never got around to it.  So, I thank Charlene for bringing this idea for her contribution to our ShoeBox Swap.


I finished off my card after coming home by designing an inside that coordinated with the outside color scheme and completing a little verse suitable for Thelma's birthday.  I hope she enjoys her handmade birthday card!


Recipe:  Stampin' Up cardstocks: Tempting Turquoise, Pool Party, Whisper White.  SU dsp: Sweet Sorbet (2015-SAB).  SU EF: Perfect Polka Dots.  Sizzix die: Flower Daisies #2. Glitter paper: white, aqua.  3/8" white satin ribbon.  Recollections: Aqua rhinestones. 

Sunday, June 21, 2015

Father's Day to Celebrate!

We are celebrating my husband this weekend for Father's Day.  He got a new gas grill barbecuer and wants to cook for the family on his special day, so we are hosting a potluck at our house with our four children and their husbands, wives, and significant other joining in.  We plan to play some lawn games if the weather holds, as you never know in the Northwest and a little gambling game I learned of at my Girls' Get-Away!


For John's card, I made almost the same coffee shaker card previously posted on May 31st.  This card suits him to a "tee," as he is a six-to-eight cups of coffee a day person.  His coffee shaker card is the first version I made of this card, and my former boss's card (and elementary school principal), was the second version.  That version was the simplified version to avoid the pleated ribbon edging on my husband's card, which I found a bit of a challenge to adhere and thought it too tedious to use for my Girls' Get-Away shoebox card (as I planned to use this design for the Get-Away ladies to make from my card kits.  My husband's card, as shown below, is the first and larger version.  Even though the ribbon was time-consuming and tedious, I do love the finished product!  I think John will be please as well.


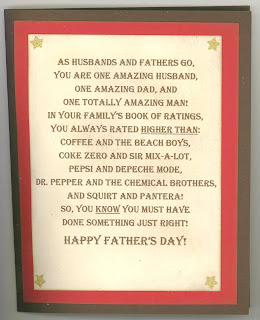
A little Father's Day verse to come up with, a little design to coordinate with the outside, and voila, John's card is complete!


Recipe:  Stampin' Up products: Cardstocks -  Early Espresso (card base), Real Red, Very Vanilla, Gold Glimmer paper; stamps - Perfect Blend (retired 6/1/15), Guy Greetings (2015 Occasions); inks - Soft Suede & Early Espresso; punches - Confetti Stars (2015 Occasions/ 2015-16 Annual); Dotted Scallop Ribbon (retired 6/1/15); framelits - Striped Scallop; largest Stars (banner fishtail pattern); smallest Banner (pattern for sentiment fishtail); Circle (3-3/4" & 3"); embossing folder - Lucky Stars (2015 Occasions/ 2015-16 Annual); cardboard from designer paper packaging (10-layer shaker frame); ribbon - Early Espresso 1/8" cotton (retired).  TomBow Glue.  Memento Tuxedo Black stamp pad.  Offray 1/4" Early Espresso Grosgrain ribbon.  Darice Dark Brown Seed Beads (coffee grounds).  Stash: Clear acyrlic sheet.  Large gold rhinestone.  Gold star brads.
(Note: I wanted to give credit to the person who originally came up with the idea for this card and the picture in my mind.  With lots of computer searching, I finally found the card I cased. . .boy do I have a good memory. . .thank you Ellen Taylor, who made the original over three years ago.) 

Tuesday, June 16, 2015

Many Belated Birthday Wishes!

A good friend and cardmaking mentor had a birthday yesterday, and I have been away on a re-decorating project with my daughter at her Oregon beach house rental.  It was a sudden decision on her part to make the trip, and she needed my help and my company as she did not want to make the trip alone.   This put me behind in my cardmaking projects for June, and I just finished my friend's card after returning home from my trip.


I had actually been thinking about Liz's card for some time.  I wanted to do something with dogs as she has two Labradors that are dearly loved from the bottom of her big heart, a male yellow Lab and a female chocolate Lab.  I was on the lookout for an outline digi image that I could use to represent her dogs.  I found a dog image that I decided was close enough to use.  I made a mirror image by flipping the image in PaintShop Pro so that I had a right-facing dog and a left-facing dog.  I wanted to put a cupcake or a birthday cake in the middle between the two dogs and put birthday hats on them.  My search was rewarded with a black and white birthday cake outline and three styles of birthday hats.  


I went to work re-sizing the images and grouping them together into one image in PaintShop Pro.  I thank my son, David, for his instruction on how to accomplish this as the hat images were sized in pixels per centimeters and the rest in pixels per inch.  He showed me how to make them all in inches and also how to find a "average" dpi for my new grouped background, as they all varied in dpi.  I was so very pleased with the outcome and really appreciate his help.  I have typed a detailed instructions sheet so that maybe next time I can accomplish it all by myself!


I selected my birthday background paper and dog paw paper and chose my Copic Marker colors to color my new image based on the shades in the papers, plus making the smaller female a chocolate lab and the large male a yellow lab as Liz's dog are.  I hope she is pleased with the end results!


Next, I wanted to create an inside that coordinated with the outside already finished design, per my usual card projects.  I found a digi "Big Birthday Wishes" in my stash of online free digis and decided to use this with a human vs. dog years in the birthday sentiment for a little humor.  I colored "BIG" with the same Copic Markers in the same color scheme on the card front.  Below is the design I came up with!


Recipe:  SU cardstocks: Old Olive, Tempting Turquoise.  Fancy Pants/ Cake Time dsp.  Basic Grey/ Max & Whiskers Tiger.  Outline Black & White digital images.  Copic Markers.  Lifestayle dies: Ovals, Scalloped Ovals, Rectangles, Scalloped Rectangles.  WRMK Corner Chomper/ Deco.  EK Punch: Large Scallops.  Stash: Tone-Tone ribbon. Computer-made sentiment.  Computer-made verse.

Friday, June 12, 2015

Sympathy Card #2

As mentioned in my previous post, I needed to send a sympathy card to my brother-in-law's brother's wife, Shelley, whose husband died unexpectedly while I was away in Oregon.


Needing cards as soon as possible, my second card to the rescue was one I made at a Stampin' Up Catalog Kick-Off Make 'N Take hosted by Dara Peterson and Luci.  This card was intended to be a Thinking of You card, but I chose not to add the sentiment shown on the original just because I felt it could be used for a variety of occasions, including a sympathy card.  I used a sentiment and a verse from a newly retired Stampin' Up stamp set, Bloom with Hope.  I was very please with the final outcome of this lovely card designed by Dara Peterson.


Here is a look at the finished inside design also using the Stampin' Up retired stamp set, Bloom with Hope for the inside verse.


Recipe:  Stampin' Up cardstocks: Watermelon Wonder (2015-2017 In Colors), Whisper White, Basic Black.  SU Stamps: You've Got This, Bloom with Hope (retired).  SU Ink: Watermelon Wonder.  Memento: Tuxedo Black. SU framelit dies: Deco Labels SU ribbon: 1" Dotted Lace/ Watermelon Wonder.  SU Marker: Delightful Dijon.  SU: rhinestones (Copic colored).

Monday, June 8, 2015

Sympathy Cards to Make. . .

While I was away in Oregon helping my daughter with re-decorating work on the beach house Tillamook Head bedroom, my husband called with some sad news.  Our brother-in-law (his youngest sister's husband), lost his only remaining brother, Walt, who developed  a very sudden and unexpected health issue.  He was taken in for emergency surgery, which he survived, but he died  unexpectedly a few days later due to complications with his diabetic condition.  He was a man in his mid-60's. . .so sad.


I needed to send a sympathy card to our brother-in-law, Dave, and to Walt's wife, Shelley.  I was already so far behind and belated on almost all of my June cards, but thankfully to the rescue came two cards that I recently made at two different cardmaking events.  My first card chosen to send to Dave was made at our May Girls' Get-Away Retreat and was designed by Liz Thayer.  The technique is to color the vellum on the backside with a coloring marker.  In this case, I used the Lost Lagoon Stampin' Up Marker.  On the front side, glue was applied to the butterflies and then sprinkled with glitter. This panel was then adhered to the card front.


I had almost completed the card at the event, but decided not to put on the sentiment, because I thought it could be used for a variety of occasions.  In addition, I switch the corded bow from the right side to the left side, deciding to place my sentiment to the lower right of the card bottom rather than on the left.  I thought the card when completely finished made a beautiful sympathy card.


My final step, as with all my cards, was to decide on an inside verse to suit a sympathy card.  I composed a little verse that I hope will let Dave know we are thinking of him and keeping him in our prayers.


Recipe:  Stampin' Up:  Cardstocks - Whisper White, Lost Lagoon; DSP - Sheer Perfection Vellum Stack (2015-SAB suppl.).  SU stamp: Thought & Prayers (sentiment).  Spellbinders dies: Petite Ovals; Petite Scallop Ovals.  QuicKutz die: Photo Corner (inside).  SU EF: Perfect Polka Dots (retired).  Thick Baker's Twine: Lost Lagoon (2-15-SAB suppl.).  SU Marker: Lost Lagoon.  SU: Dazzling Diamonds glitter.  SU rhinestones.