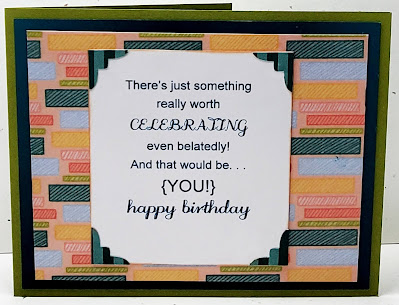
Ingredients: Stampin' Up Products-- Cardstock/ Papers: Old Olive, Pretty Peacock, Basic White, Paper Pumpkin March 2021 - Here's to You--envelope inserts used as dsp. Stamps: Itty Bitty Birthdays. Ink: Pretty Peacock, Early Espresso. Other-- Punch: EK Medium Victorian Corners. Chatterbox verse (computer). Technique: Front Flap Fold. Size: 4-3/4x6-1/4-inches.
THE CONSTRUCTION STORY
This will be my second alternative card for the Paper Pumpkin March 2021 kit, Here's To You. You might remember that alternative cards are my goal and personal challenge when making up my Paper Pumpkin kits.
Once again, I fussy-cut, layered, and sponged to get more depth, color, shadowing, texture and definition from the flat scenic papers provided in the kit. I used the sunset scene again and coordinating cardstock colors in greens, blues, and blue-green to give my card a more masculine look. This card will be for my son-in-law's October birthday. Instructions for building your card follow.
1. I planned a Front Side Overlay Flap Fold (aka Front Flap Fold) design with a square flap and three layers, using the mountain sunrise scene from the kit. (Note: Use the finished card picture as your guide throughout the construction process).
2. Here are the cutting dimensions for my card paper, which is for a 4-3/4 x 6-inches finished size:
--Cardbase = Old Olive = 9-1/2" x 4-3/4". Score at 3-1/2" to form the Front Fold, which leaves a 6" Inside base.
--Inside Middle Layer/ Middle Fold Layer = Pretty Peacock:. Inside Middle: Cut to 5-3/4" x 4-1/2". Front Middle Fold: Cut to 3-1/4" x 4-1/2".
--DSP Layers--Inside / DSP Front Top Fold: DSP Inside: Cut to 5-1/2" x 4-1/4". DSP Front Top Fold: Cut to 3" x 4-14".
--Overlay Flap Square Layers: Bottom Overlay Flap = Old Olive: Cut to 3-1/2" x 3-1/2".
--Middle Overlay Flap (layer) = Pretty Peacock: : 3-1/4" x 3-1/4" square.
--Top Overlay Flap (mountain-sunrise scene in this card): Cut two to a 3" x 3" square, removing all the the Petal Pink cardstock framing from arount the scene.
3. From one mountain-sunrise scene, fussy-cut the sun and its background to remove the lower half of the scene at the mountains. With Pretty Peakcock ink, ink-distress and sponge lightly along the top edges of the mountains. This gives the mountains more color, shadowing, and depth. Set aside.
4. From the second mountain-sunrise scene that is still untouched, carefully fussy-cut off the Old Olive trees from the bottom of the scene. Working with the Old Olive fussy-cut treets, ink-distress the edges and sponge the surfaces with Old Olive ink. Set the remaining scene, from which you removed these trees, and the fussy-cut trees.
5. Glue the fussy-cut mountains, created in #3 above, onto the mountain-sunrise scene, created in #4 above, so the top mountains are slightly lower than the bottom layer of mountains. This will give the mountains more texture and definition. When the gluing is complete, you will have one mountain-sunrise scene unit.
6. Glue the Old Olive fussy-cut trees, created and sponged in #4 above, to the scene completed in #5 above. (Note: This completed unit will be used for form the 3-1/2" square Front Overlay Flap.)
7. From the kit, sponged one set of die-cut evergreen trees and their land base with Pretty Peacock ink to add texture and depth. Glue them, starting at the left side, across the bottom of the scene. They will overlay part of the Olive Green trees (see card picture). Finally, with Early Espresso ink, stamp a set birds flying near the mountains.
Just an FYI, here is the kit design version using this sunrise-mountain scene:


No comments:
Post a Comment
Thank you for visiting my blog. If you leave a comment, it is much appreciated! Have a GREAT day! Carlene (aka Chatterbox)