Tuesday, January 25, 2022
Happiest of Birthdays for an SCS Friend!
Wednesday, January 19, 2022
Under the Weather?
My youngest son has been quite sick for going on his second week. I thought I'd make a fun card to get a little smile and give some encouragement to get well. I've been wanting to finish off some OLD Alphabet Challenge Rounds using the letter Z for Zany, so I purposeful sought out a zany, quirky digital image to color with my Copics. I think I found the perfect image to make a fun card and to fulfill zany all rolled into one! Take a look below at the finished card inside and out!
Ingredients: Stampin' Up: Cardstock--Real Red. DSP--2012-2014 In-Color Stack (Midnight Muse Stripe, Summer Starfruit Dots). Dies: Reverse Confetti Lacy Scallop Frame; Lawn Fawn--Grassy Hillside. Digital image: source unknown. Copic Markers. Journal Black Pen. White Gel pen.
Thursday, January 13, 2022
An Anniversary for January!
This card is for my youngest daughter and her husband in celebration their fifth anniversary. I wanted to send them a card to mark this half-decade event, and I decided on a little bit of fall to mark the season in the year that we all spent so much time together getting the wedding and reception all arranged. They married in a large barn, and my son-in-law was instrumental in using CAD software to arrange the layout for the wedding area and the reception. One-third of the barn was used for the wedding "stage" with garden arbor and seating, and the other two-thirds was set up for the reception. I distinctly remember one blustery fall evening when we drove to the barn for measurements to see if his drawings worked...being an engineer, I never doubted him!
Take a look at their finished anniversary card. I may have to explain the fall design to them, but I'm sure they will enjoy their card made by one of their Moms!
Ingredients: BoBunny Double Dot--Rust; Echo Park patterned dsp; Papertrey Ink: Autumn Acorns stamps/ dies. Spellbinders: Labels 16 Nested dies (sentiment frame); 3/8" stash ribbon; Computer-made sentiment.
Wednesday, January 5, 2022
So Sweet Thank You!
My Mom has been my go-to-person for getting my stamps, dies, and "must have" Stampin' Up items since I resigned as a Stampin' Up demonstrator back in August. If they would just stop inventing new stuff that I just can't live without, it would help. I wanted to send her a little thank you card just to let her know how much I appreciate all her work...I do know what a big job it is to get things entered and on order in a timely manner in order to take advantage of sales that pop up every now and then!
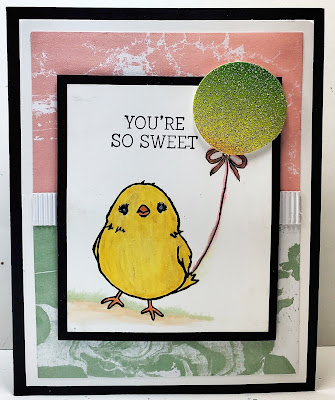
I decided to check out my “To Dos” stash and finish a card I started back in early 2016. This little chick was an SAB freebie, and I started coloring her when I was away from home, and didn't have my Copic markers with me. I was not super happy with how she turned out. I don't find I'm very skillful using water-base markers in getting any blending or shading. I did try to go back and "fix her up" with my Copic markers later, but I'm not sure I improved upon her at all! I did add a little ground shading so she was not floating in the air!
Originally, I was trying out a honeycomb paper balloon embellishment, but I found they don't store well and are flimsy and pull apart easily, so I tore off the honeycomb and added a glitter balloon made from a Duck Tape Rainbow Glitter roll that I bought about three years ago, but never opened the package to try it out. It really is quite pretty and I think it works quite well with my color scheme.
I shipped off a check to pay Mom for my order along with this little So Sweet thank you card. I think Mom will enjoy the thoughtfulness even if it was just a quick and speedy card! Take a peek below at my inside and outside finished card for Mom!
Ingredients: Ingredients: SU Products: Cardstock--Basic Black, Basic White. DSP: Perfectly Artistic (2016 SAB) Stamps: Honeycomb Happiness (2016 SAB). Ink: Memento Tuxedo Black. Punch: 1-1/2" Circle. Stamp-Write Markers: Daffodil Delight, Pumpkin Pie. Copic Markers. Ribbon: stash. Inside: Mint Macaron, Blushing Bride. Scalloped Scallops punch. Other: Savvy Dies: Thank You Cursive. Duck Tape: Rainbow Glitter. Size-4-3/4" x 6".
Wednesday, December 29, 2021
Let's Have Cattail Weather for a January Birthday!
My husband's brother has an early, early January birthday, and I wanted to make a card for him this year since I've missed several birthdays during Covid! Masculine cards are more difficult for me, so I need lots of inspiration to get my creative mojo brewing, and I'm already running out of time in order to beat the lengthy out-of-state mailing time.
The weather here and in northern California has been really cold for the last several weeks, and I know the family has all been talking about...let's bring on the warmth! Ultimately, I decided to case a card I made over two years ago so that I could use its wonderful cattail scenery dies again and speed up my finishing time with the idea of let's bring on that warm cattail weather and a lovely sunset sky! We sure need some gold rays and are already getting tired of winter!
My husband has decided to send his brother an email picture of his card inside and out on his birthday just in case it does not arrive on time! Now that's being proactive! Take a peek below at the repeat version of my own old card and the inside design with my BIL's birthday verse!
Ingredients: Stampin' Up Products: Cardstocks--Rich Razzleberry, So Saffron, Soft Suede, Naturals-Ivory (retired). Inks--Rich Razzleberry, Crushed Curry, Real Red (sky sponging/ stamping). Stamps--Friend Like You (sentiment/ dragonflies). Dies--Friendly Silhouettes (cattails/ dragonflies). Punch: Tailored Tag. Marker: Early Espresso (pussywillows). Mini Pearls (Copic colored). Other: EK Victorian corner punch (inside). Chatterbox Verse--computer made. Size: 4-3/4" x 6".
Tuesday, December 21, 2021
You Can NEVER Have Too Much Happy!
My friend and former co-worker's birthday falls right after Christmas, and here is another example of missing birthday cards due to my loss of creative mojo during Covid! I was determined to make a card for her this year as I've finally gotten myself been back to my craft table after an 18 mos. hit & miss hiatus! It was definitely time to get out of my funk!
My friend and I worked together as a team for 13 years as elementary school office staff. One of our major functions each year was school start-up in my role as the elementary school office manager and she as the student registrar. A favorite fun thing we looked forward to each year was welcoming our new little kindergarteners with their smiling, happy little faces and cute antics.
With this in mind, I thought she would really enjoy a kindergarten art easel shape for her birthday card. I remembered an easel template that I've had in my stash for several years, but it was smaller than I wanted as I prefer cards that are 4-3/4 x 6-inches. Before getting started, I enlarged the template dimensions. I am really please with my finished easel card. Take a look below at my finished card with its inside design and my verse completed on the computer!
Ingredients: Stampin' Up Products: Cardstock--Crumb Cake, Basic Black, Crisp Cantaloupe, Soft Sky. Stamps--Yippee Skippee (sentiment), Hardwood BG. Dies--Floral Fusion Sizzilit. Ink--Baked Brown Sugar, Staz-On White. Patterned Paper--scraps. Punch--Banner. Linen Thread. Basic Pearl--minis. Other: EK punch--Victorian Corners
Tuesday, December 7, 2021
Being Strong!
My brother recently lost his wife quite suddenly and unexpectedly! It was a shock to all of us. I wanted to send him a Thinking of You card to let him know I'm keeping him in my prayers and thought each and everyday!
This is a CASE of a card designed by Liz Thayer for her class that I attended way back in the fall of 2013. It has been lurking in my "To Do" stash of partially completed cards needing to be finished. I made some of my own modifications and changes to enlarge the card, add a bit of sparkle, and change the sentiment as well. I added a new Natural Ivory card base plus a dark brown glitter mat layer to the already existing Crumb Cake mat layer and my card became a thinking of you card rather than a thank you card. I also decorated the inside and added my own computer-made verse.
I'm really pleased with the added layers and glitter paper. It really dressed up the card a lot. I think my brother will be pleased with his card and really like the inside verse, as it fits the occasion perfectly. Take a peek below at the finished card inside and out.
Ingredients: Stampin' Up products: Cardstocks--Naturals Ivory, Crumb Cake, Bashful Blue. Ink--Crumb Cake, Early Espresso. Stamps--Truly Grateful stamps (circle bg, acorns-2013 Holiday). Dies--Window Framelits Collection ((2013-14 Annual). Embossing Folder--Stylish Stripes. Festive Paper Piercing Pack. 1-1/4" Burlap Ribbon. Linen Thread. Dazzling Diamonds Glitter. Other: Recollections Signature 12" Assorted Glitter Pad (dark brown). EK punch: Victorian Corner.
Tuesday, November 30, 2021
You Are Looking A Little Green! (VSN#1)
I needed a get well card for my daughter's long-time friend, who will have eye surgery in a few days. It was like a stroke of perfectg serendipity, because I also needed a get well card to fulfill one of the three VSN mini challenges! Other than Christmas cards, I really like to know who is going to receive my card when making and designing it as it helps me decided what I want to do when I can think about who is getting the card when finished.
My daughter's friend must remain immobile and face down for up to two weeks after surgery. My daughter plans take meals when she visits, along with this funny get well card, which will go along to cheer her up. More of the card's story continues below the card images. Take a peek at the finished card inside and out below:
Ingredients: Papers: Cardstock--SU-Cherry Cobbler, Basic White; Darice Kraft. Patterned Paper--Cosmo Cricket/Earth Love-rethink; Fancy Pants/ Rusted Sun-Umbrella; October Afternoon/ Cakewalk-Hula Hoop; Jillibean/ Macho Nacho Soup-4 Parts Hero. Image: ClipArtMax-Funny Frog Cartoon Animal. SU Border Punch--Scalloped Scallops. Colorbox--Chestnut Roan ink distressing. Maya Arts--Jute Twine. Copic Marker--G40. Chatterbox sentiment/ verse (computer-generated). Size--4-3/4" x 6".
CARD STORY & HISTORY
As mentioned above, needing this get well card tied in nicely with my yen to participate in the Virtual Stamp Night Challenge (VSN), which is December 17 & 18 with a total of approximately 18 challenge all due by December 29. The December theme is a fun one...Let TV Be Your Guide! All challenges will focus on something to do with TV shows (no movies) in the past or present.
VSN has already had its 3-card VSN Mini Challenge in mid-November to get you excited and interested to participate. In the past, I've started with the Minis, but something always comes up that prevents me from participating in the entire main event. I hope this time it will be different.
The first VSN Mini Challenge presented by one of the three VSN coordinators who recently had hip replacement surgery and is actually still in recovery. Her hospital stay exposed her to many medical professionals...some cheerful and friendly and some business-focused only. She felt better with more cheer than glum, which encouraged, uplifted, and helped her to recover in body and spirit. This experience led to her challenge to make a humorous get well card, based on the old 1972 TV show, M*A*S*H, which was about Army doctors who treated Korean War casualties and other personnel in the battlefield surgical center. Strangely enough, it had a lot of comedic humor, helping them be better doctors and helping patients and others as well.
I used a time-saving, pre-colored image adding Copic-coloring in soft green to the BG and sentiment to stay within the one-hour cardmaking time limit. I used patterned paper scraps, a pre-cut cardbase and a pre-cut Kraft layer. The sentiment is a Chatterbox creation printed with the computer.
Thursday, November 25, 2021
It's A Night Sky for Christmas! (VSN#3)
Splitcoaststamper's Virtual Stamp Night sprang onto the scene, leaving me with the exclamation, "How did I miss that VSN was coming up?!!" I think I first noticed it when they did a call for Hostesses several weeks back, but it completely slipped my mind with unexpected family happenings! Bottom line, all of a sudden there it was, and I was spurred me to action.
I have always wanted to fully participate, but I never seem to accomplished more than the Pre-MINI challenges and just a few of those during the main event. This theme sounds really fun, "Let TV Be Your Guide!" I really wanted to play!! So, I am already playing catch up!
Since LuvLee's MINI3 will be easy for me as I have a kit card I'm going to use, I'm going to undertake that one next! It will meet the galaxy night sky requirement. My goal is to complete the last of the three MINIs within the next few days since they have now been posted for slightly over a week!
With this card completed, I have two down and one to go. Then, I'll be ready when the main event starts on December 17th. After the card image below, I will follow with "The Story" of my changes making this card into a bit of an Alternative rendition rather than just like the kit version.
Ingredients: Stampin' Up: Kit--Christmas Whimsy--papers, stamps, die-cut, and embellishments. Cardstock--Blueberry Bushel, Red Foil. Ink--Night of Navy. Glitter--Dazzling Diamonds (retired). Wink of Stella/Clear. Basic Rhinestones. Other: Gelly Roll-White/fine.
THE CONSTRUCTION STORY
To start, I cut the fronts off all of the kits pre-folded card bases. I wanted to add more color layers, and I also wanted my cards to end up as a 4-3/4 x 6-inches, as I prefer this size to the traditional A2 size of 4-1/4 x 5-1/2-inches.
I cut my new cardbase from Blueberry Bushel and then the added a Red Foil layer which will be underneath the card front itself. Working with the kit's card front scene, I stamped an array of galaxy stars with Night of Navy ink and added metallic star and snowflake gems scattered about. To the evergreen trees and using a fine white Gelly Roll pen, I added white lines to depict a sparse layer snow. To the snow shadows, I added Dazzling Diamonds glitter. I also added Wink of Stella/Clear to all the red parts in the scene: packages, elf hats, and elf shoes. I adhered the card front to the Red Foil layer. Next, I popped up my elves, package, and sled onto the card front and finished by adding clear rhinestones to the elf hats. I thought all these additions dressed up the fun snow scene quite nicely and added lots of pizzazz to the original kit design!
Thursday, November 18, 2021
Santa's Sleigh Christmas Tag Card! (VSN#2)
At the end of September, I went to a card class hosted my Stampin' Up demonstrator duo and friends, Dar Peterson and Luci Kirschbaum. It was their annual holiday card event and it was so nice to see friends of old! I'm always looking for more Christmas cards, so I was only too happy to attend!
As always when presented with a finished card sample, my creative edit mode kicks in with ideas that I might like to change or include that would make the card more me. This never means that I do not like the original design, it just means that I can not curb myself to just make the card as is...my bad??!! Therefore, I often complete cards at home after leaving the class, keeping in mind while at class where I might want to make changes. I got this card's die-cutting, embossing, etc. complete at class and brought the pieces home, along with a picture, but I just finished putting it together last night because it was so perfect for one of the Splitcoaststampers' VSN mini challenges (more about that later).
This card's original design is by Dar Peterson. She used Stampin' Up's new holiday die, Giving Gifts, using the Santa Sleigh, plus the Tailor Made Tags dies from the Annual catalog. Though I contempted adding a red foil layer instead of the regular Real Red cardstock, I loved this sweet Christmas card pretty much just as it was. I ended up deciding to only add red rhinestones to give a little sparkle. . . three to the upper left and two to snowflakes. Take a peak at the finished card, which is almost ready to mail after I add my verse and inside design:
NOTE: I just found another card on Pinterest by Cindy Brumbaugh that is very similar to this with a few tweaks. It was made about 5 weeks before Dar's; Dar's uses a different sentiment and ribbons; but I suspect they should each be given credit for this card design, thus I am doing so. My rhinestone additions were a different twist not on either card.
Ingredients: Stampin' Up Papers: Cardstock--Sahara Sand, Real Red, Basic White. Pattern Paper--Tidings of Christmas dsp. Stamps--Peaceful Deer (sentiment). Dies--Giving Gifts; Tailor Made Tags, So Many Snowflakes. Ink--Real Red. Embossing Folder: Wintry 3D. Red Rhinestones. Ribbon--Playful Pets (red); White Cotton twine. Chatterbox inside verse. Size:4-1/4 x 5-1/2-inches.
Sunday, November 14, 2021
Triangle Christmas Trees!
This is a Christmas card design by Luci Kirschbaum from a Stampin' Up card class I attended at the end of September. I brought it home to think about what it needed, if anything, before I felt it was finished. It has been sitting in my unfinished Christmas cards for well over a month! It was time revisit it and make up my mind what I wanted to do. . .leave it as is or add something more.
The design is geometric, not normally my style especially in a Christmas card, but somehow I found this card very appealing. I decided I liked it, but maybe it needed a little sparkle and be a bit larger to fit the card size I generally prefer. I added some rhinestone tree toppers for sparkle and a new Always Artichoke card base, enlarging its size to 4-3/4 x 6-inches. I do like the sparkle, extra color, and layering that I added to tweak just a little. See my finished card below:
Ingredients: SU Cardstock--Evening Evergreen, Basic Gray, Always Artichoke. SU 2021 July-Dec Mini: Peaceful Place Specialty DSP & Sweet Little Stockings stamps. SU Dies--Stitched Triangles. SU Ink--Evening Evergreen. SU Embossing Folder--Evergreen Forest 3D. SU Basic Rhinestones. Colorbox Charcoal ink distressing (trees). Chatterbox computer verse. Size: 4-3/4" x 6".
Saturday, November 6, 2021
A Happy Day Birthday! (Paper Pumpkin--March 2021--"Here's to You" Alternative #3)
Ingredients: Stampin' Up Products--Cardstocks/ Papers: Old Olvie, Pretty Peacock, Basic White, Copper Foil; Paper Pumpkin March 2021--Here's To You (scenes, die-cuts, dsp=envelope inserts, fussy-cut scene pieces). Stamps: Itty Bitty Birthdays. Die: Stitched Nested Labels. Ink: Early Espresso, Pretty Peacock, Old Olive, Seaside Spray. Embossing Folder: Subtle Dynamic Textured. Sequins: Artistry Blooms. Other-- Colorbox Chestnut Roan pigment ink (inked edge distressing); Maya Arts Hemp Twine; Copic Markers (sky, water enhancement); Chatterbox verse (inside); Size: 4-3/4" x 6".
CARD STORY & CONSTRUCTION NOTES
My friend's birthday was yesterday while I am away at a crafting get-away with my long-time group of crafting buddies. This hobby event has been a long time coming as the last was pre-COVID (over two years ago)! Now that we've all been vaccinated, we've been anxiously awaiting getting together again! So, while I am here, my primary project was to make this needed birthday card. I wanted to keep my crafting supplies to a minimum, so I've decided to take Paper Pumpkin kits that either were not finished or ones not started, along with their coordinating papers, inks, extra sentiment stamps, ribbon, and other embellishments that I might need.
For this first project, I decided to use a kit I had already made two alternative cards from...the Paper Pumpkin--March 2021 - Here's To You. It, of course, is Alternative Card #3. I used the cloud-meadow scene that I have not yet used. Like I did previously, I fussy-cut scenery parts to double layer these areas in the scene in order to add more depth, texture, and color. For this Alternative #3 card, I focused on the clouds, lake shadows, green trees, and meadow with flowers leading to the lake.
Onto the fussy-cut pieces, I sponged on more ink for color depth, plus I ink-distressed the edges with the Colorbox Chestnut Roan ink that I loved to use when I want ink edge distressed this effect. Notice that I sponged Pretty Peacock on several of the cloud formations and Old Olive onto the green trees before double layering them onto the scene. I Copic-colored the fussy-cut lake shadows as I did not have an appropriate ink color to use and double layered them as well.
Next, I embossed the card base front and the copper foil layer with the SU Subtle 3D embossing folder. I really like the copper foil with this particular kit as it enriches and brightens the entire look of the completed card. To finish, I added my trio of twines and adhered all layers including the card front together. I stamped the sentiment, added the copper die-cut layer pieces, attached the sentiment layering, and finished with sequin embellishments.
My friend's birthday was yesterday while I am away at a crafting get-away with my long-time group of crafting buddies. This hobby event has been a long time coming as the last was pre-COVID (over two years ago)! Now that we've all been vaccinated, we've been anxiously awaiting getting together again! So, while I am here, my primary project was to make this needed birthday card. I wanted to keep my crafting supplies to a minimum, so I've decided to take Paper Pumpkin kits that either were not finished or ones not started, along with their coordinating papers, inks, extra sentiment stamps, ribbon, and other embellishments that I might need.
For this first project, I decided to use a kit I had already made two alternative cards from...the Paper Pumpkin--March 2021 - Here's To You. It, of course, is Alternative Card #3. I used the cloud-meadow scene that I have not yet used. Like I did previously, I fussy-cut scenery parts to double layer these areas in the scene in order to add more depth, texture, and color. For this Alternative #3 card, I focused on the clouds, lake shadows, green trees, and meadow with flowers leading to the lake.
Onto the fussy-cut pieces, I sponged on more ink for color depth, plus I ink-distressed the edges with the Colorbox Chestnut Roan ink that I loved to use when I want ink edge distressed this effect. Notice that I sponged Pretty Peacock on several of the cloud formations and Old Olive onto the green trees before double layering them onto the scene. I Copic-colored the fussy-cut lake shadows as I did not have an appropriate ink color to use and double layered them as well.
Next, I embossed the card base front and the copper foil layer with the SU Subtle 3D embossing folder. I really like the copper foil with this particular kit as it enriches and brightens the entire look of the completed card. To finish, I added my trio of twines and adhered all layers including the card front together. I stamped the sentiment, added the copper die-cut layer pieces, attached the sentiment layering, and finished with sequin embellishments.
Thursday, October 28, 2021
It's A Shaving Cream Birthday!
Another October birthday, and I'm running late (but what is new with me)! This crafting friend's birthday happens to fall on my anniversary as well. My hope is to finished and at least to take it with me to our early November crafting retreat, which I was able to do, but I was late posting it here (and even later posting it to my Splitcoaststampers gallery)!
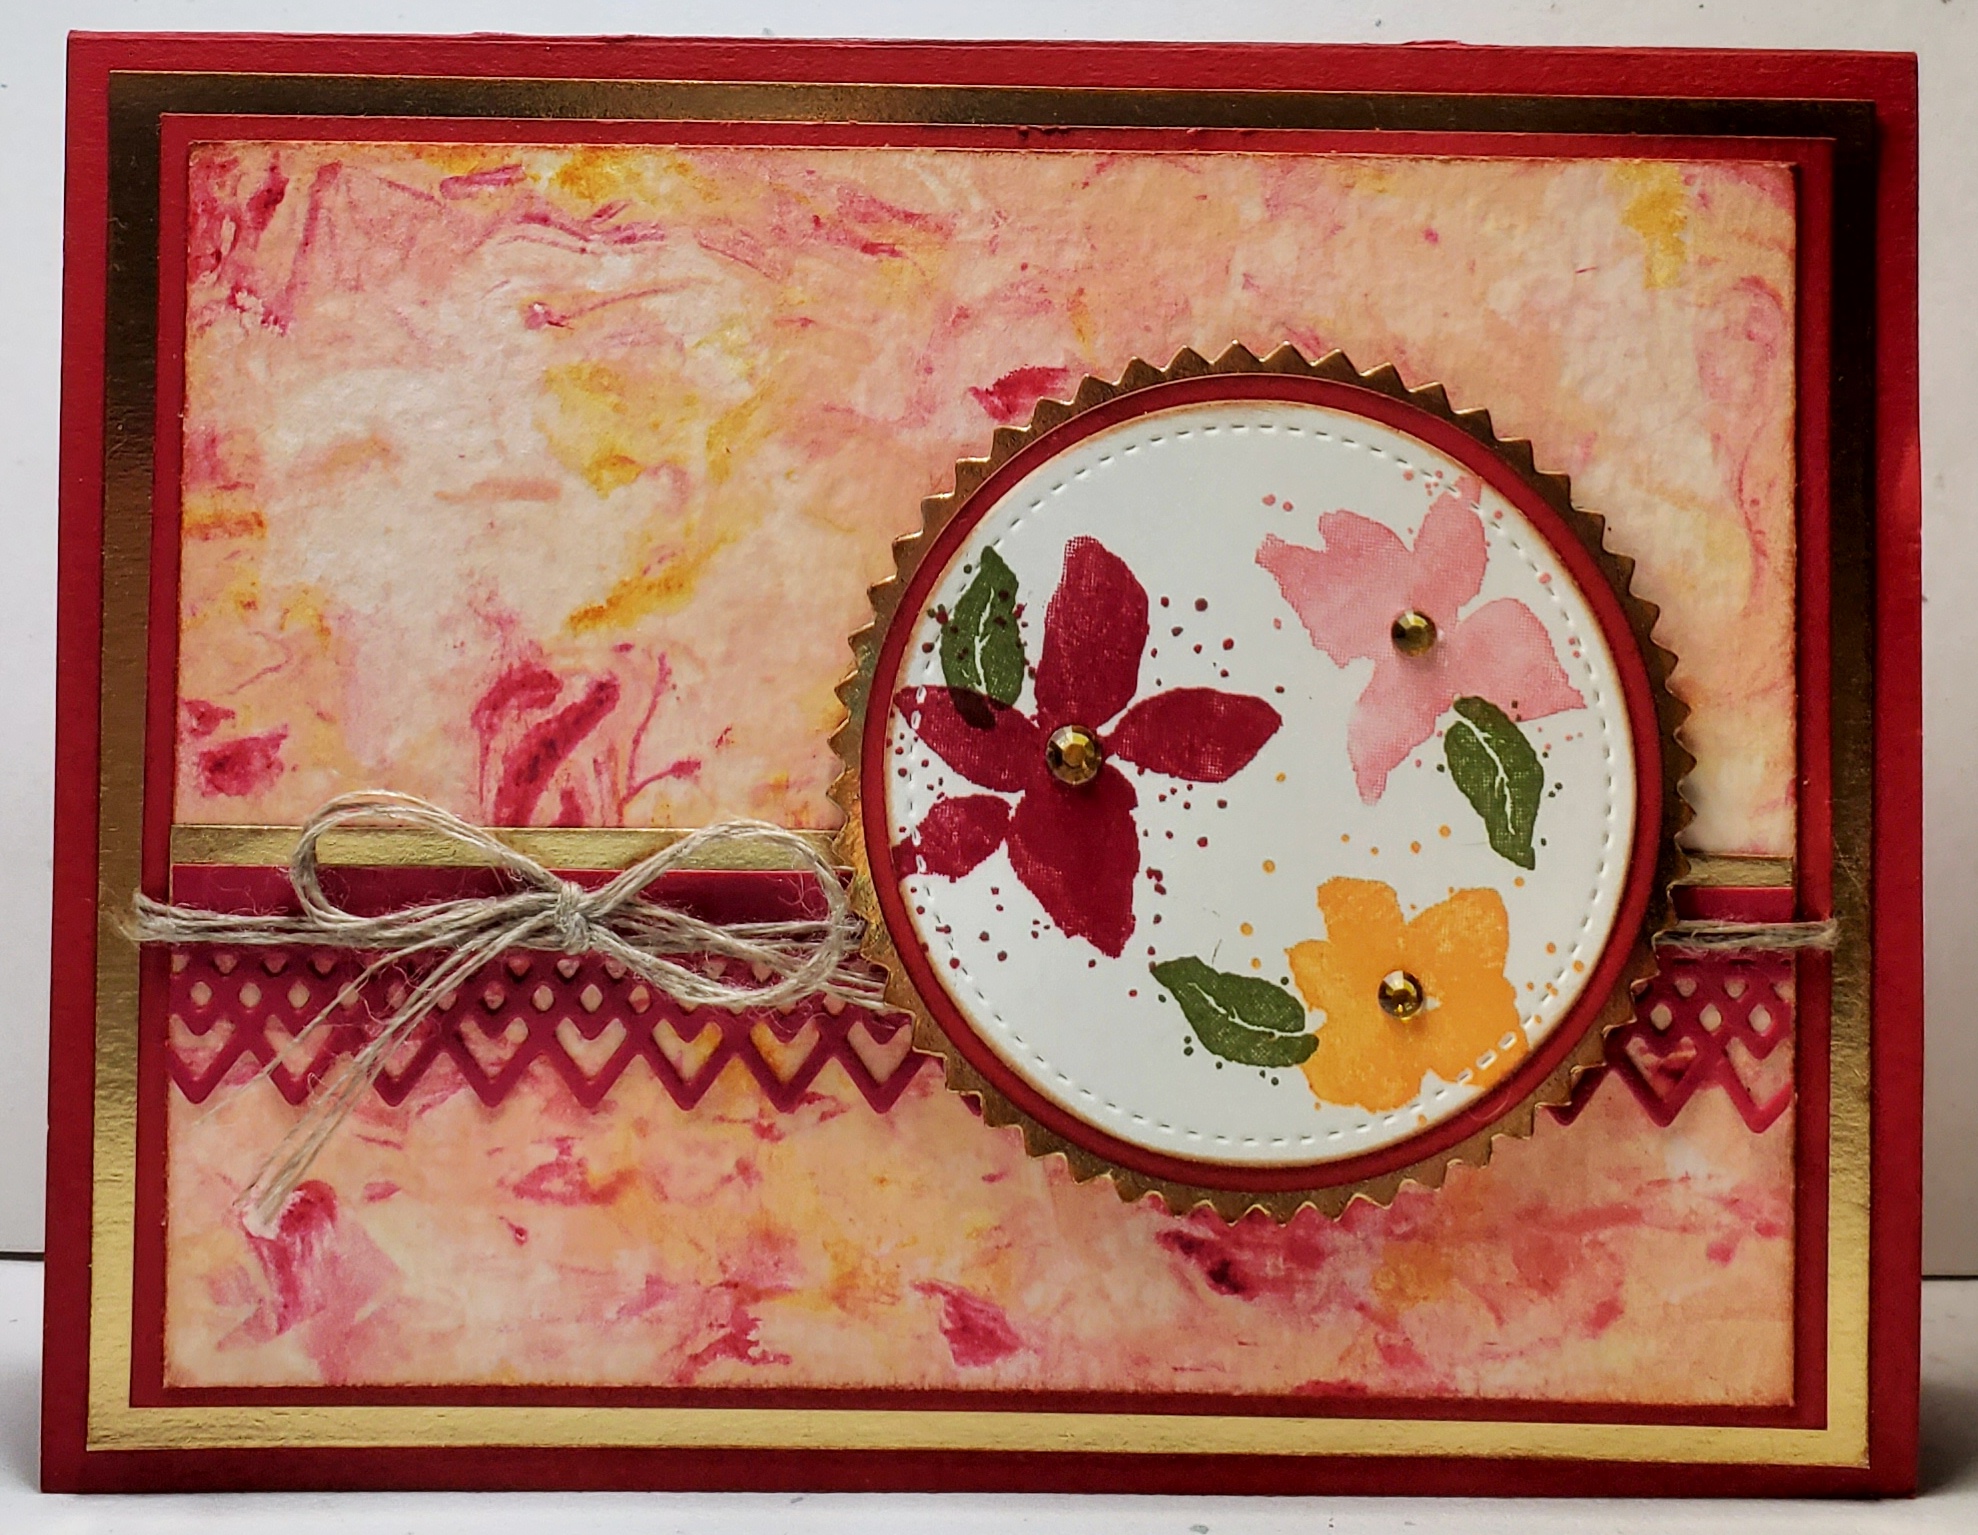
I found a shaving cream technique YouTube by Darla Watson...Scrap Happens with Darla! She is my Mom's Stampin' Up demonstrator and mentor and I've had the pleasure of crafting with her and her group when visiting Mom, though that has not happened now in several years because of Covid! I love Darla's color combination and card design, so I thought I'd follow along with the video and make my own changes to make the final card more me.
For my shaving cream BG, I chose to use watercolor paper (video showed regular cardstock). I adjusted the layout and placement of the elements. I raising my horizontal strip and lowered my circle of flowers so it sat more right centered than almost above the horizontal strip. I added several more background layers...Gold Foil and an additional Lovely Lipstick.
Additional additions are, ink-distressed edging, a Gold Foil Starburst BG layer beneath the Stitched Circle flowers, gold metallic Gilded Gems for flower centers, and a Gold Foil strip to the top edge of the horizontal decorative heart border. I chose to use 4 strands of Linen Twine and center my 4-strand bow in the left negative space rather than right next to the flower circle. I love my shaving cream background, and really like my changed layout, layering, and bling additions. I think my crafting friend will like it as well...take a peak below at the finished results:
Ingredients: Stampin' Up: Cardstock--Lovely Lipstick, Very Vanilla. Other Paper--Watercolor, Gold Foil. Stamps--Parcels & Petals. Dies--Delicate Lace; Stitched Shapes-circles; Starburst Framelits. Inks--Mango Melody, Flirty Flamingo, Lovely Lipstick, Mossy Meadow. Linen Thread. Gold Metallic Gems. Other: Colorbox Chestnut Roan (ink edge distressing). Technique: Shaving Cream BG--2 drops ea. ink (no Mossy Meadow). Chatterbox inside computer verse. Size: 4-3/4 x 6-inches.
Monday, October 18, 2021
October Birthday with Paper Pumpkin--March 2021--Here's to You Alternative #2!
Ingredients: Stampin' Up Products-- Cardstock/ Papers: Old Olive, Pretty Peacock, Basic White, Paper Pumpkin March 2021 - Here's to You--envelope inserts used as dsp. Stamps: Itty Bitty Birthdays. Ink: Pretty Peacock, Early Espresso. Other-- Punch: EK Medium Victorian Corners. Chatterbox verse (computer). Technique: Front Flap Fold. Size: 4-3/4x6-1/4-inches.
THE CONSTRUCTION STORY
This will be my second alternative card for the Paper Pumpkin March 2021 kit, Here's To You. You might remember that alternative cards are my goal and personal challenge when making up my Paper Pumpkin kits.
Once again, I fussy-cut, layered, and sponged to get more depth, color, shadowing, texture and definition from the flat scenic papers provided in the kit. I used the sunset scene again and coordinating cardstock colors in greens, blues, and blue-green to give my card a more masculine look. This card will be for my son-in-law's October birthday. Instructions for building your card follow.
1. I planned a Front Side Overlay Flap Fold (aka Front Flap Fold) design with a square flap and three layers, using the mountain sunrise scene from the kit. (Note: Use the finished card picture as your guide throughout the construction process).
2. Here are the cutting dimensions for my card paper, which is for a 4-3/4 x 6-inches finished size:
--Cardbase = Old Olive = 9-1/2" x 4-3/4". Score at 3-1/2" to form the Front Fold, which leaves a 6" Inside base.
--Inside Middle Layer/ Middle Fold Layer = Pretty Peacock:. Inside Middle: Cut to 5-3/4" x 4-1/2". Front Middle Fold: Cut to 3-1/4" x 4-1/2".
--DSP Layers--Inside / DSP Front Top Fold: DSP Inside: Cut to 5-1/2" x 4-1/4". DSP Front Top Fold: Cut to 3" x 4-14".
--Overlay Flap Square Layers: Bottom Overlay Flap = Old Olive: Cut to 3-1/2" x 3-1/2".
--Middle Overlay Flap (layer) = Pretty Peacock: : 3-1/4" x 3-1/4" square.
--Top Overlay Flap (mountain-sunrise scene in this card): Cut two to a 3" x 3" square, removing all the the Petal Pink cardstock framing from arount the scene.
3. From one mountain-sunrise scene, fussy-cut the sun and its background to remove the lower half of the scene at the mountains. With Pretty Peakcock ink, ink-distress and sponge lightly along the top edges of the mountains. This gives the mountains more color, shadowing, and depth. Set aside.
4. From the second mountain-sunrise scene that is still untouched, carefully fussy-cut off the Old Olive trees from the bottom of the scene. Working with the Old Olive fussy-cut treets, ink-distress the edges and sponge the surfaces with Old Olive ink. Set the remaining scene, from which you removed these trees, and the fussy-cut trees.
5. Glue the fussy-cut mountains, created in #3 above, onto the mountain-sunrise scene, created in #4 above, so the top mountains are slightly lower than the bottom layer of mountains. This will give the mountains more texture and definition. When the gluing is complete, you will have one mountain-sunrise scene unit.
6. Glue the Old Olive fussy-cut trees, created and sponged in #4 above, to the scene completed in #5 above. (Note: This completed unit will be used for form the 3-1/2" square Front Overlay Flap.)
7. From the kit, sponged one set of die-cut evergreen trees and their land base with Pretty Peacock ink to add texture and depth. Glue them, starting at the left side, across the bottom of the scene. They will overlay part of the Olive Green trees (see card picture). Finally, with Early Espresso ink, stamp a set birds flying near the mountains.
Just an FYI, here is the kit design version using this sunrise-mountain scene:
Saturday, October 9, 2021
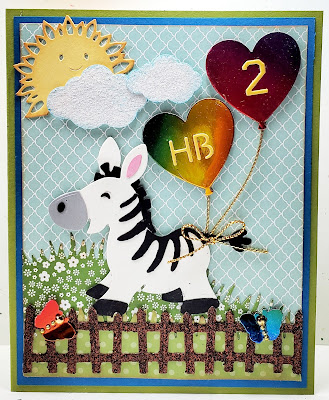
A Lovable Birthday Zebra for Evie!
Ingredients: Stampin'Up: Cardstock--Lucky Limeaide, Pacific Point Blue, So Saffron; Patterned Papers--2013-14 Subtles Dsp Stack-Pool Party, 2016-17 Subtles Dsp Stack-Wild Wasabi, 2012-13 Subtles Dsp Stack-Certainly Celery; Ribbon--Gold Metallic Cord; Gems--Gold Metallic. Other--Dies:
Marianne Collectables--Zebra-Donkey; Cottage Cutz Sun & Clouds; My Favorite Things--Frightful Fence; Lawn Fawn Party Balloons; IO Dies--Small Grass die, Insect Set (butterflies); Lawn Fawn--Grassy Hillside; Memory Box--Varsity Numbers; Poppystamp--Happy Birthday Banner Flags (Letters); Glitter--Impress Sparkle; Wink of Stella/ Clear. Chatterbox verse--computer. Size: 4-3/4 x 6-inches.
CARD STORY & CONSTRUCTION NOTES
My youngest granddaughter will be turning two in mid-November, and I wanted to get her card finished early so I would be absolutely sure to have it on time! Her birthday party theme this year will be butterflies.
I had been fiddling around with my Marianne cute little zebra die many months ago when I was making last year's granddaughter birthday cards. At that time, I die-cut the parts for several zebras and though this little zebra girl turned out just as cute as I thought she would, I decided to go for 3D ballerina girls instead! I got side-tracked and never quite decided what I was going to do with the little zebra, so she's been lurking around my craft for all this long while!
I recently came upon a challenge that basically said to use up those items in your stash (or laying around) that were finished or partially finished or just throw them out. I spotted the little zebra, and I knew I did not want to throw her out; therefore I was motivated to find her a home! Though a zebra did not exactly fit the butterfly theme, I thought I'd be able to fix that if I incorporated some butterflies flitting around a zebra card scene. I even recycled a rainbow foil birthday party hat that this same birthday granddaughter had previously worn at a party. Though it was torn a little, I'd been saving it as the perfect recycle paper to somehow use on a card for her. The balloons and flitting butterflies I planned were the perfect thing! Take a look at Evie's finished card below. I'm pretty pleased with the results and think she will LOVE it!
Subscribe to:
Posts (Atom)